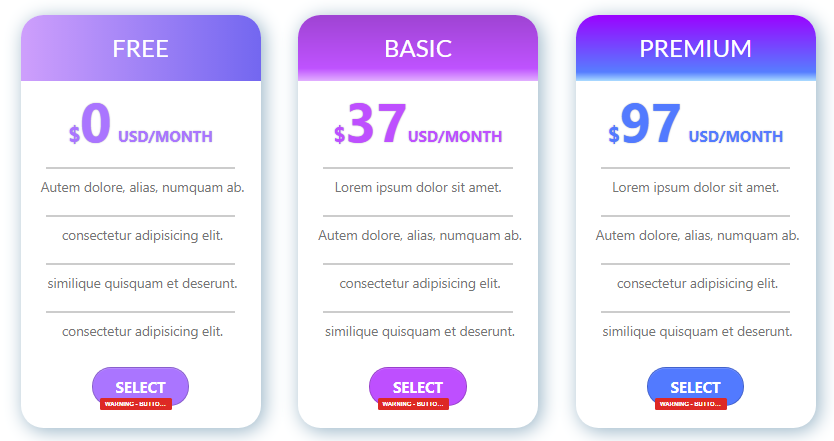
THE END GOAL IS THIS
Step 1 - Right now you are on the editor screen. As you can see below the screenshot.

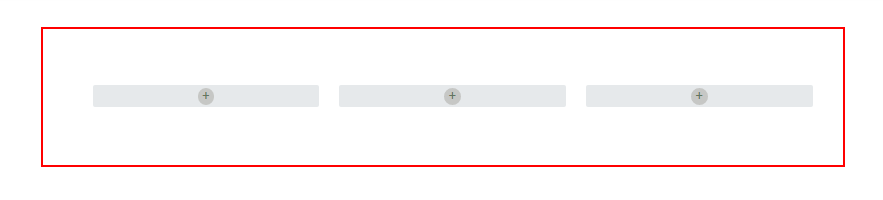
After that when you click on the section. Now it looks like this. (below screenshot)

Step 2 - Then add 3 rows in the section. Let’s click on the “+” button(As you can see in the above screenshot) -> select the row and drag these “3 columns” rows.

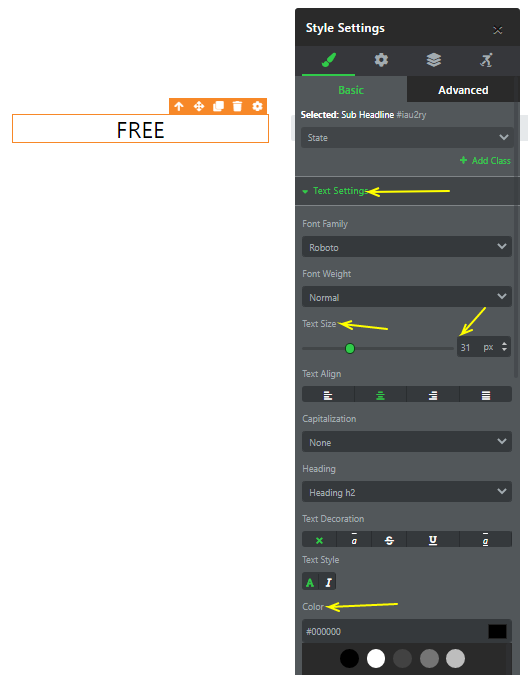
Step 3 - Add a sub-headline element in the 1st column. By simply clicking on the “+” as you can see in the above screenshot.

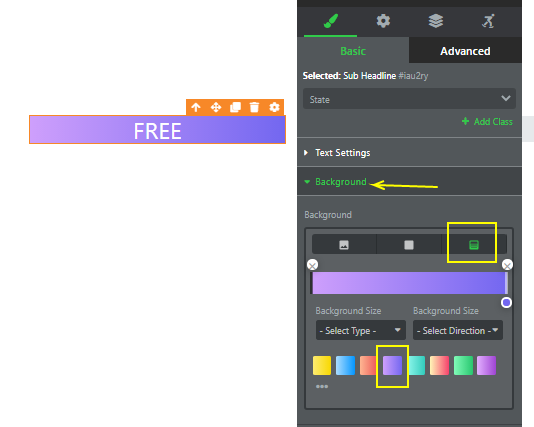
Step 4 - Change the text of the sub-headline by simply double-clicking it, change the font and the font setting, and change the BG color of that sub-headline.
1.
2.
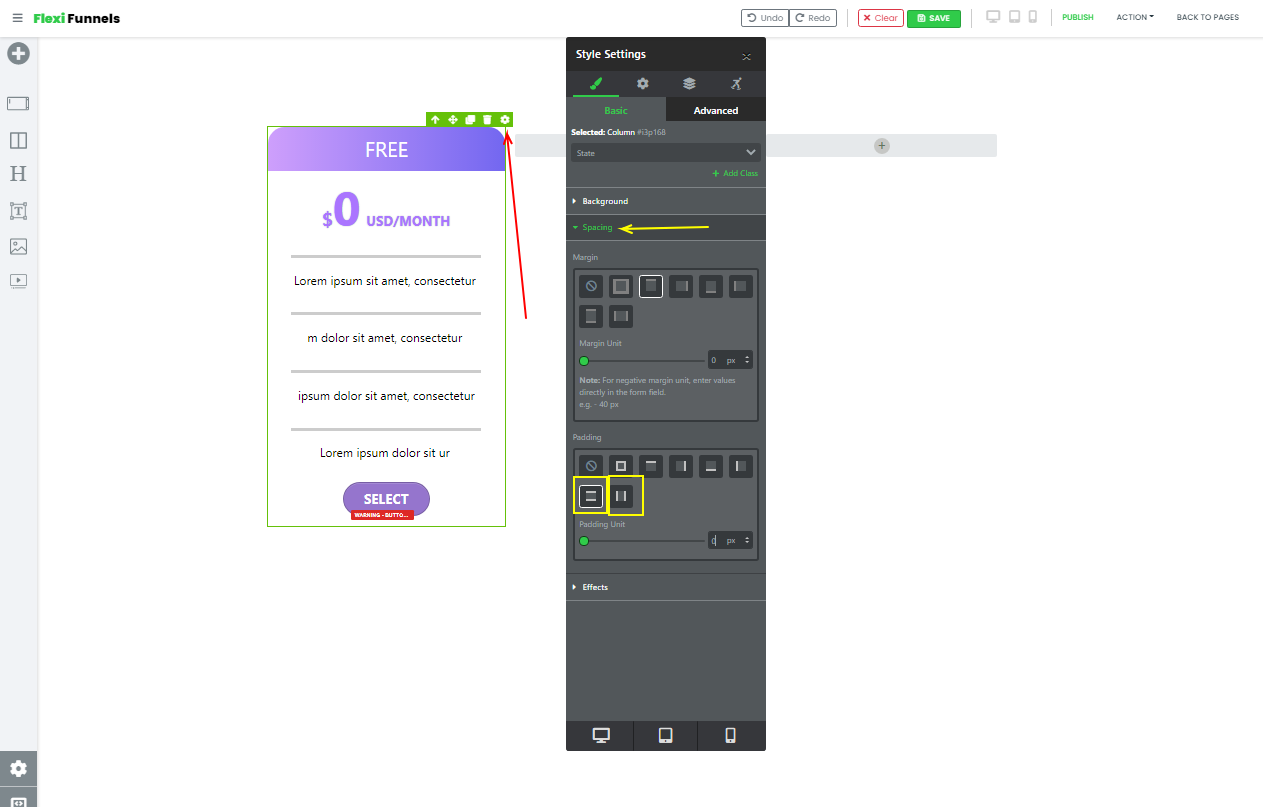
Step 5 - Now let’s change the padding, and “border-radius”.


Step 6 - Now add the headline element below that “FREE” text.
Just simply click on the “+” as you can see on the left-hand side which We marked as a red box and simply drag that headline element and put it below that text.

Step 7 - Now change the text and text settings.
Change the size of “$0” by double-clicking it and from the bar ,there you can change the size of every single word (which as We marked the red line).

Step 8 - Now add divider and paragraph text. As you can see in the below screenshot.

Step 9 - Now change the size of the divider and text(by following the previous steps)

Step 10 - Now simply make a clone of the Divider and text.

Step 11 - Now your section will look like this.
![]()
Step 12 - Let’s add a button below that text. Simply click on the “+” button, drag that button element, and put it below that text.

Step 13 - Change the text (by double-clicking the button element text ), text setting, BG color, and Border radius.


Step 14 - Give “0px” padding to the 1st row. See the yellow boxes in the below screenshot.
You have to give “0px” to both boxes.
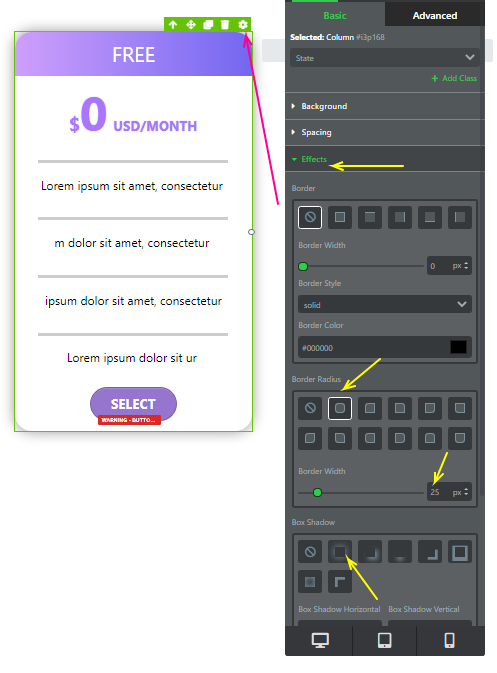
Step 15 - Let’s give shadow to the entire column and change the border-radius. Change has to be done which We marked as a yellow line.
Step 16 - Now give some spacing and simply make 3 clones of the first column and delete the vacant one.

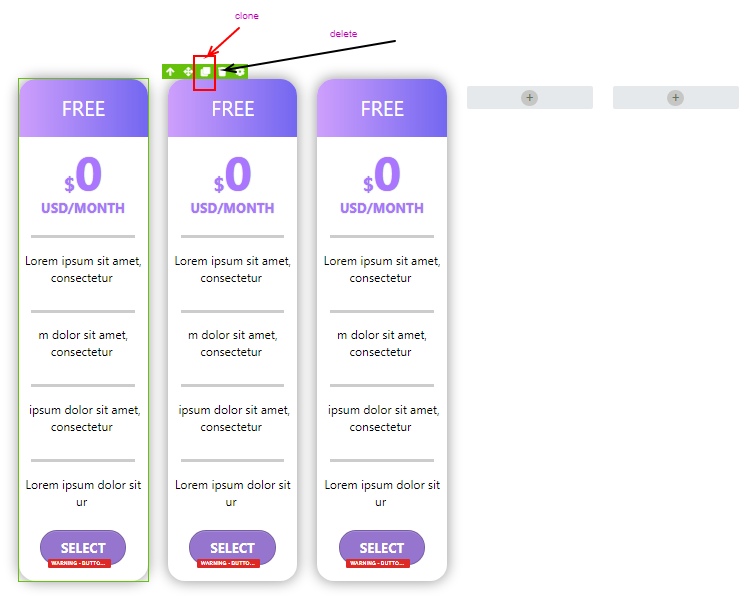
Step 17 - Delete the empty columns.
Now change the color of the other pricing tables. (See the previous screenshots to change the color and text).
Step 18 - Your section is ready and well done. You achieved your end goal. :-)

NOW, DO PRACTISE TO HONE YOUR SKILL.
Was this article helpful?
That’s Great!
Thank you for your feedback
Sorry! We couldn't be helpful
Thank you for your feedback
Feedback sent
We appreciate your effort and will try to fix the article