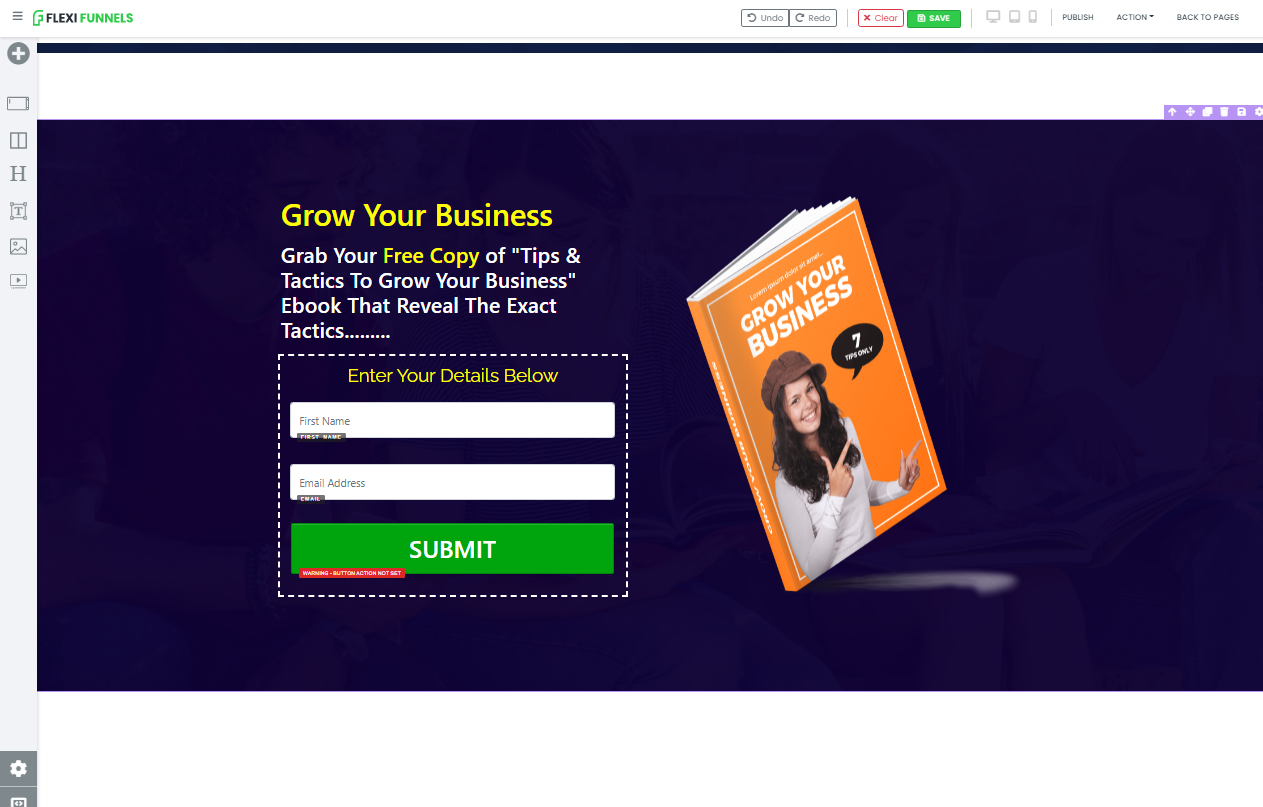
THE END GOAL IS THIS
Right now you are on the editor screen. As you can see below the screenshot.

Step 1 - Simply click on the “+” button and add a section.
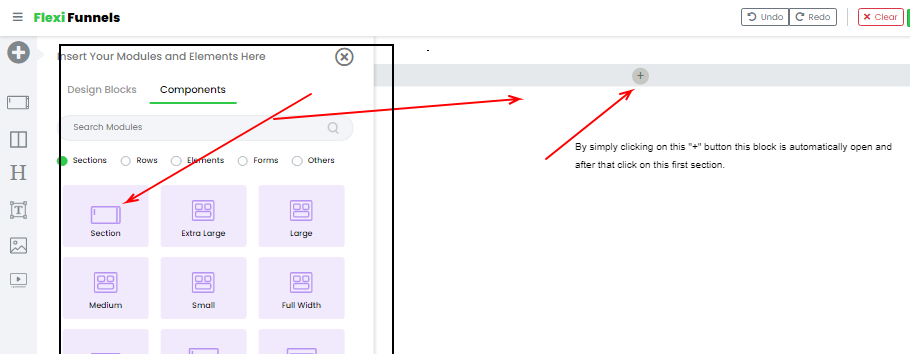
After that when you click on the section. Now it looks like this. (below screenshot)

Step 2 - Then add the “2 columns” row inside the section.
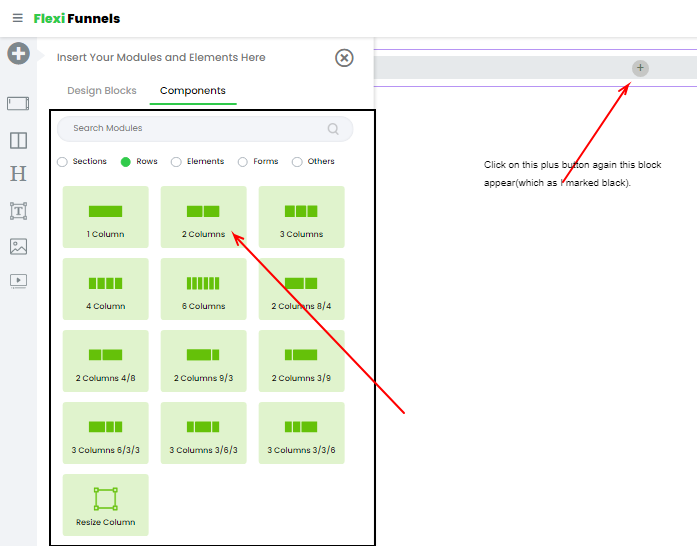
After adding the “2 Column” row it will look like this. (below Screenshot)

Step 3- Add a headline in the 1st column and change the text by double-clicking on it.

Step 4- Change the text setting. After changing the text setting, give the BG image to the whole so that your text is visible on it.

Now click on the images which we marked as a Yellow box.

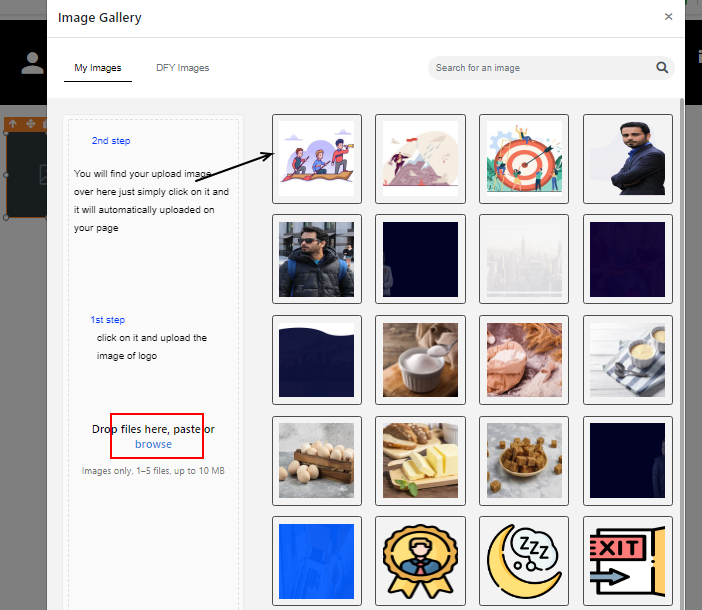
After Clicking on it you will find an image box where you can upload your images to put as a BG.

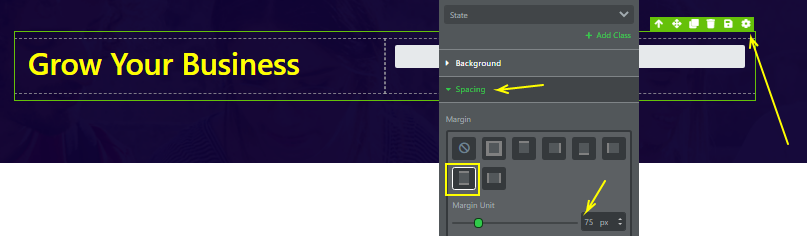
Step 5- Give some spacing to that row so that it will look clear and neat.
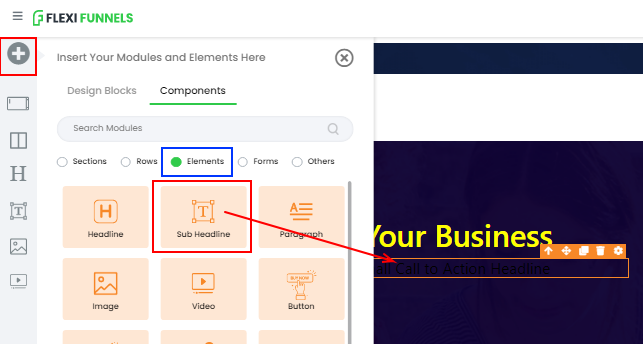
Step 6 - Add a sub-headline below that Headline. And change text and text setting as we discussed in the previous headline screenshots.
After changing the text and text setting it will look like this.

Step 7- Make a clone of the above sub-headline element .
Change the text, color, and reduce the size of the text.


Step 8 - Now add one row in the first row. By simply drag and put in the row 1st.

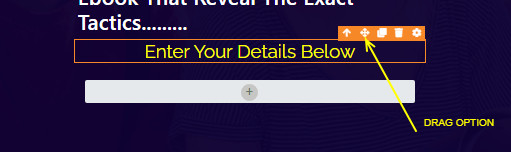
Step 9 - Drag that sub-headline text(Enter Your Details Below) and put it in that row below.
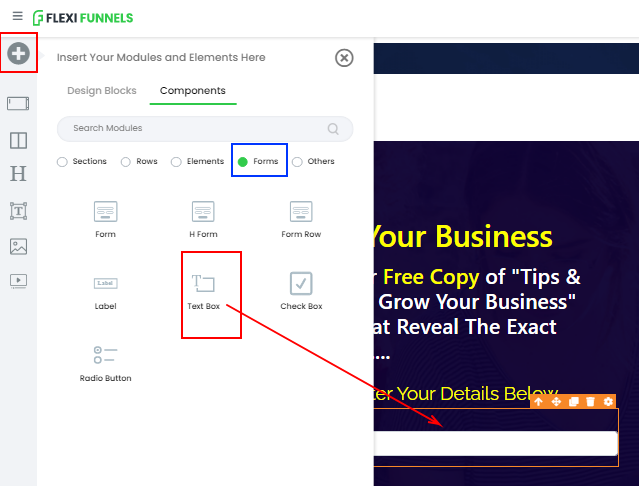
Step 10 - Add a text box below that sub-headline (Enter Your Details Below) text. Simply click on the “+” and choose the form section where you will find the text box element just simply drag and put it below that text.
Step 11 - Change the setting of the text box and write the text in it. Click on the gear icon setting. This setting box will appear after that click on the advance setting which we marked as a Yellow box and write the text in that placeholder. (First name)

Step 12 - Let’s make it more neat and clean by simply changing the text and text box setting(padding & spacing). After doing the changes in the text and text box, make it a clone of that text box and change the text box text.


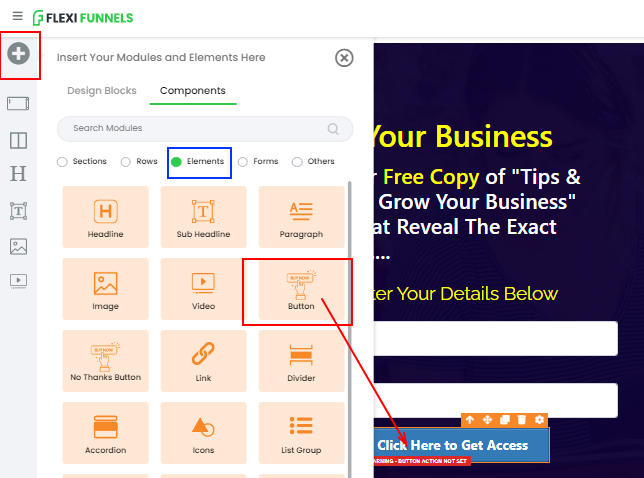
Step 13 - Now add a button below that text box.
Step14- Let’s change the text(By simply double-clicking on it) and the button setting.
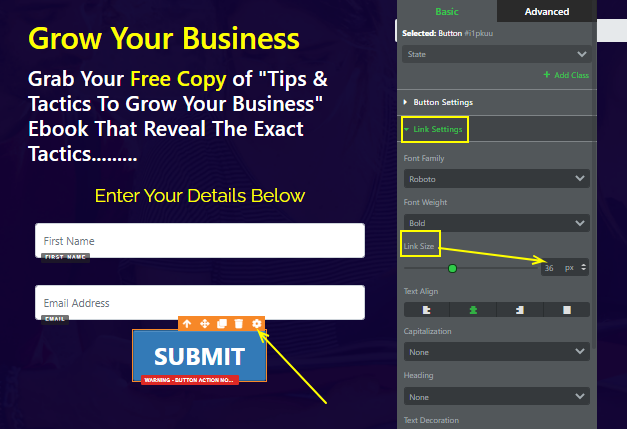
Give some spacing(up and down) and padding(from the left and right).

Lastly, give a BG color to the button.

Step 15 - One thing is remaining and that is the border. So simply click on the setting of the embedded column in the 1st column. Go to the effects option and give the border and change the border color.

Now your 1st column is completed.

Step 16 - Let’s take the 2nd column and add an image element to it.
Simply click on the plus button and drag an image element and put it in the 2nd column.

Step 17 - Put your Ebook image or your course box-shot image by simply double-clicking on it and you will find an image box where you put any image you want.
Step 18 - Your section is ready and well done. You achieved your end goal. :-)

NOW, DO PRACTISE TO HONE YOUR SKILL.
Was this article helpful?
That’s Great!
Thank you for your feedback
Sorry! We couldn't be helpful
Thank you for your feedback
Feedback sent
We appreciate your effort and will try to fix the article