Klaviyo is an email marketing software that lets you send newsletters, follow-up emails, and automated campaigns to your subscribers. By connecting Klaviyo with FlexiFunnels, every lead who fills a form on your FlexiFunnels page — or buys your product — can be sent straight into your Klaviyo lists automatically. No downloading CSV files, no copy-pasting email addresses one by one.
Think of it like this: FlexiFunnels is the shop where people walk in and share their details, and Klaviyo is the diary where you keep everyone's contact information. This integration is the assistant who instantly writes every new visitor's details into your diary the moment they walk in — so you never lose a single lead.
To connect the two, you only need one thing from Klaviyo: a Private API Key. You'll create it inside Klaviyo and paste it into FlexiFunnels. That's the whole integration.
What you will need
- A FlexiFunnels account
- A Klaviyo account (logged in)
Part 1 — Create your Private API Key in Klaviyo
Step 1. Log in to your Klaviyo account.
Step 2. On the Klaviyo dashboard, look at the bottom-left corner — you'll see your account name below your profile. Click on it, and a small menu will pop up. Click on Settings from that menu. (See the below screenshot)

Step 3. Inside Settings, go to the Account section and click on API keys.
Step 4. On the API keys page, you'll see the Private API Keys section. Click the Create Private API Key button. (See the below screenshot)
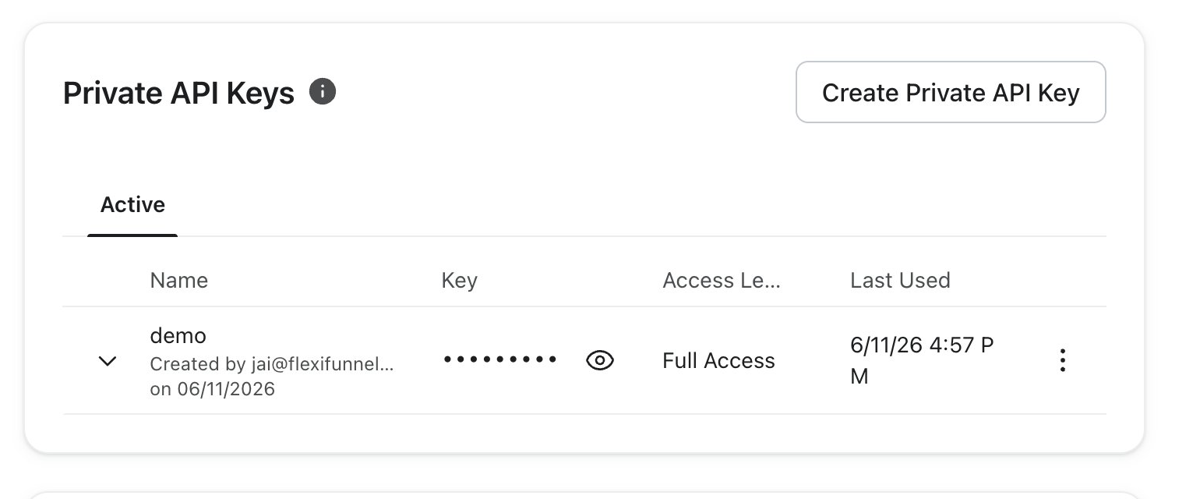
Step 5. Give your key a name you'll recognize later (e.g., "FlexiFunnels"), and select the access level as Full Access. Then click Create.
Step 6. Copy your new Private API Key and keep it handy. You'll paste it into FlexiFunnels in the next part.
Part 2 — Connect Klaviyo inside FlexiFunnels
Step 1. Log in to your FlexiFunnels account.
Step 2. Click on the gear (⚙️ Settings) icon on the FlexiFunnels dashboard. Then click on Autoresponder Integrations. (See the below screenshot)

Step 3. Click the +Add Autoresponder button to see the list of all supported autoresponders.
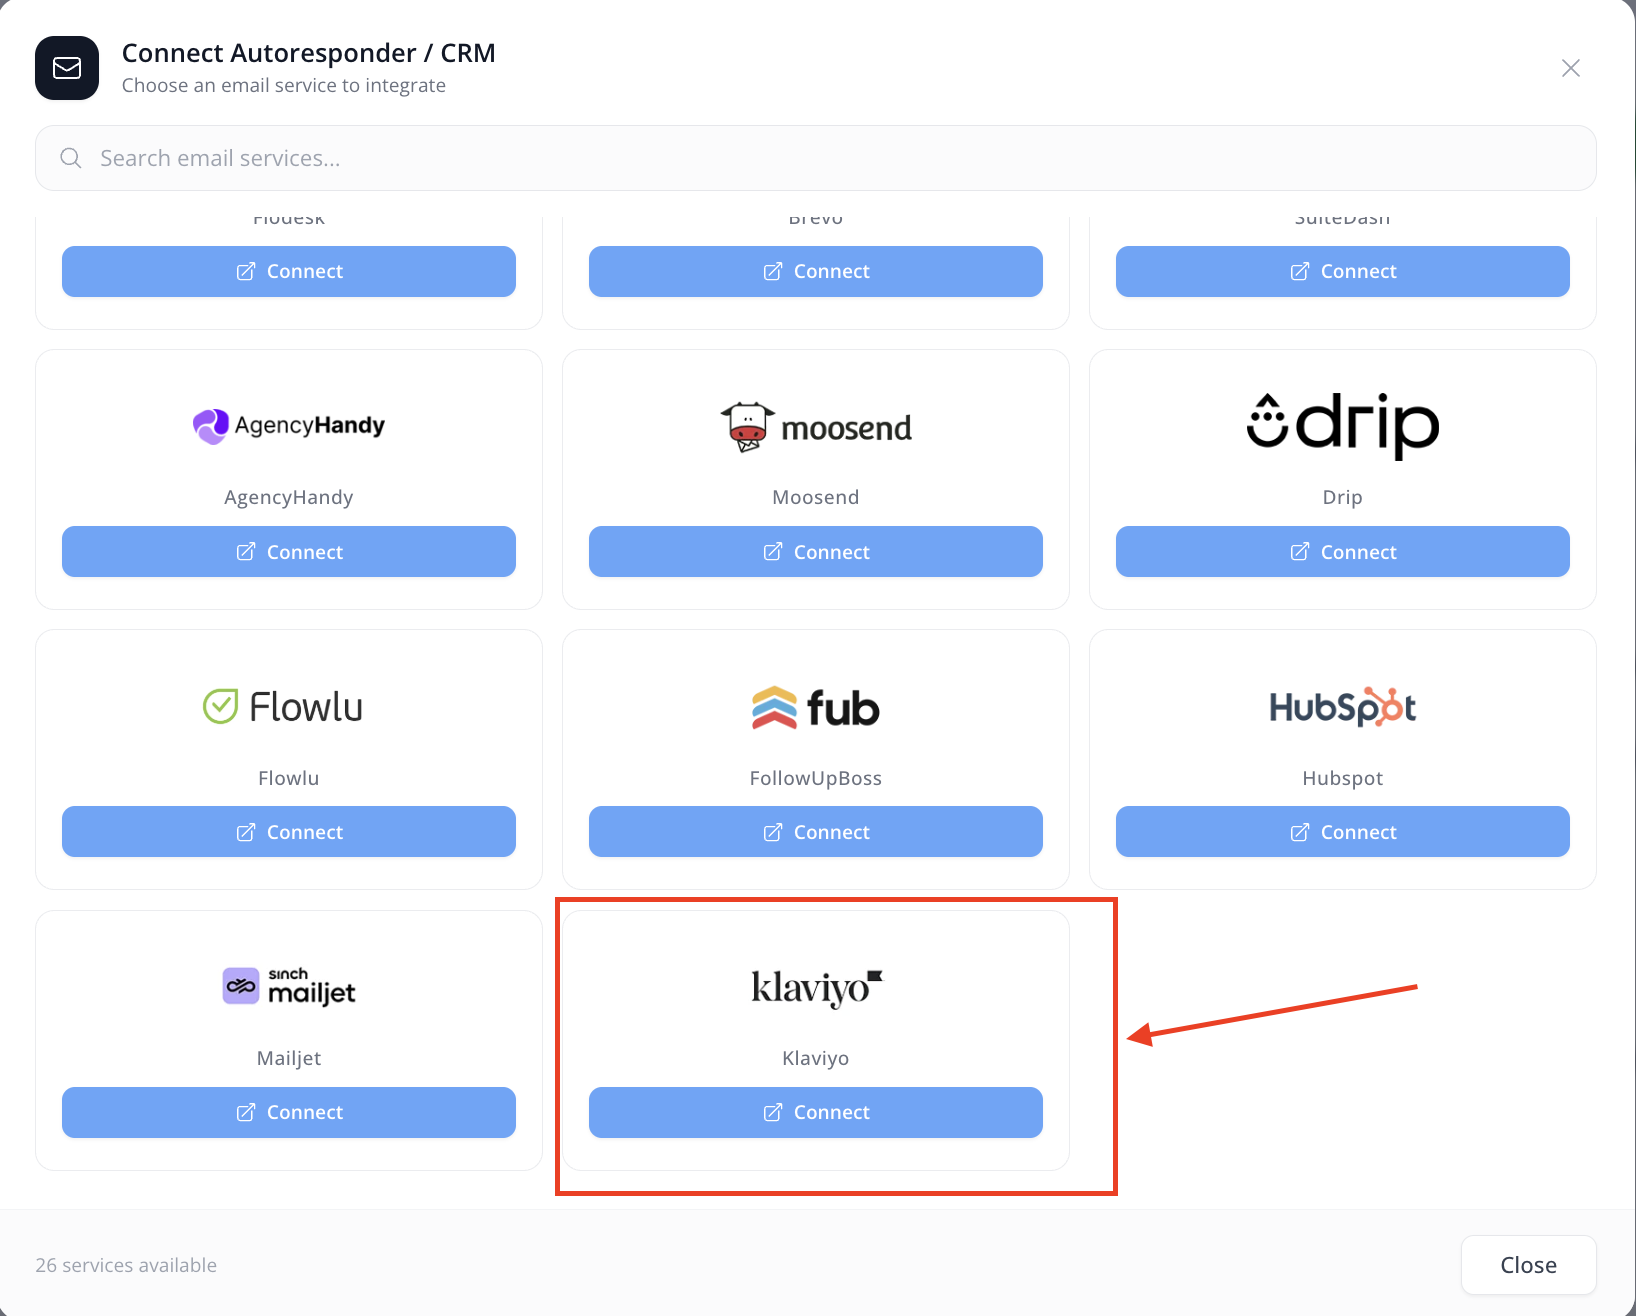
Step 4. Choose Klaviyo from the list and click on the Connect button.

Step 5. A form will open asking for your credentials. Enter an account name (any name that helps you recognize this connection later, e.g., "My Klaviyo"), then paste the Private API Key you copied from Klaviyo into the API Key field. That's the only key Klaviyo needs — there is no secret key here.
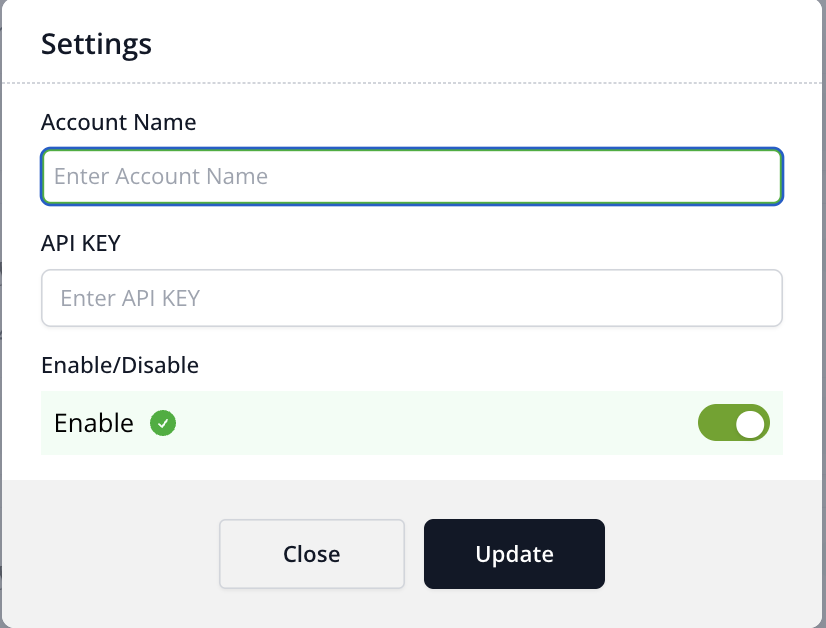
Step 6. Click Save.
? That's it — your Klaviyo account is now connected with FlexiFunnels. You'll see Klaviyo listed under your connected autoresponders on the settings page.
Connecting Klaviyo in settings is like plugging the cable in — now you need to tell FlexiFunnels where to use it. There are two places: your products (so buyers get added to your Klaviyo list) and your form elements (so page visitors who opt in get added). Both are covered below.
Part 3 — Connect Klaviyo to your Product (Set Rules)
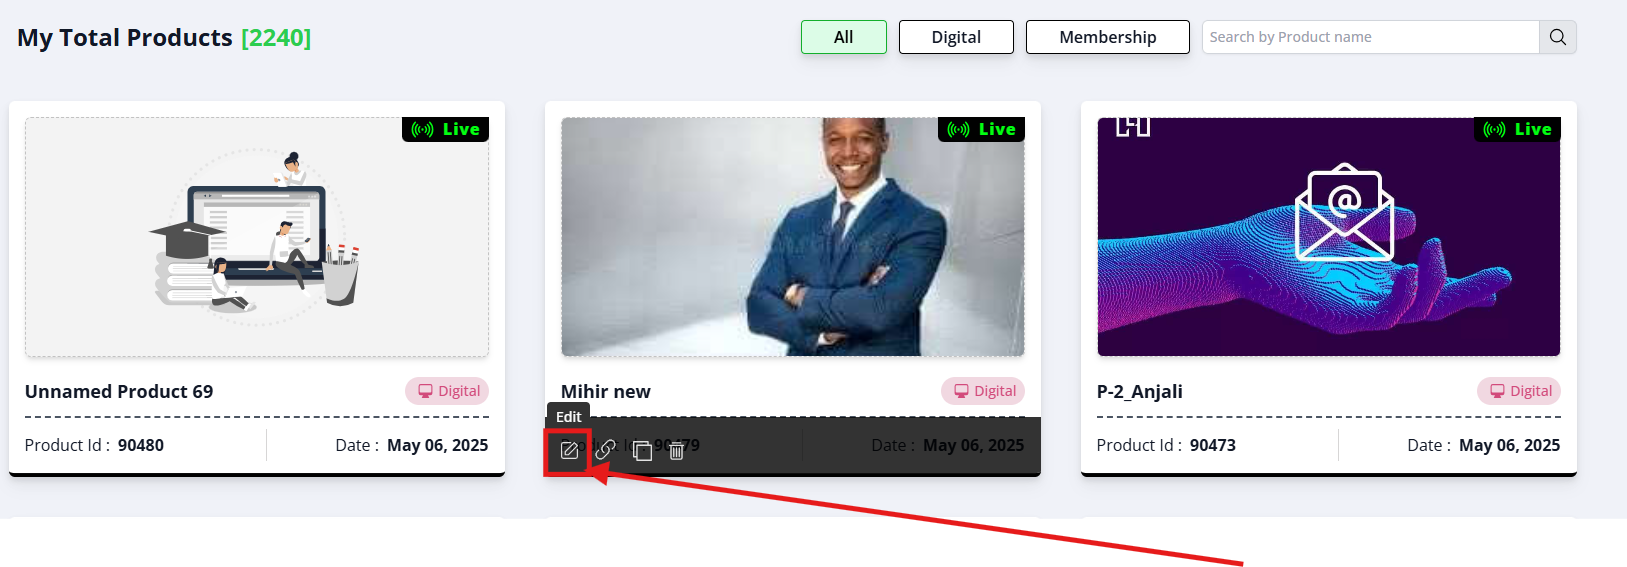
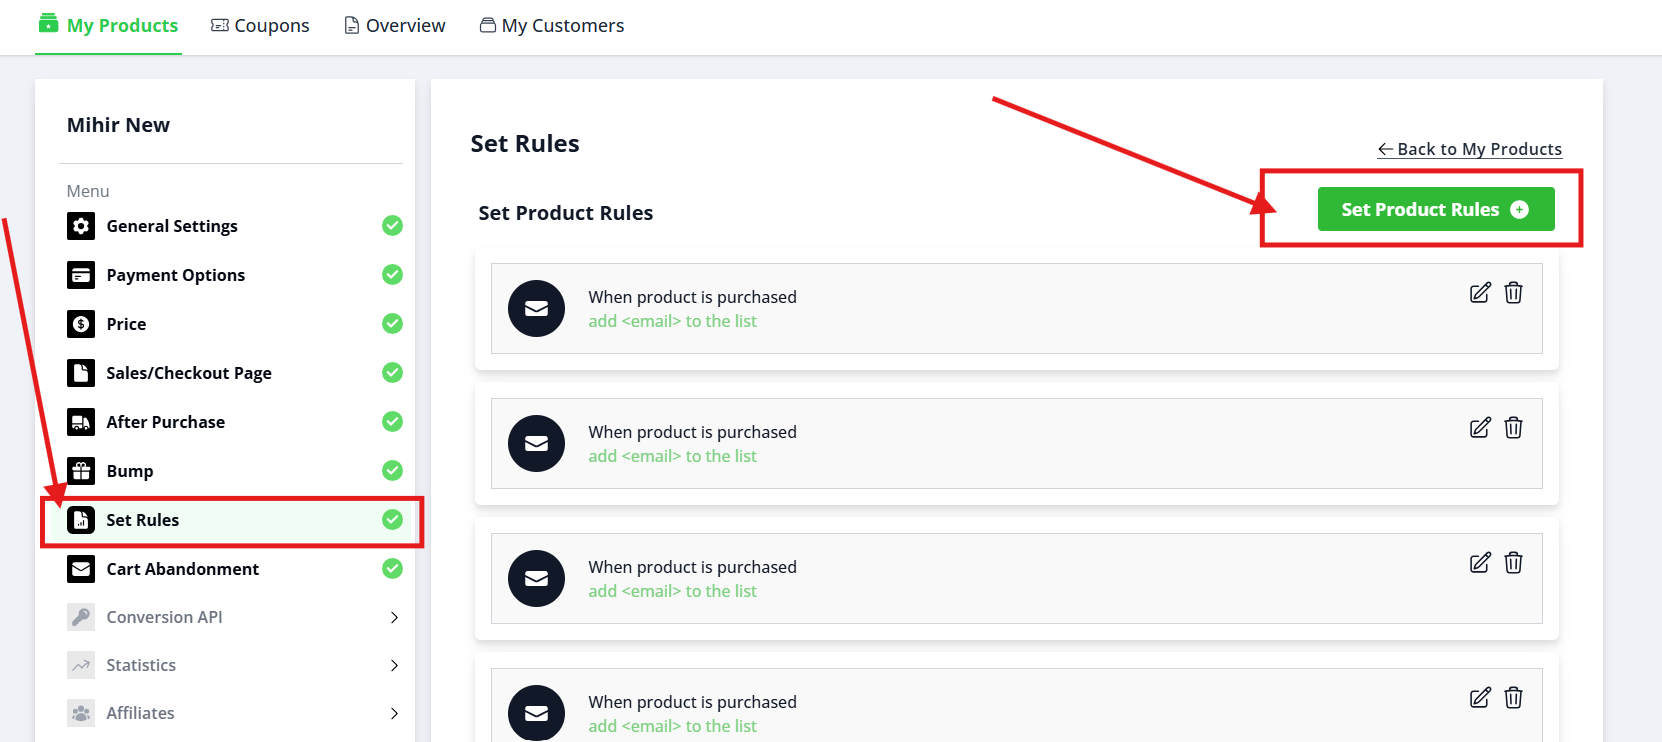
Step 1. Navigate to the Products Tab — Click on the "Products" tab located in the top menu bar.

Step 2. Select Your Product — From the list, click on the product name you want to set up rules for to open its settings.
Step 3. Open the Set Rules Option — In the product settings menu on the left side, click on "Set Rules". A dialog box will open.
Step 4. Select Autoresponder — Select your connected Klaviyo account from the "Select an autoresponder" dropdown menu.
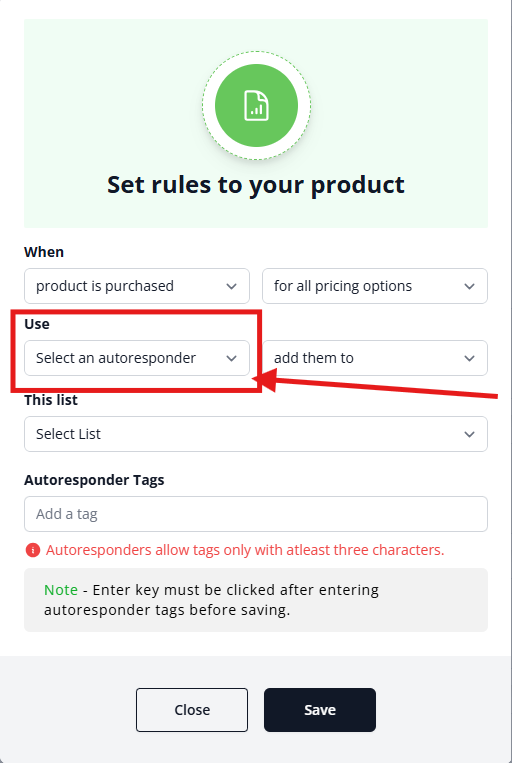
Step 5. Add to a List — Choose the Klaviyo list from the "Add them to this list" dropdown where buyers should be added.
Step 6. Set Autoresponder Tags (optional) — In the "Autoresponder Tags" field, add tags to organize your members (e.g., "buyer", "course-a"). Note: tags must be at least three characters long.
Step 7. Save Your Settings — Click the blue "Save" button at the bottom of the dialog box. Done — every buyer of this product will now flow into your Klaviyo list automatically.
Part 4 — Connect Klaviyo to a Form on your Landing Page
Step 1. A form lives on a landing page, and a landing page lives inside a project. So first, click on "Projects" on the FlexiFunnels dashboard, then click the "+Create New" button.

Step 2. Type your Project name and click on the "+ADD project" button.
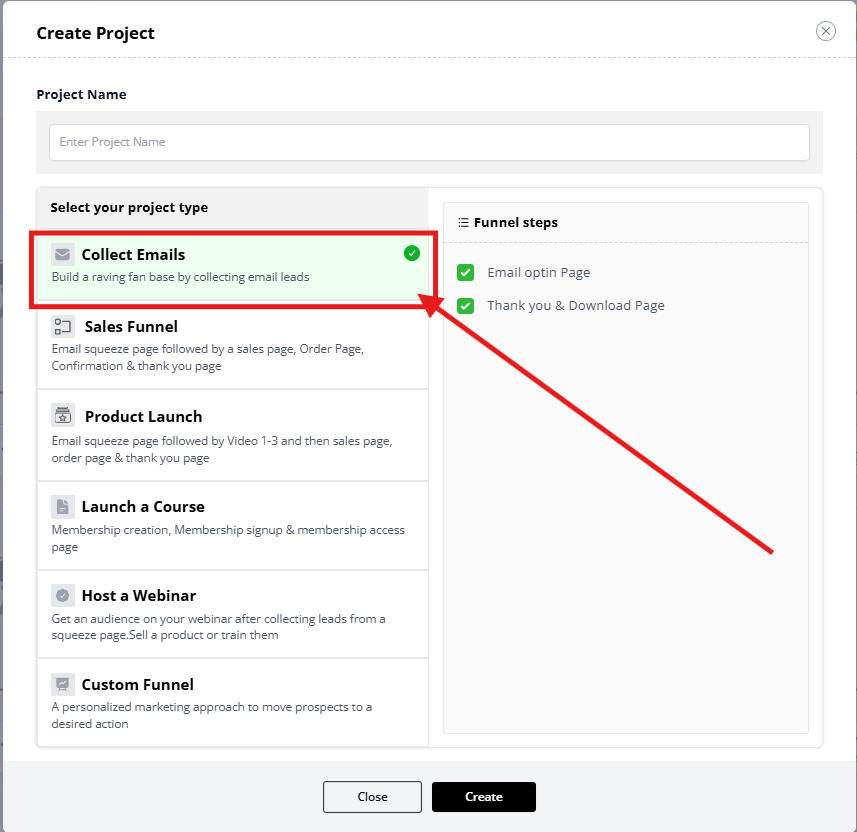
Step 3. Select the Landing Page category — we have different template categories and different templates in each category.

Step 4. Select your preferred template. After selecting, the screen will look like this — your project with a landing page is ready. Now click the "Edit Page" button.

Step 5. Inside the editor, click on the sidebar "plus" button and select the "Forms" option under components to add a form to your page.

Step 6. Once the form element is on your page, click on the form element's gear icon to open the form settings, then click on Advanced Settings.
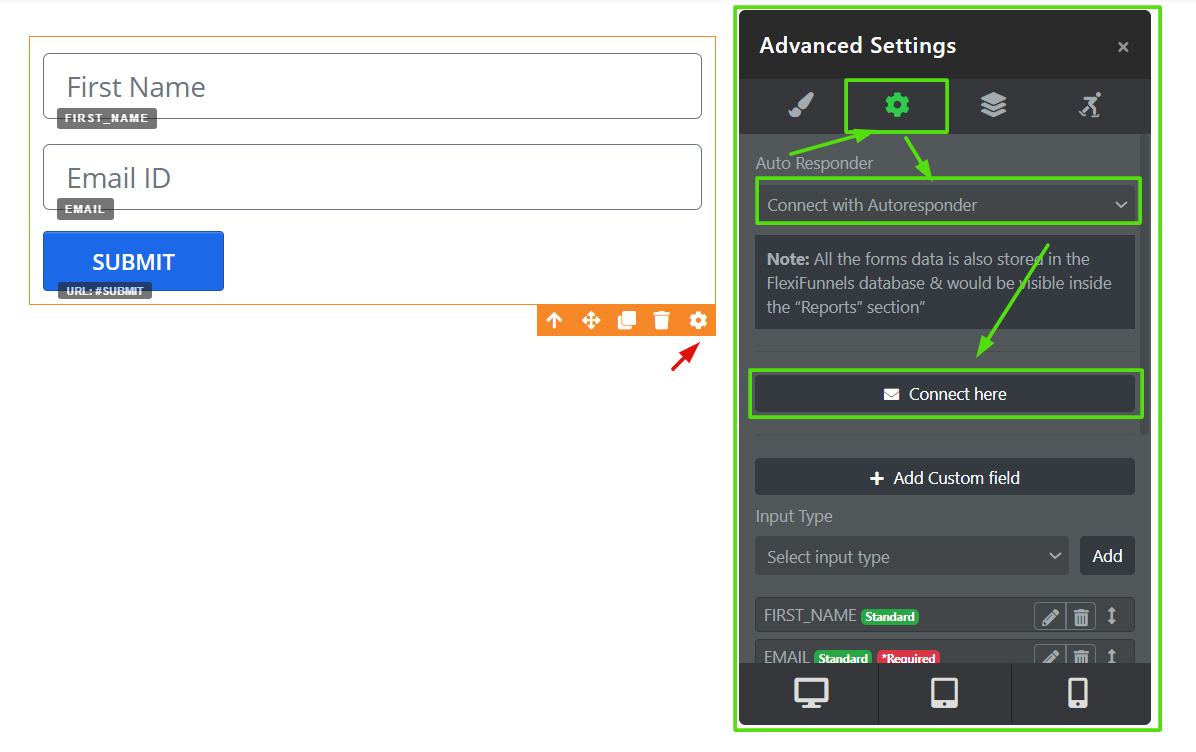
Step 7. Select the "Connect with autoresponder" option from the dropdown, then click the "Connect here" button. Select Klaviyo (the account you connected in Part 2).
Step 8. Choose your email list from the dropdown (optional), and write the tag(s) to be passed in the autoresponder tags field (optional — you can pass multiple tags). Then click "Save". When successfully connected, it will show "Active."
Step 9. Now publish the landing page using the "Publish" button at the top, and start collecting leads.
The leads submitted on your published page will be directly reflected in the Klaviyo list connected with the form element.
Common situations & quick fixes
"Invalid credentials" or the connection fails when I click Save.
Double-check two things: (1) there are no extra spaces before or after the key, and (2) you copied the full Private API Key (Klaviyo private keys start with pk_). If unsure, create a fresh Private API Key in Klaviyo with Full Access and try again.
Klaviyo connected, but leads aren't being added to my list.
The most common cause: the API key was created with Read-only or limited access instead of Full Access. Go back to Klaviyo → Settings → API keys, create a new key with Full Access, and reconnect it in FlexiFunnels. Also make sure you've connected Klaviyo to your specific form element (Part 4) or product (Part 3), selected the right Klaviyo list, and published the page after connecting the form.
I can't find the API keys page in Klaviyo.
Click your account name at the bottom-left of the Klaviyo dashboard → Settings → Account → API keys. Or simply open https://www.klaviyo.com/settings/account/api-keys while logged in.
My Klaviyo lists aren't showing in the FlexiFunnels dropdown.
First confirm the key has Full Access. Then make sure the list actually exists in the same Klaviyo account whose key you connected — if you manage multiple Klaviyo accounts, each has its own API keys, and FlexiFunnels can only see lists from the connected account.
I want to remove or change the connected Klaviyo account.
Go to Settings → Autoresponder Integrations, remove the existing Klaviyo connection, then add it again with the new account's Private API Key.
Related articles:
- Autoresponder Integration (overview)
- Autoresponder Standard Integration
- How to collect leads from FlexiFunnels using Autoresponder in your Form Element
- Autoresponder Custom Form Parse Code
Still stuck? We're happy to help — Submit a ticket and our support team will get you sorted.
Was this article helpful?
That’s Great!
Thank you for your feedback
Sorry! We couldn't be helpful
Thank you for your feedback
Feedback sent
We appreciate your effort and will try to fix the article