Overview
The Countdown Timer element lets you display a live timer on a FlexiFunnels landing page. Use it to communicate time-sensitive events, scheduled offers, registrations, or daily deadlines. You can configure the timer’s appearance, select the countdown type, control which time units are shown, and define what happens when the timer expires.
Before You Begin
- Sign in to your FlexiFunnels account.
- Open the landing page in the FlexiFunnels page editor.
- Add a Countdown Timer element to the page, or select an existing one.
- Decide whether the timer should use a fixed end date, an evergreen duration, or a daily end time.
Video Tutorial
Step 1: Open the Countdown Timer Style Settings
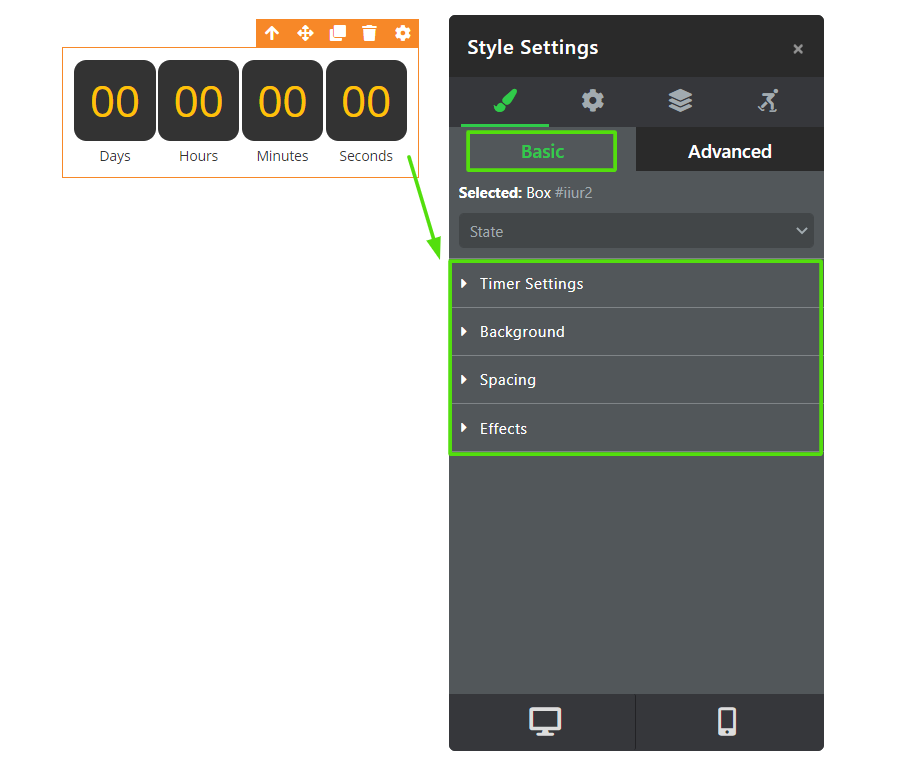
Select the Countdown Timer element in the page editor, then open its Style Settings. These settings control how the timer and its labels appear to visitors.
Step 2: Configure the Timer Appearance
Use the Timer Settings panel to format the countdown values. These settings help the timer match the visual style of your landing page.
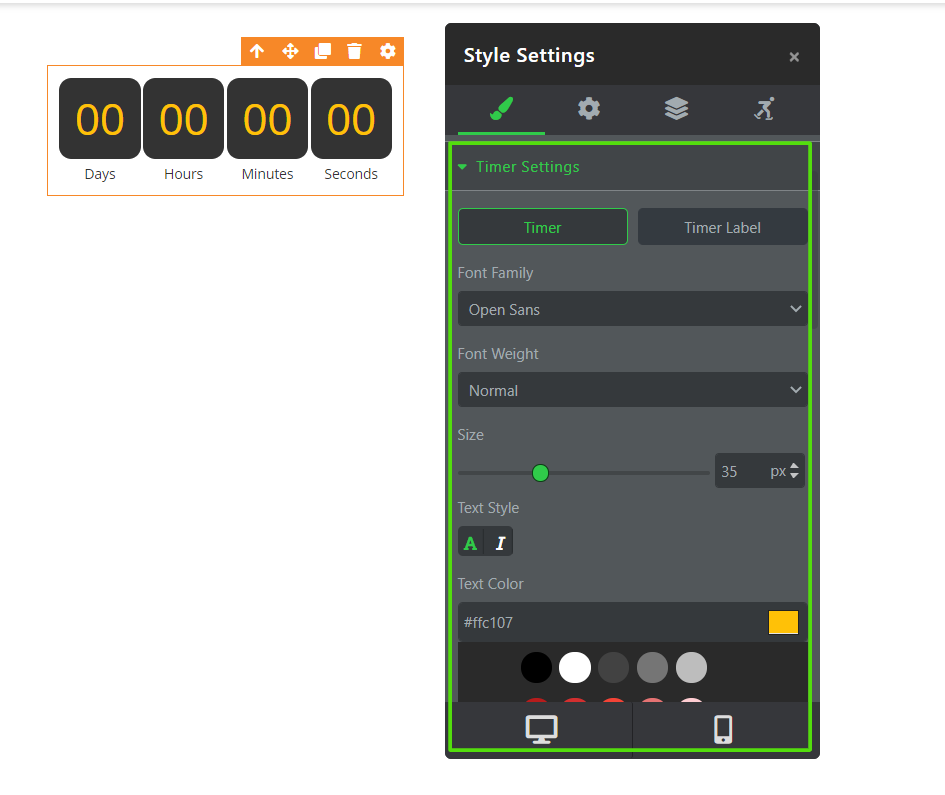
Timer text settings
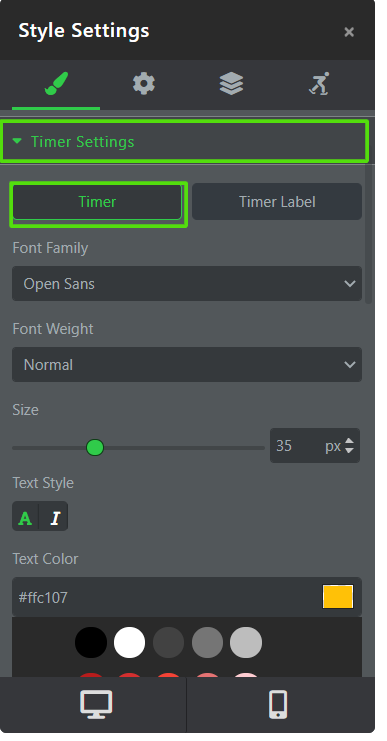
- Font Family: Select the typeface used for the countdown values.
- Font Weight: Choose the visual weight of the values, such as light, normal, or bold.
- Size: Use the slider to increase or decrease the size of the countdown values.
- Text Color: Select the color applied to the countdown values.
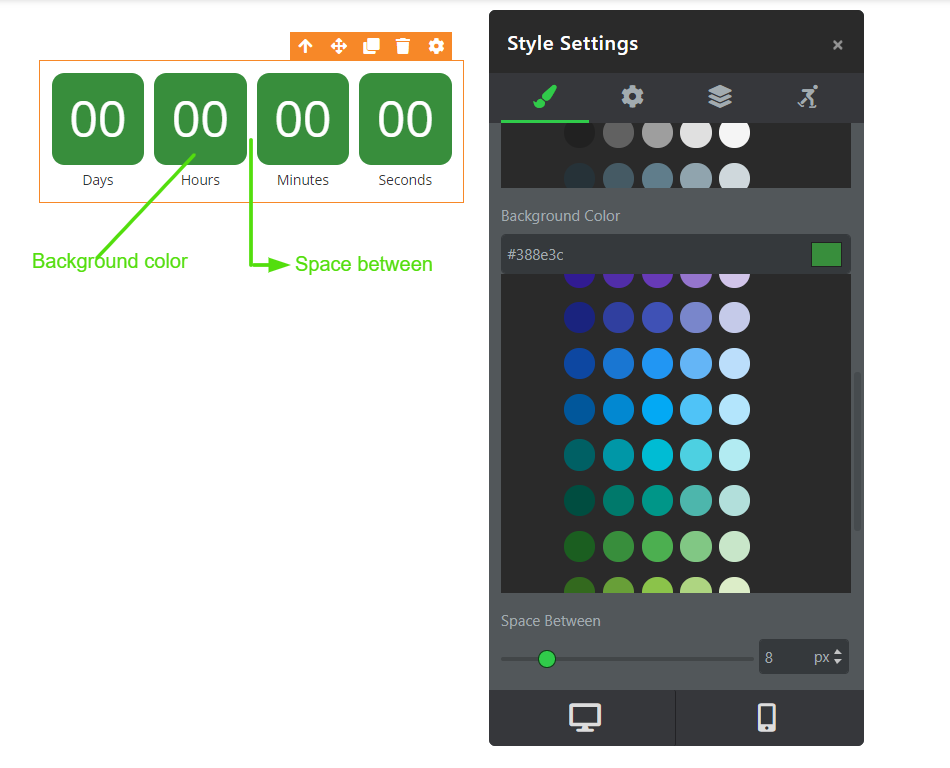
Timer container settings
- Background Color: Select a background color for the timer blocks.
- Space Between: Adjust the spacing between the displayed units, such as days, hours, minutes, and seconds.
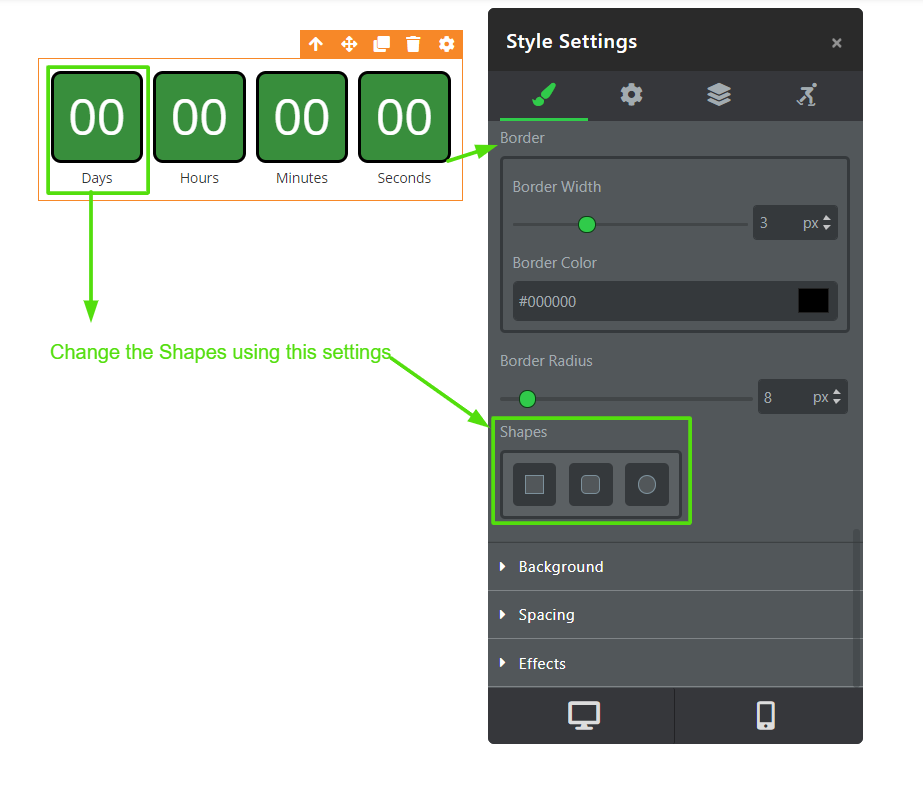
- Border Width: Set the thickness of the border around each timer block.
- Border Color: Select a border color from the palette or enter a hex color value.
- Border Radius: Adjust the corner rounding of the timer blocks.
- Shapes: Select the preferred visual shape for the timer blocks.
Step 3: Configure the Timer Labels
Configure the Timer Label settings to control the labels displayed below or alongside the timer values, such as Days, Hours, Minutes, and Seconds.
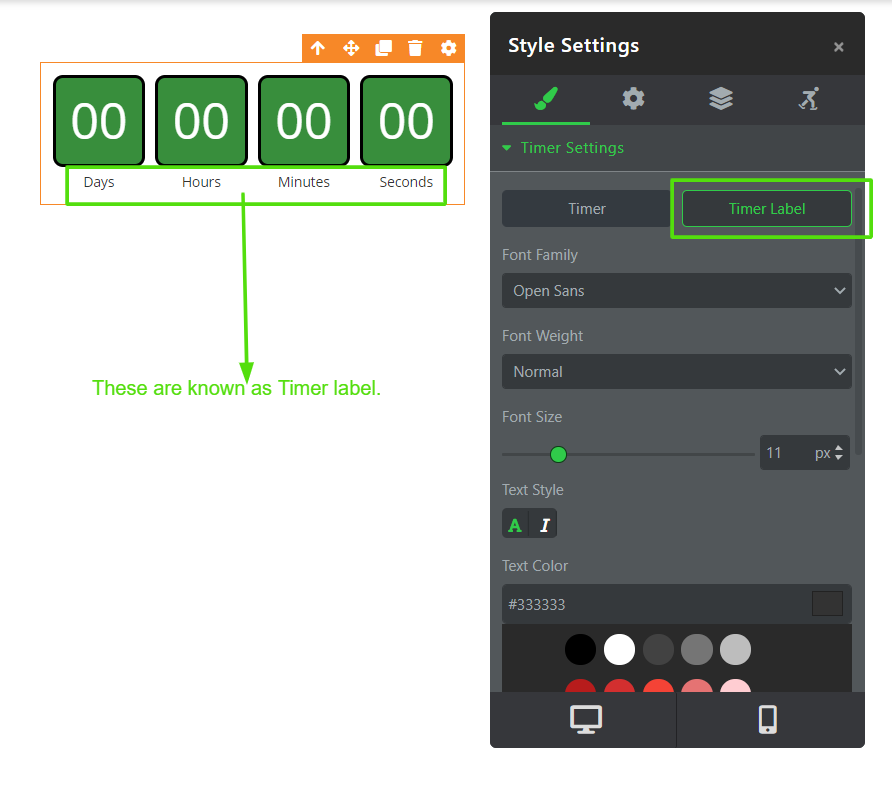
- Font Family: Select the typeface used for the timer labels.
- Font Weight: Set the label weight, such as light, normal, or bold.
- Font Size: Use the slider to set the size of the timer labels.
- Text Color: Select the color used for the labels.
- Capitalization: Display labels in uppercase, lowercase, or title case.
Step 4: Choose a Countdown Timer Type
Open the Countdown Timer advanced settings and choose the timer type that matches your campaign. FlexiFunnels provides a fixed Countdown Timer, an Evergreen Timer, and a Daily Countdown.
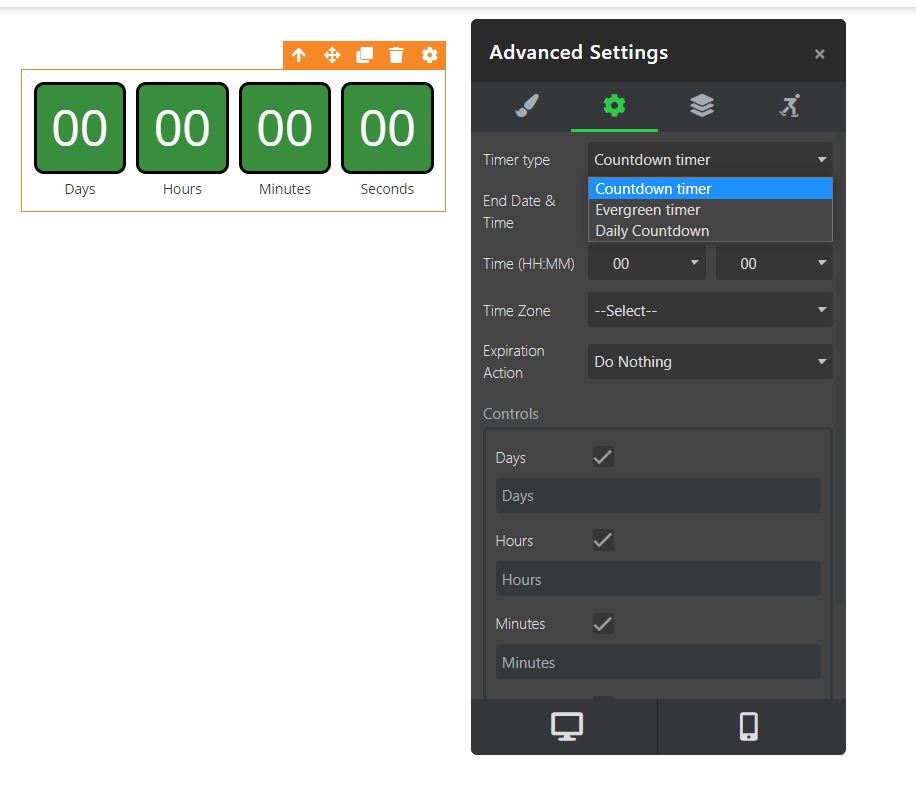
Fixed Countdown Timer
Use a fixed Countdown Timer when every visitor should see the same deadline. This is useful for launches, webinars, or events that start at a specific date and time.
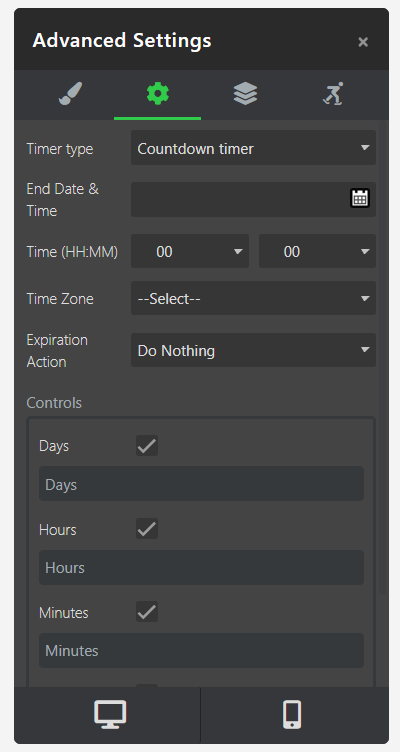
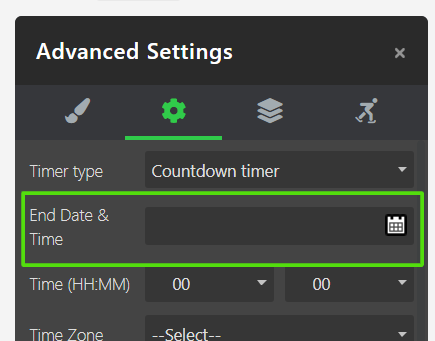
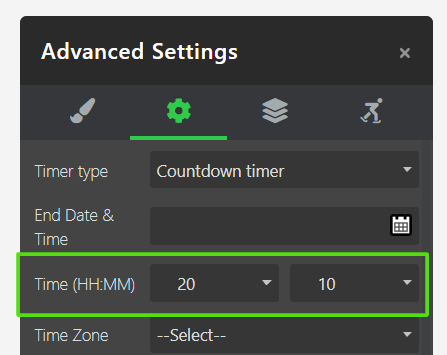
- End Date & Time: Select the date and time at which the countdown reaches zero.
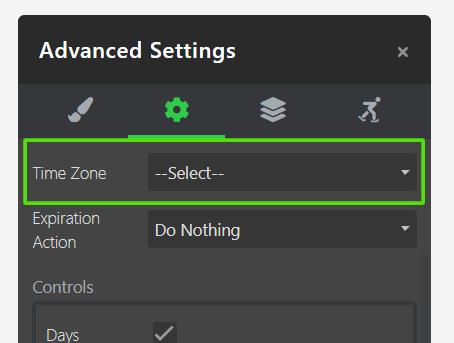
- Time Zone: Select the standard time zone used to start and expire the timer.
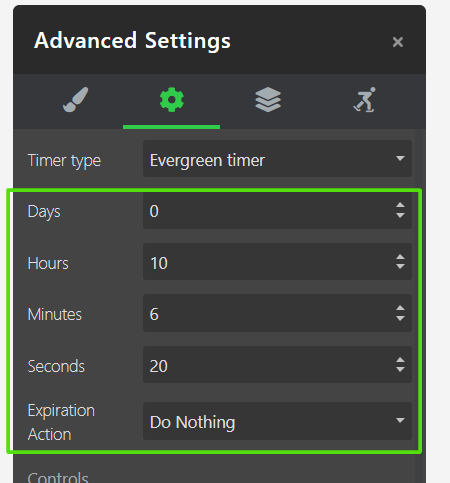
Evergreen Timer
Use an Evergreen Timer when each new visitor should receive an individual countdown duration. The timer uses cookies so the same visitor continues to see the appropriate remaining duration during the configured cookie or session period.
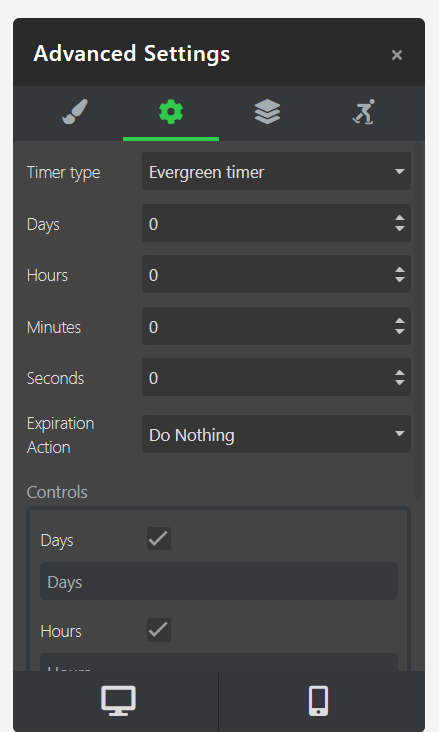
Days, Hours, Minutes, Seconds: Set the duration a visitor should see when a new session begins or after the configured cookie expires.
Daily Countdown
Use a Daily Countdown to count down to the same time each day. This option is appropriate for recurring daily cutoffs or time-based daily offers.
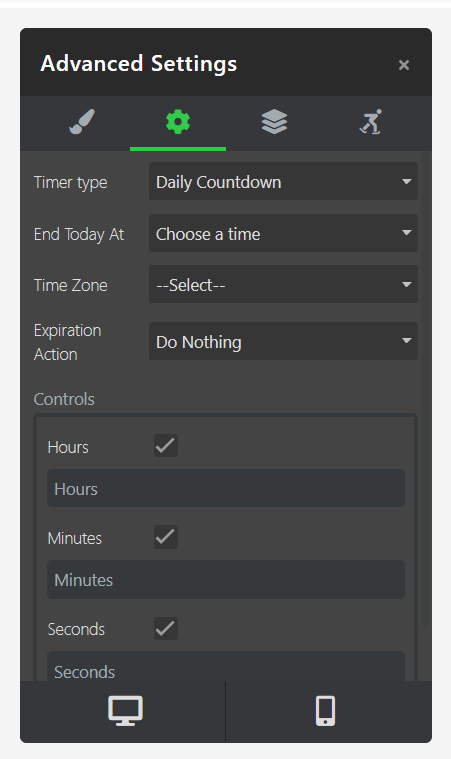
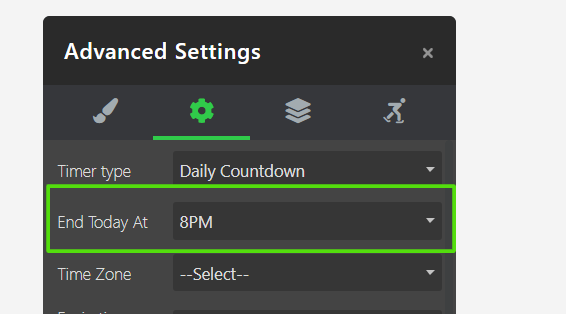
End Today At: Select the daily end time at which the countdown expires.
Time Zone: Select the standard time zone according to which the timer starts and expires.
Step 5: Set the Expiration Action
Choose what visitors should see after the timer reaches zero. Configure this setting for each timer type to ensure the page behaves as intended after expiry.
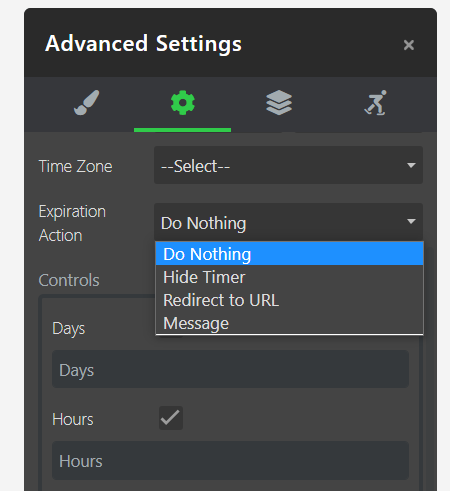
- Do Nothing: The landing page remains unchanged after the timer expires.
- Hide Countdown Timer: The timer is removed from view after it expires.
- Redirect to URL: Visitors are redirected to the URL you specify after expiry.
- Message: A message is displayed when the timer expires.
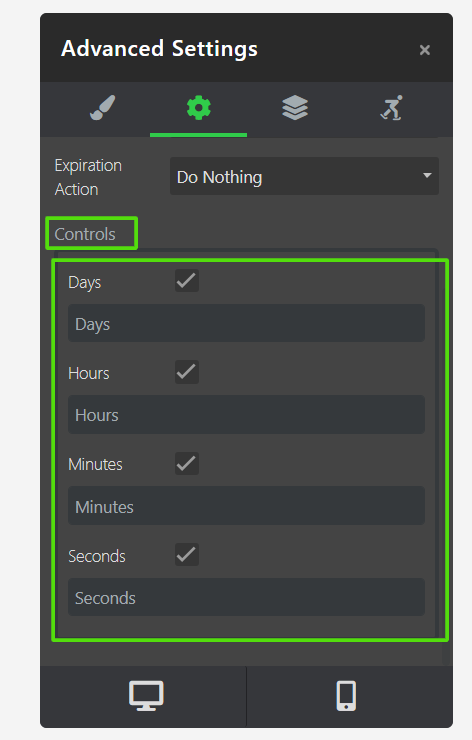
Step 6: Select the Timer Controls
Use Controls to select the time blocks displayed in the Countdown Timer. Depending on the timer type, you can show years, months, weeks, days, hours, minutes, and seconds.
Verify the Configuration
Preview the landing page after saving your changes. Confirm that the selected time units, typography, colors, and timer type display correctly. For fixed and daily timers, verify that the displayed deadline uses the intended time zone. For evergreen timers, test in a private browser window to confirm that a new session receives the configured duration.
Common Scenarios
- Webinar registration: Use a fixed timer that expires when registration closes.
- Limited-time offer: Use an evergreen timer to provide each visitor with an individual offer duration.
- Daily promotion: Use a daily countdown that resets for the next day after the selected end time.
- Expired campaign page: Use Redirect to URL to send visitors to a current offer after expiry.
Best Practices
- Use the same time zone across the timer and related campaign communications.
- Use a fixed timer only when the deadline is genuinely the same for all visitors.
- Test evergreen timers in a private browser window to avoid existing cookie data.
- Keep timer text readable against its background color.
- Show only the time units that are meaningful for the remaining duration.
- Configure an expiration action before publishing the landing page.
- Verify redirect URLs before publishing a timer that uses Redirect to URL.
Before Contacting Support
- Confirm that the Countdown Timer element is selected and saved in the page editor.
- Verify the selected timer type, end date or duration, and time zone.
- Check the configured expiration action and redirect URL, if applicable.
- Preview the page and test it in a private browser window.
- Clear browser cookies when testing an Evergreen Timer.
- Publish the latest version of the landing page before testing the live page.
Expected Outcome
After configuration, your landing page displays a Countdown Timer with the selected design, visible time blocks, and countdown behavior. When the timer expires, FlexiFunnels performs the expiration action you configured.
Was this article helpful?
That’s Great!
Thank you for your feedback
Sorry! We couldn't be helpful
Thank you for your feedback
Feedback sent
We appreciate your effort and will try to fix the article