Overview
A pop-up is a configurable window that appears on a landing page based on visitor behavior or a defined trigger. In FlexiFunnels, you can use pop-ups to collect leads, display time-sensitive information, promote offers, or guide visitors to a specific action.
Use this feature when you need to display focused content without redirecting visitors away from your Landing Page .
Before You Begin
- Sign in to your FlexiFunnels account.
- Open the landing page you want to edit in the FlexiFunnels page editor.
- Prepare the content you want to display, such as text, images, form fields, buttons, or offer details.
- Determine when visitors should see the pop-up.
Video Tutorial
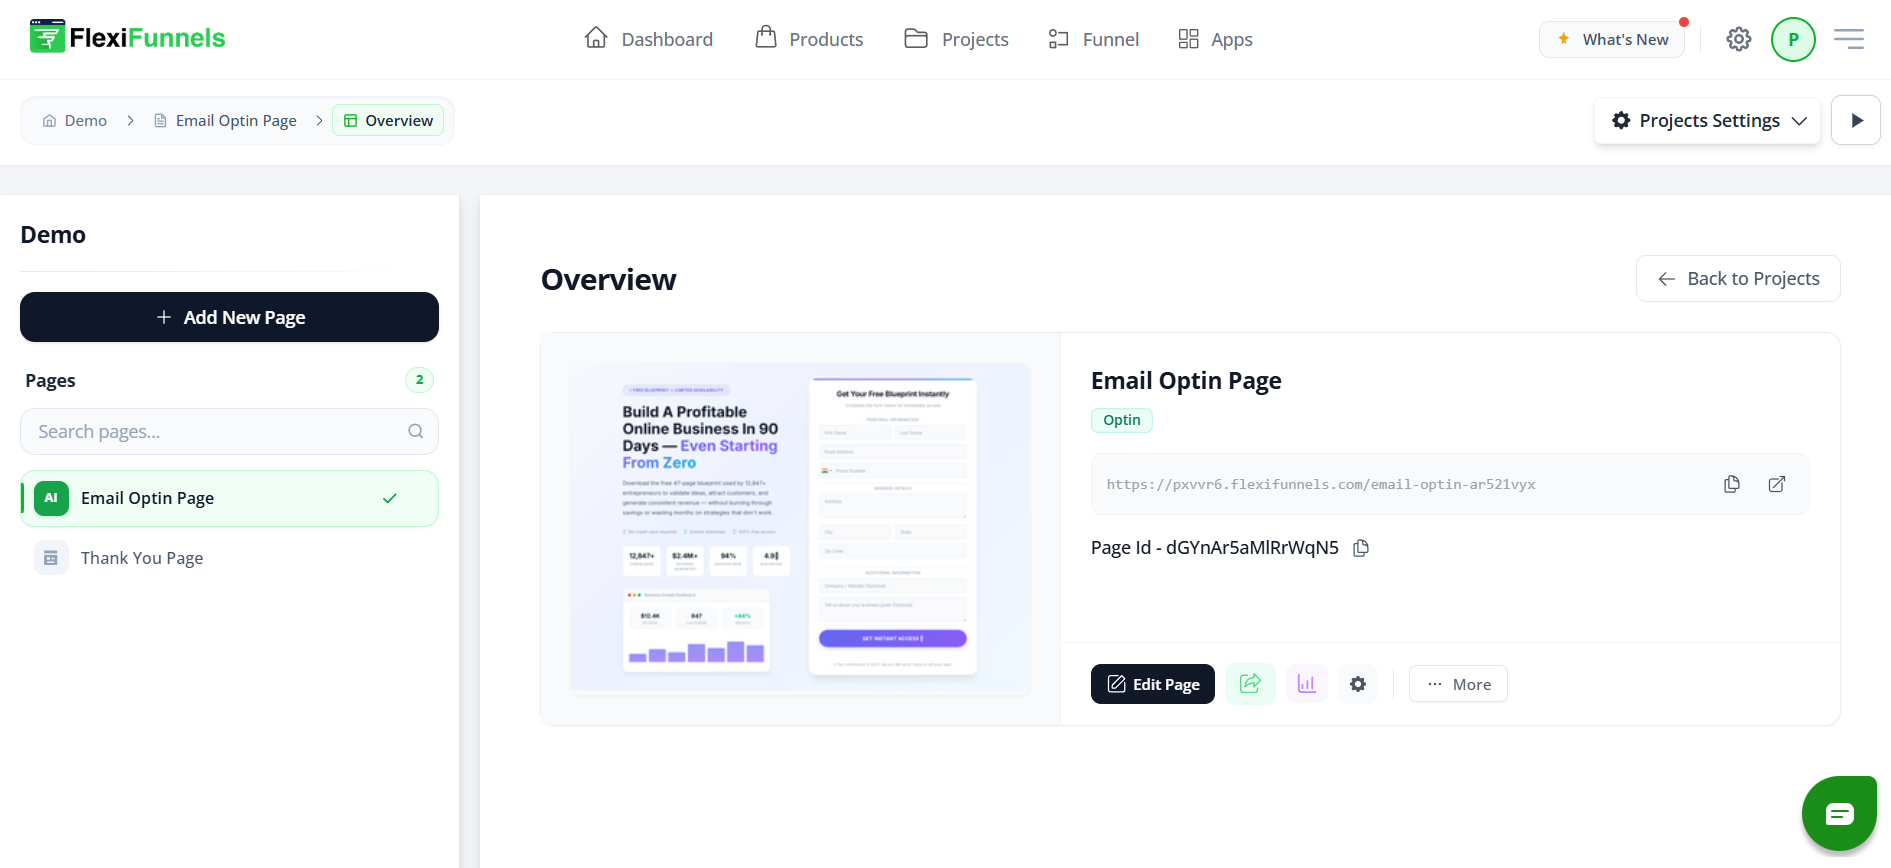
Step 1: Open the Page Editor
Open the editor for the landing page where you want to display the pop-up. The pop-up is configured at the page level, so confirm that you are editing the correct landing page before continuing.
Step 2: Open the Pop-Up Settings
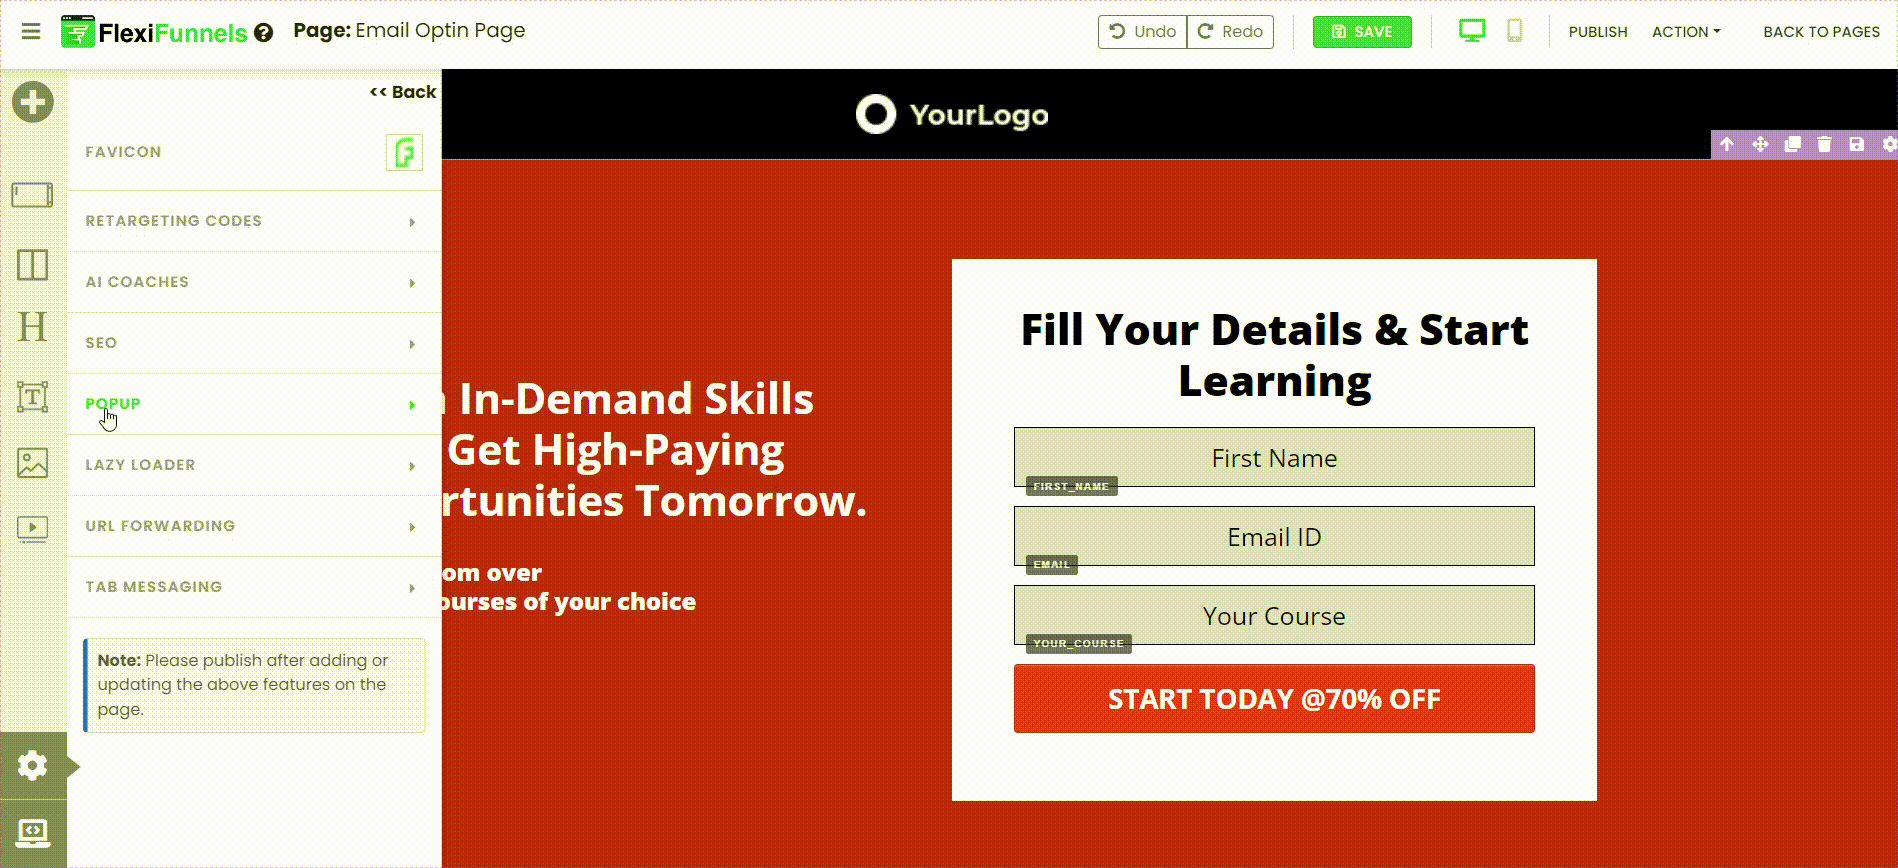
In the lower-left area of the editor, select the gear icon to open page settings. Then select Popup. This opens the area where you can add and manage pop-ups for the landing page.
Step 3: Add and Customize the Pop-Up
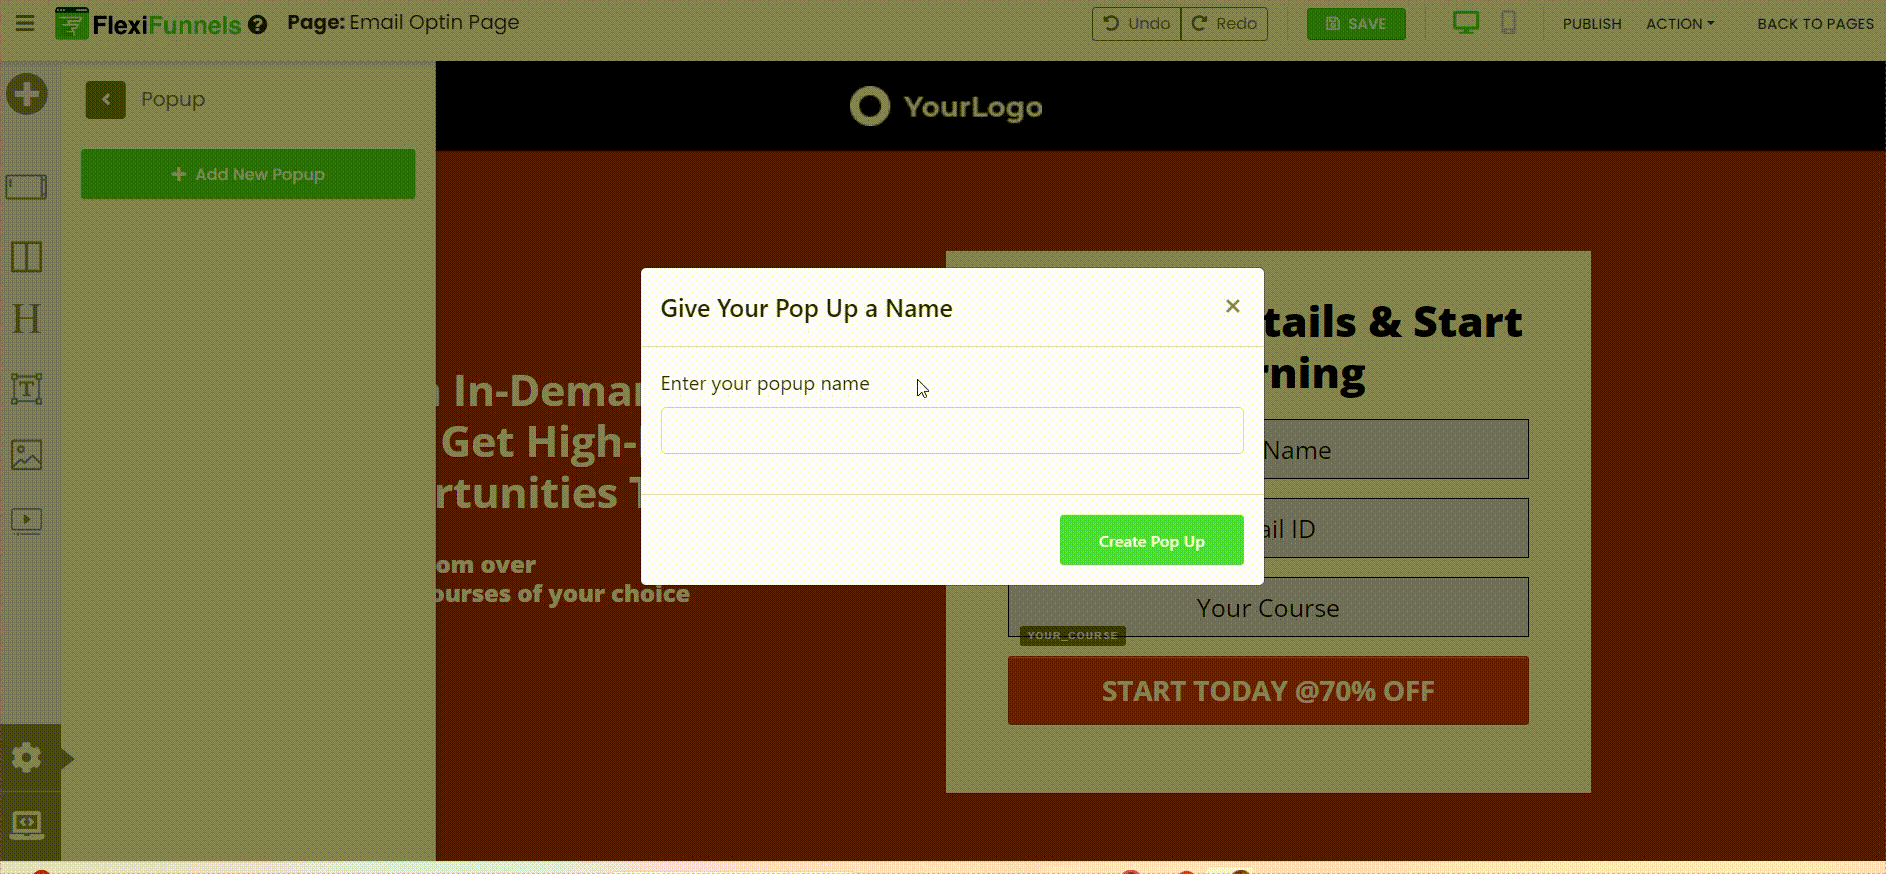
Add a new pop-up, then customize its contents to match the purpose of your campaign. You can add elements such as text, images, call-to-action buttons, forms, and other page content. Save the pop-up after completing your design so that the changes are retained.
Step 4: Configure Basic Pop-Up Settings
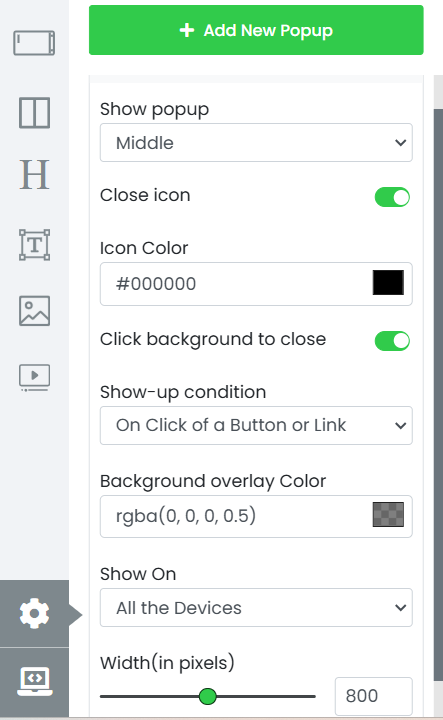
Configure the basic settings to control the pop-up’s placement, appearance, and visitor interaction.
- Show Pop-Up: Select where the pop-up appears on the page, such as the center or top of the screen.
- Close Icon: Enable or disable the X icon that visitors can use to close the pop-up.
- Click Background to Close: Allow visitors to close the pop-up by selecting the area outside its boundaries.
- Background Overlay Color: Set the overlay color that appears behind the pop-up.
- Width in Pixels: Define the width of the pop-up to suit the content and page design.
- Delete: Remove the pop-up when it is no longer required.
Step 5: Set the Show-Up Conditions
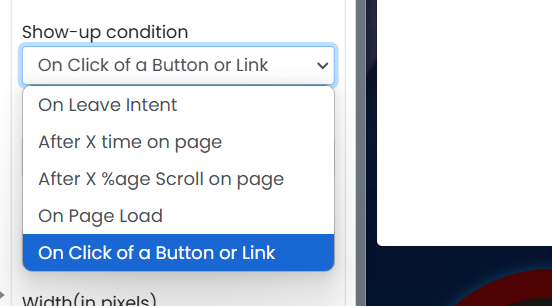
Set a show-up condition to determine when the pop-up is displayed. Choose the trigger that supports your campaign objective and visitor journey.
- On Leave Intent: Displays the pop-up when a visitor indicates that they may leave the page, such as by moving toward the browser controls or switching tabs.
- After X Seconds: Displays the pop-up after a visitor has been on the page for the number of seconds you specify.
- After X% Scroll: Displays the pop-up after a visitor scrolls through the specified percentage of the page.
- On Page Load: Displays the pop-up immediately after the landing page loads.
- On Click: Displays the pop-up when a visitor selects a specified button or image.
Verify the Configuration
Save the page and preview it before publishing. Test the selected trigger to confirm that the pop-up appears at the expected time or interaction point. Verify that the content is readable, all buttons and forms work correctly, and visitors can close the pop-up according to the settings you configured.
Common Scenarios
- Lead generation: Display a form that collects email addresses or phone numbers in exchange for a resource or offer.
- Special offer: Show a discount, flash sale, or limited-time promotion after visitors have engaged with the page.
- Exit-intent retention: Present a final offer or alternative call to action when visitors attempt to leave the landing page.
- Webinar registration: Open a registration form when a visitor selects a registration button.
- Content announcement: Display important updates or next-step information on page load.
Best Practices
- Use one clear call to action in each pop-up.
- Match the pop-up design to the branding and visual hierarchy of the landing page.
- Use On Page Load sparingly so visitors can view the page content without interruption.
- Use an exit-intent trigger for retention messages or last-chance offers.
- Keep forms short and request only the information required for the intended follow-up.
- Test the pop-up on desktop and mobile devices before publishing.
- Ensure that the close option is enabled when appropriate for the visitor experience.
Before Contacting Support
- Confirm that the pop-up has been saved in the page editor.
- Verify that a show-up condition is selected.
- Test the exact condition configured for the pop-up.
- Check that any button, image, form, or link inside the pop-up is configured correctly.
- Preview and publish the latest version of the landing page.
- Clear browser cache or use a private browser window when retesting the live page.
Expected Outcome
After completing these steps, the landing page displays the configured pop-up when its selected condition is met. Visitors can view the intended content, complete the requested action, and close the pop-up according to the interaction settings you configured.
Related Articles
Was this article helpful?
That’s Great!
Thank you for your feedback
Sorry! We couldn't be helpful
Thank you for your feedback
Feedback sent
We appreciate your effort and will try to fix the article