What This Feature Does
Automatically issues a customized completion certificate to students when they finish a course, with an optional email notification.
Before You Start
- Have your background image ready (813×568 px)
- Have your logo ready (205×45 px)
- Have your badge image ready (140×231 px)
- Decide what your signature/signee name should say (e.g., course creator, CEO)
Step 1: Open Certificate Settings
- Go to Membership Settings
- Click "Certificate Settings"
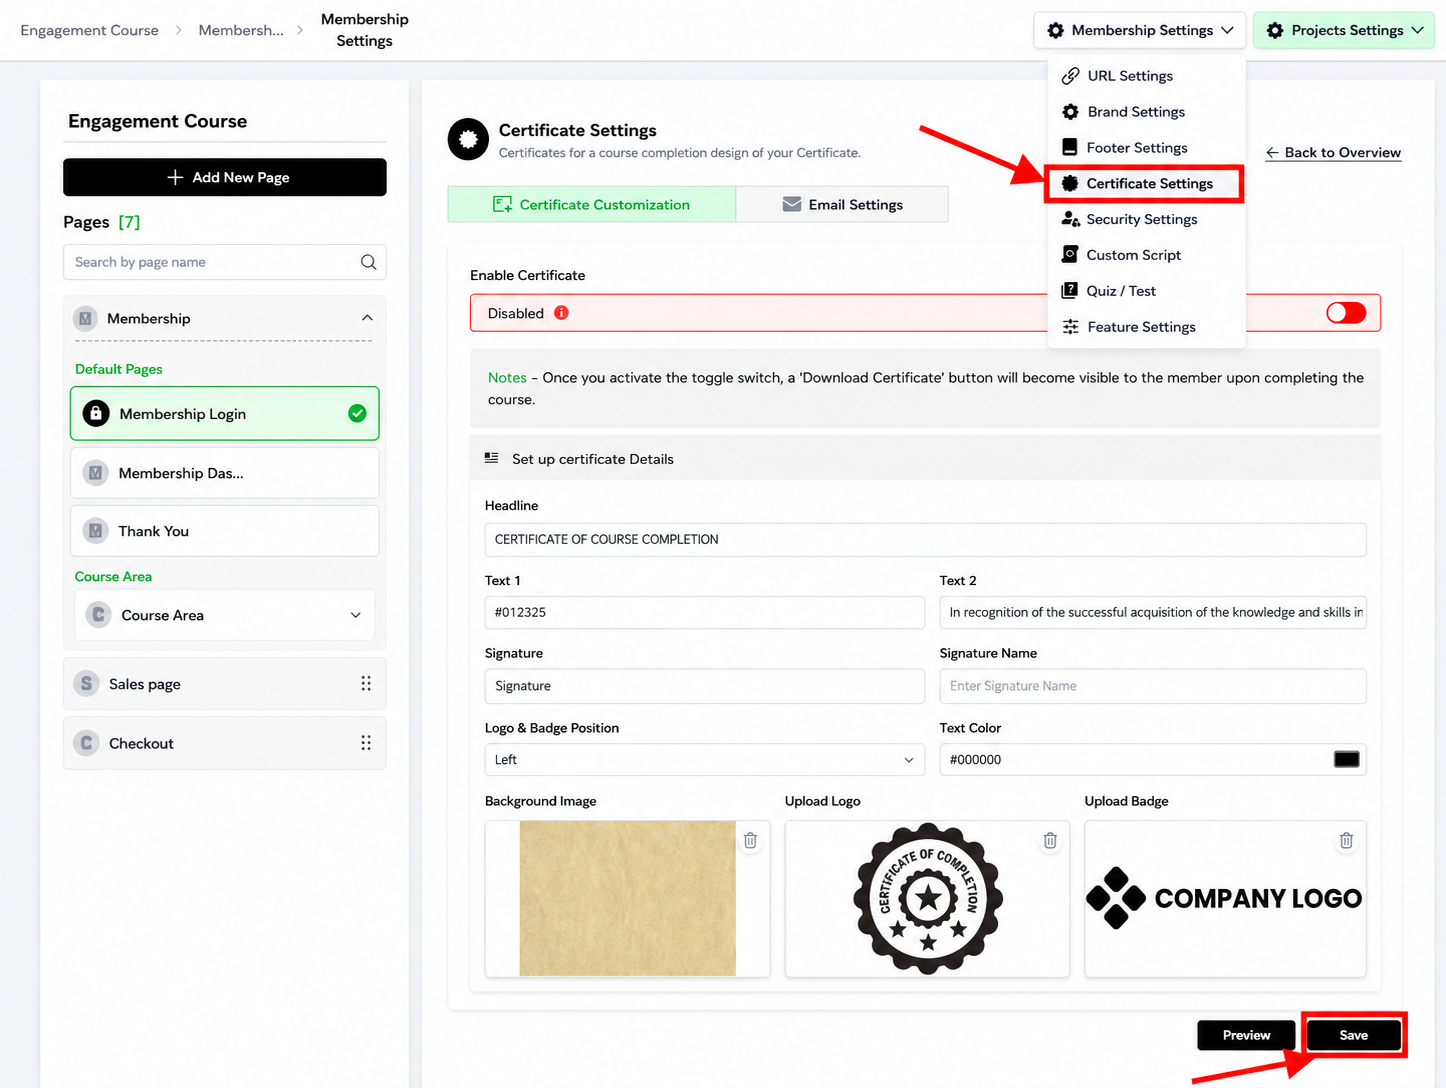
Step 2: Customize the Certificate
- Go to "Certificate Customisations"
- Fill in:
- Headline — the main title on the certificate (e.g., "Certificate of Completion")
- Text1 / Text2 — supporting text lines (e.g., "This certifies that [Name] has successfully completed...")
- Signature — upload or select a signature image
- Signature Name — the name displayed under the signature
- Text Color — choose a color that's readable against your background
- Upload your background image (813×568 px — using the wrong size will distort or crop the certificate)
- Turn ON the toggle — without this, none of the above takes effect
Step 3: Add Logo and Badge
- Go to "Certificate Badge and Logo Upload"
- Upload your logo (205×45 px)
- Upload your badge (140×231 px)
- Choose left or right positioning for both
- Turn ON the toggle
v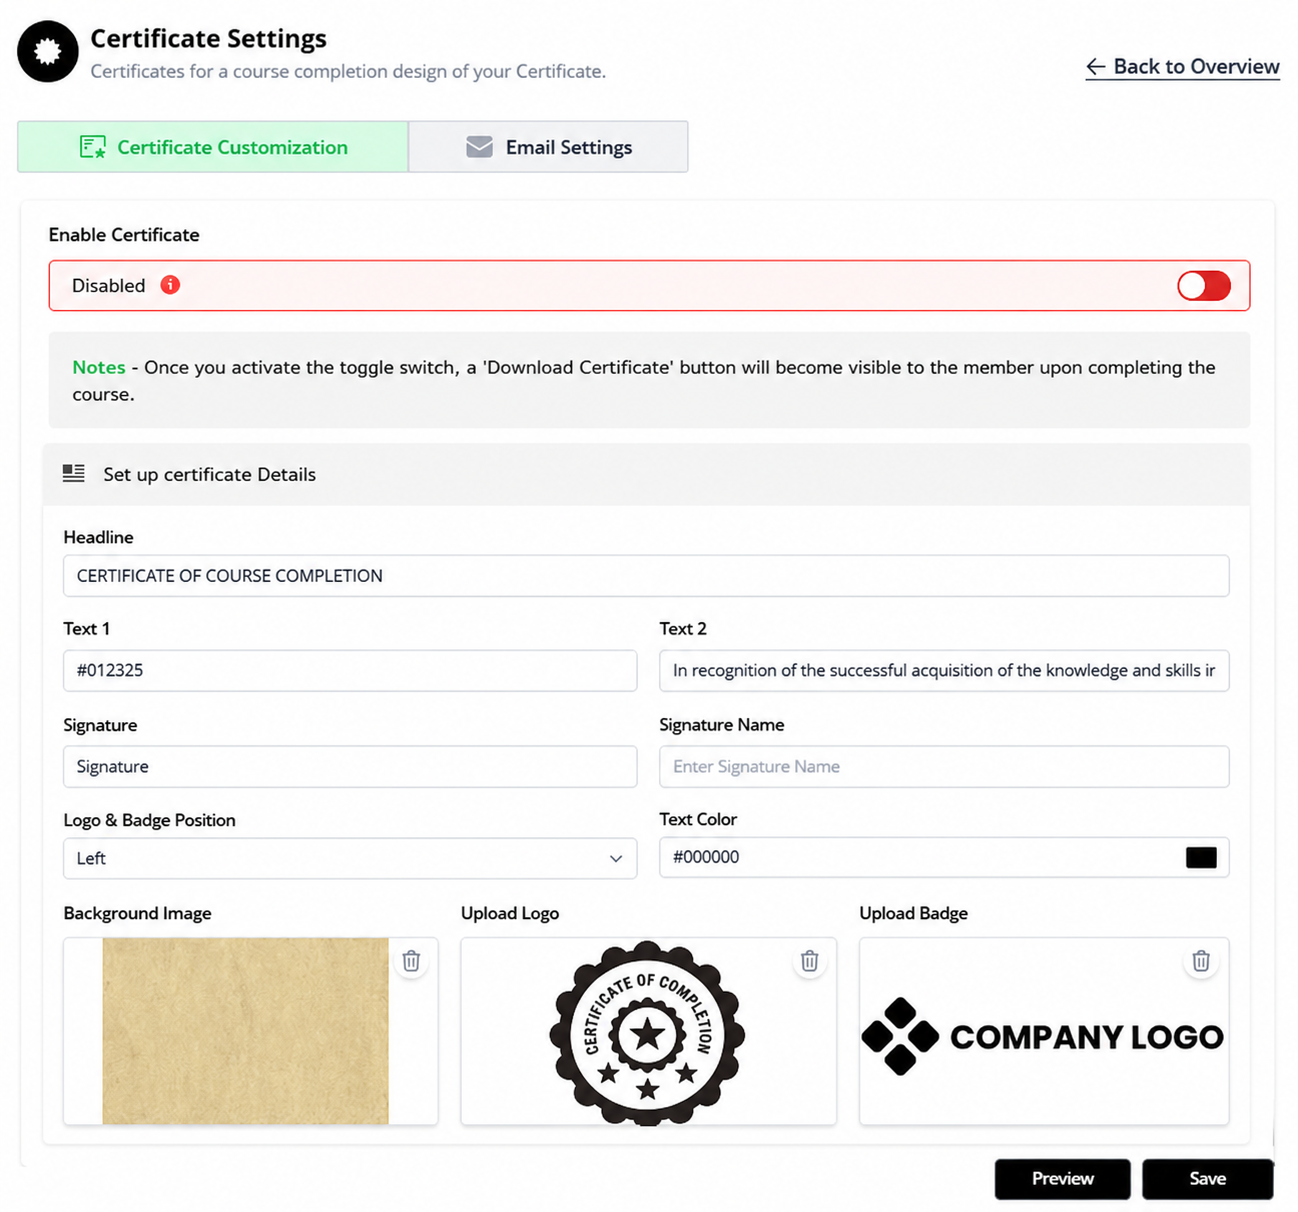 Step 4: Set Up the Completion Email (Optional)
- In Certificate Settings, find the email settings section
- Customize the subject and body using shortcodes:
| Shortcode | Inserts |
|---|---|
[member_name] | Student's name |
[course_name] | Name of the completed course |
[admin_name] | Course admin/instructor name |
[certificate_url] | Direct link to the student's certificate |
[date] | Completion date |
- Turn ON the toggle — if this is off, no email gets sent regardless of what you've written
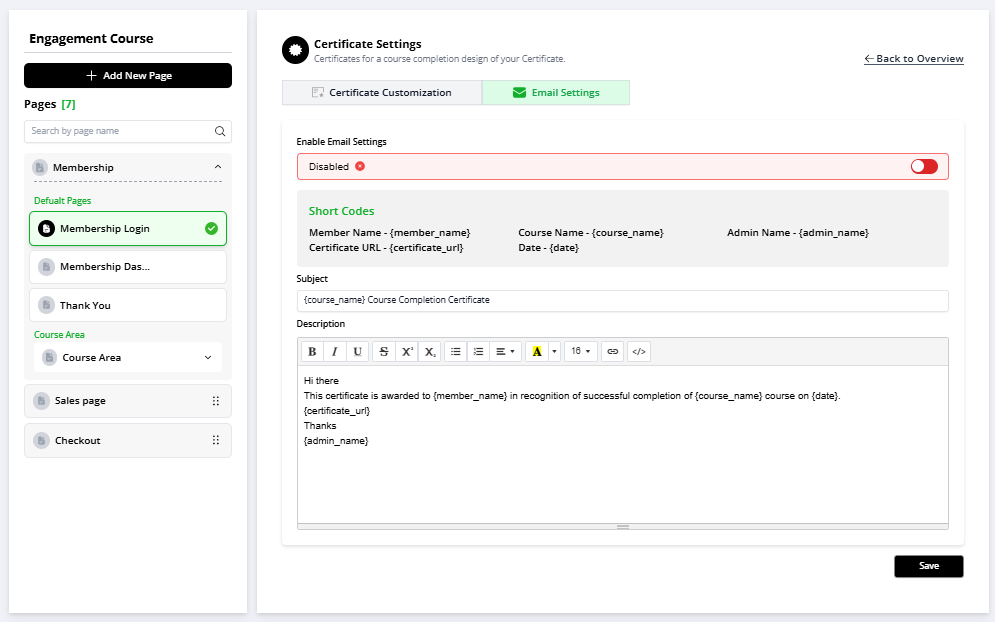
Turn ON the toggle — if this is off, no email gets sent regardless of what you've written
Step 5: Test Before Launch
- If possible, mark a test account as "complete" for the course
- Confirm the certificate generates correctly (check text, images, colors)
- Confirm the email sends and the
[certificate_url]link actually works
Use Cases
1. Tailored Recognition for Different Courses: Use the Certificate Customisations options to create distinct certificates for various courses offered on the platform. Customise the headline, text, signature, and background image to reflect the unique identity and value of each course, making each certificate special for the recipients.
2. Branding Consistency: With the Certificate Badge and Logo Upload feature, ensure all issued certificates are in line with your organisation's branding guidelines. Upload your logo and badge, and strategically position them to enhance brand visibility and recognition among course completers.
3. Enhanced User Engagement: Activate the email configuration settings to automate the sending of personalised congratulatory emails upon course completion. Utilize shortcodes to insert specific details like the Member Name, Course Name, and Certificate URL, providing a seamless and engaging user experience.
4. Recognition in Professional Networks: Encourage members to share their achievements on professional networks by customising certificates with appealing designs and including easily shareable Certificate URLS in the completion emails. This not only enhances the user's professional profile but also increases visibility for your courses.
Motivation Through Personalisation: Leverage the customization options to add personal congratulatory messages or quotes from industry leaders, tailored to the course topic. This personal touch can significantly boost motivation and engagement, encouraging learners to pursue further courses.
By effectively utilizing the Certificate Settings, educators and administrators can elevate the value of their courses, foster a stronger community, and offer a tangible and meaningful token of achievement to their members.
Common Issues & Fixes
| Problem | Likely Cause | Fix |
|---|---|---|
| Certificate doesn't generate at all | Toggle wasn't turned ON | Go back and check both toggles (Customisation + Badge/Logo) |
| Certificate email never arrives | Email toggle is OFF | Turn on the email toggle and save |
| Logo/badge looks stretched or blurry | Wrong image dimensions uploaded | Re-upload using exact recommended sizes (205×45 for logo, 140×231 for badge) |
| Background image looks cropped or distorted | Image isn't 813×568 px | Resize the image to the exact recommended dimensions before uploading |
Shortcodes show as literal text (e.g., [member_name]) in the email | Typo in the shortcode, or wrong brackets used | Copy shortcodes exactly as listed, square brackets included |
| Certificate URL in email is broken | Certificate wasn't generated before the email was sent, or link expired | Confirm the certificate generation toggle is on and test the flow end-to-end |
Was this article helpful?
That’s Great!
Thank you for your feedback
Sorry! We couldn't be helpful
Thank you for your feedback
Feedback sent
We appreciate your effort and will try to fix the article