Overview
You can connect your WPX domain to FlexiFunnels by adding the required DNS records in your WPX DNS settings and then verifying the domain inside FlexiFunnels.
Once your domain is successfully connected, you can use it for your funnels, websites, landing pages, checkout pages, membership sites, and other FlexiFunnels projects.
Important: If you're following an older video tutorial, you may notice a different IP address. Always use the latest FlexiFunnels server IP:
137.66.21.168
Before You Begin
Before starting the integration, make sure:
- You have an active domain managed through WPX.
- Your domain has not expired.
- You have access to your WPX DNS settings.
- You have access to the Domains section in your FlexiFunnels account.
Note: DNS changes are not immediate. Depending on your DNS provider, propagation can take anywhere from a few minutes up to 24–48 hours.
Follow these step-by-step instructions to connect your WPX domain to FlexiFunnels successfully:
Step 1: Access Your WPX Account
Log in to your WPX account.
Navigate to the DNS Settings from the left-side menu.
In the DNS settings, locate the Records section.
Click on the option to Add New Record.

Step 2: Add DNS Records
Depending on whether you are integrating a primary domain or a subdomain, you need to add specific DNS records.
For Primary Domain Integration
In the DNS settings, click on Add New Record.
Select A Record.
Enter the following details:
Host:
@Points to:
137.66.21.168TTL: Leave it as default.
Save the record.

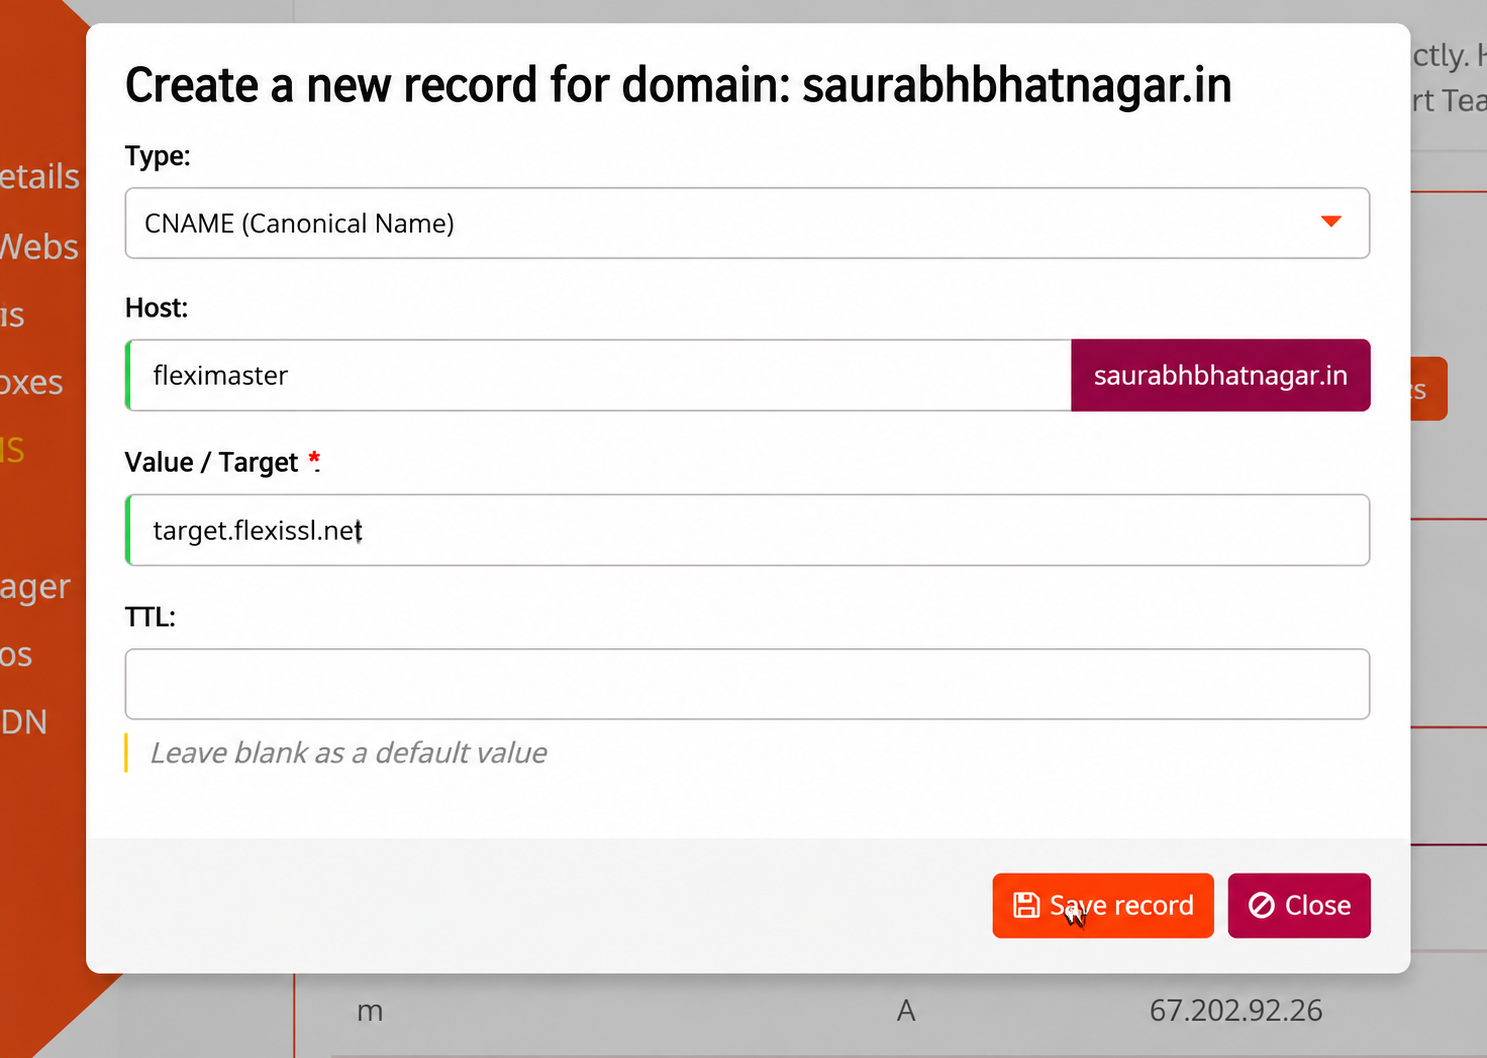
For Subdomain Integration
In the DNS settings, click on Add New Record.
Select CNAME Record.
Enter the following details:
Host: Your subdomain name (e.g.,
subdomain)Points to:
target.flexissl.netTTL: Leave it as default.
Save the record.
Step 3: Add Domain in FlexiFunnels
Log in to your FlexiFunnels account.
Navigate to the Domains section.
Click on Add Domain.
Enter your Primary Domain and Subdomain.
FlexiFunnels will provide the required CNAME and A Name values.
If not provided, use the values mentioned above.

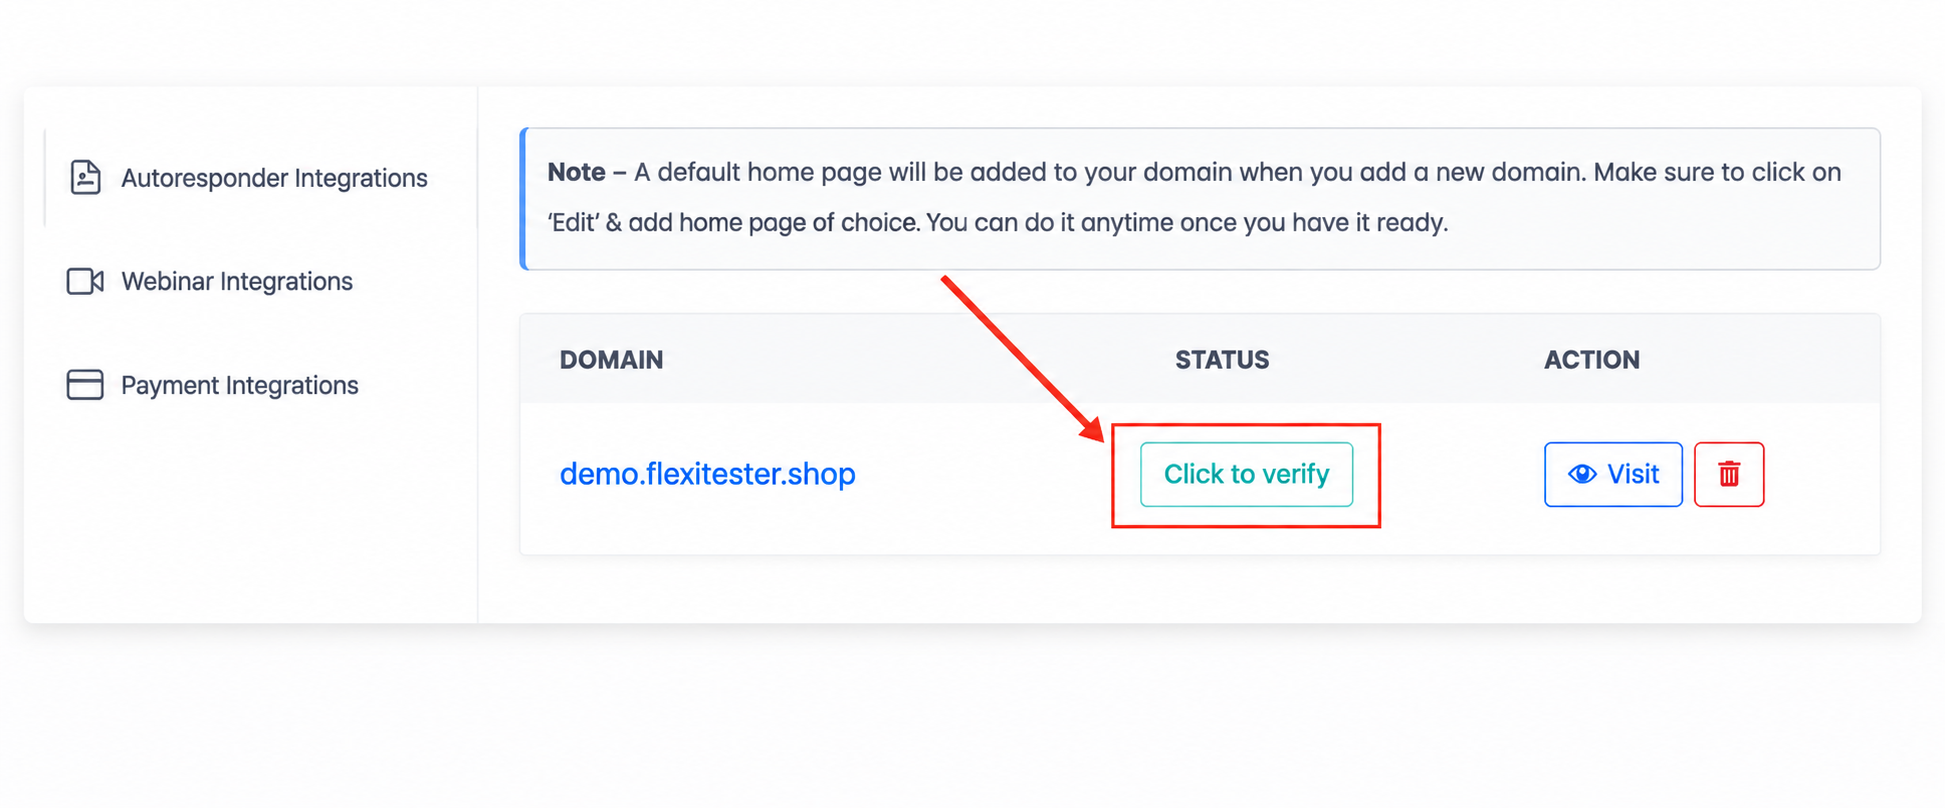
Step 4: Verify Domain Integration
After adding the DNS records in WPX and linking your domain in FlexiFunnels, return to FlexiFunnels.
Click on Verify Domain.
If configured correctly, your domain will be successfully secured and integrated.
Common Scenarios
My domain verification is failing.
Verify the following:
- The correct DNS record type has been added.
- The A Record points to 137.66.21.168.
- The CNAME points to target.flexissl.net.
- The Host value is correct (
@for the primary domain or your subdomain name for subdomains). - There are no typing mistakes in the DNS records.
My SSL certificate is still pending.
SSL provisioning begins only after the DNS records have propagated successfully.
Please allow up to 24–48 hours for DNS propagation before troubleshooting further.
My domain still opens my old website.
This usually means your DNS is still pointing to another server.
Review your DNS records and check for:
- Old A Records.
- Existing CNAME Records pointing to another platform.
- Conflicting DNS entries.
Remove any conflicting records before verifying your domain again.
FlexiFunnels cannot verify my domain.
Check the following:
- The DNS records were saved successfully in WPX.
- DNS propagation has completed.
- There are no duplicate A Records or CNAME Records.
- You're verifying the same domain that was added to FlexiFunnels.
Should I use an A Record or a CNAME Record?
Use:
- A Record for your primary/root domain (
yourdomain.com) - CNAME Record for subdomains (
courses.yourdomain.com)
Using the incorrect record type may prevent successful verification.
Best Practices
- Always use the DNS values recommended by FlexiFunnels.
- Remove conflicting DNS records from previous hosting providers.
- Avoid creating duplicate A Records or CNAME Records.
- Wait for DNS propagation to complete before clicking Verify Domain multiple times.
- Test your domain using an Incognito/Private browser window after successful verification.
Before Contacting Support
Before contacting our support team, please verify the following:
- ✅ The correct DNS record type has been added.
- ✅ The A Record points to 137.66.21.168.
- ✅ The CNAME points to target.flexissl.net.
- ✅ DNS changes have been saved successfully in WPX.
- ✅ You've allowed up to 24–48 hours for DNS propagation.
- ✅ There are no conflicting or duplicate DNS records.
- ✅ You've clicked Verify Domain inside FlexiFunnels.
If the issue still persists, please provide:
- A screenshot of your WPX DNS Settings.
- A screenshot of the Domains section in FlexiFunnels.
- The domain name you're trying to connect.
- Any verification or SSL error messages.
- A brief description of the issue and the troubleshooting steps you've already completed.
Was this article helpful?
That’s Great!
Thank you for your feedback
Sorry! We couldn't be helpful
Thank you for your feedback
Feedback sent
We appreciate your effort and will try to fix the article