Bundles allow you to group multiple courses together and offer them as a single package. Instead of selling or granting access to individual courses, you can organize related courses into a bundle, making it easier to deliver structured learning programs and increase the value of your offerings.
This guide explains how to create, edit, manage, and configure bundles in Flexi Membership.
Check this quick video to create a course using MCP/Flexi Genie:
What are Bundles?
A Bundle is a collection of one or more courses grouped together into a single offering.
Bundles help you:
- Sell multiple courses as one package.
- Grant access to several courses simultaneously.
- Organize related courses under one learning program.
- Simplify product and access management.
For example, instead of selling three individual courses separately, you can combine them into a single bundle called Digital Marketing Masterclass.
Creating a Bundle
Bundles can be created in two ways.
Automatically
When you create a new course, Flexi Membership automatically creates a bundle using the course name, if you opt for it.
This bundle is linked to the course and can be customized later from the Bundles section.
Manually
To create a new bundle:
- Open your membership project.
- Navigate to Bundles.
- Click Add Bundle.
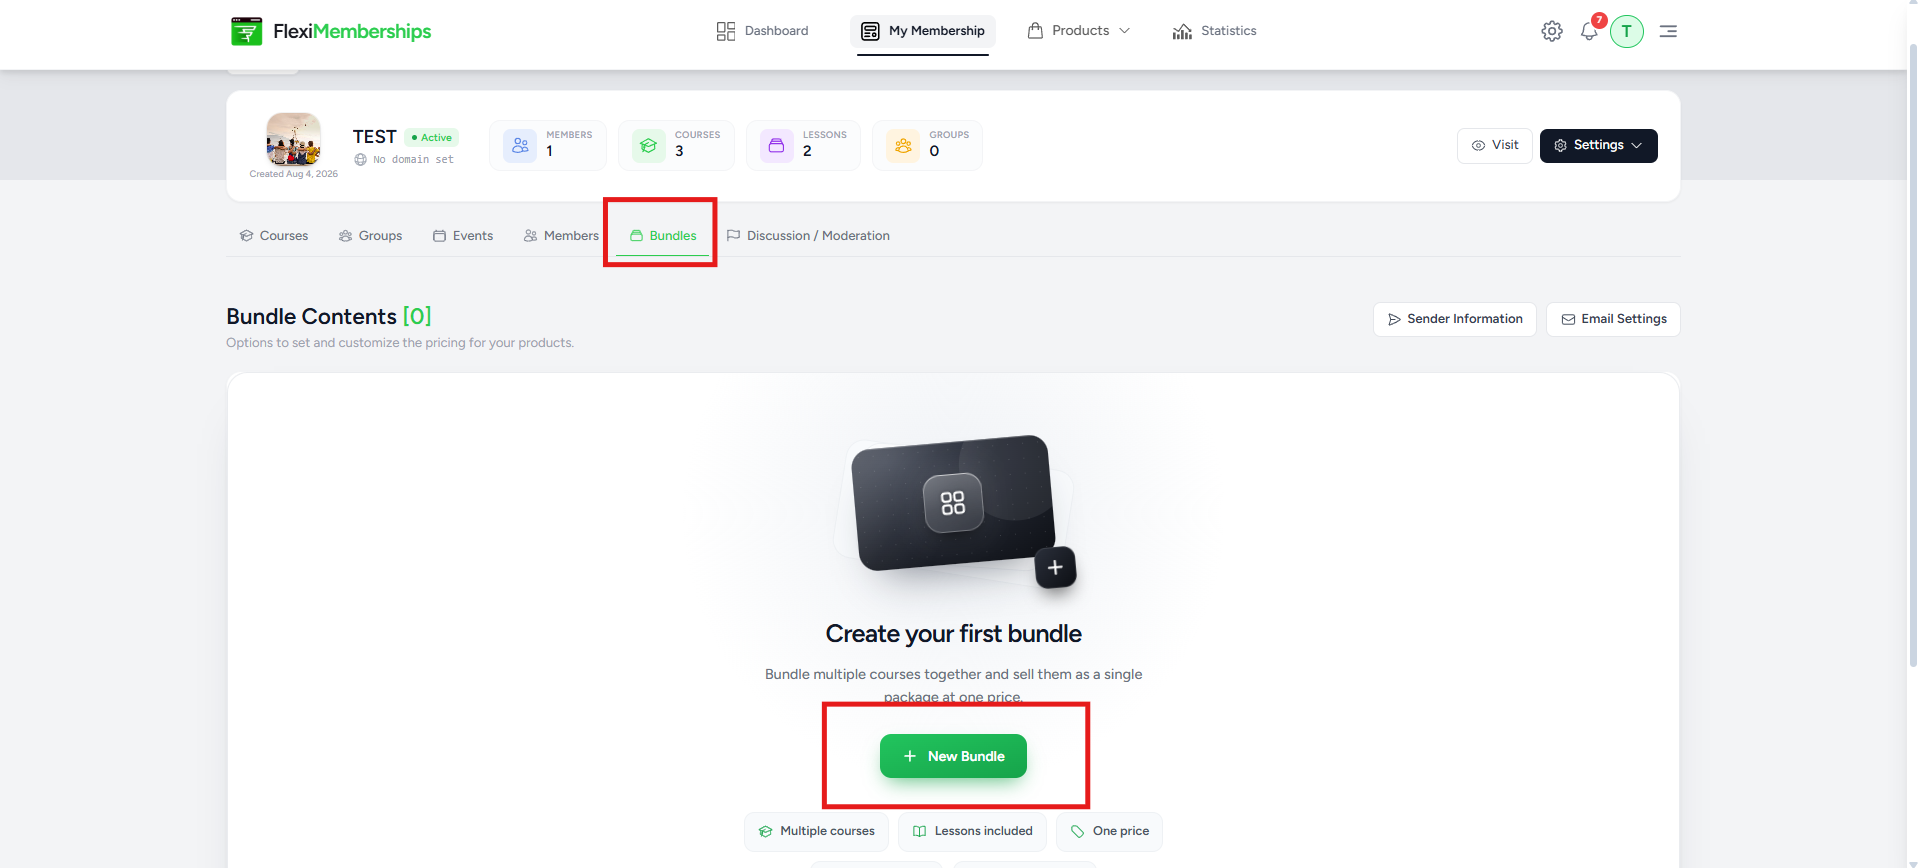
- Enter a Bundle Name.
- Configure the Access Duration.
- Click Add Bundle.
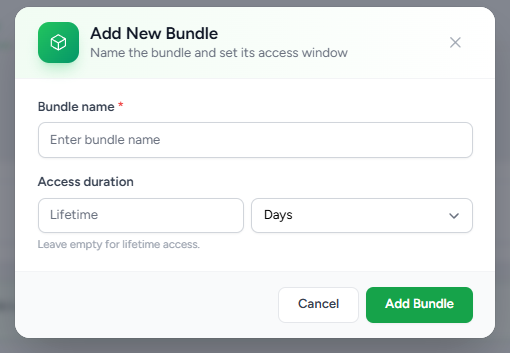
Bundle Name
Provide a descriptive name for your bundle.
The bundle name is displayed throughout the membership area and can also be used in email templates.
Access Duration
Specify how long enrolled members can access the bundle.
You can configure:
- Lifetime Access (leave the duration empty)
- Time-limited Access
For time-limited access, enter the duration and select the appropriate unit.
Example:
- 30 Days
- 90 Days
- 12 Months
If no duration is specified, members receive lifetime access to the bundle.
Managing Bundle Content
Once a bundle has been created, you can manage the courses included within it.
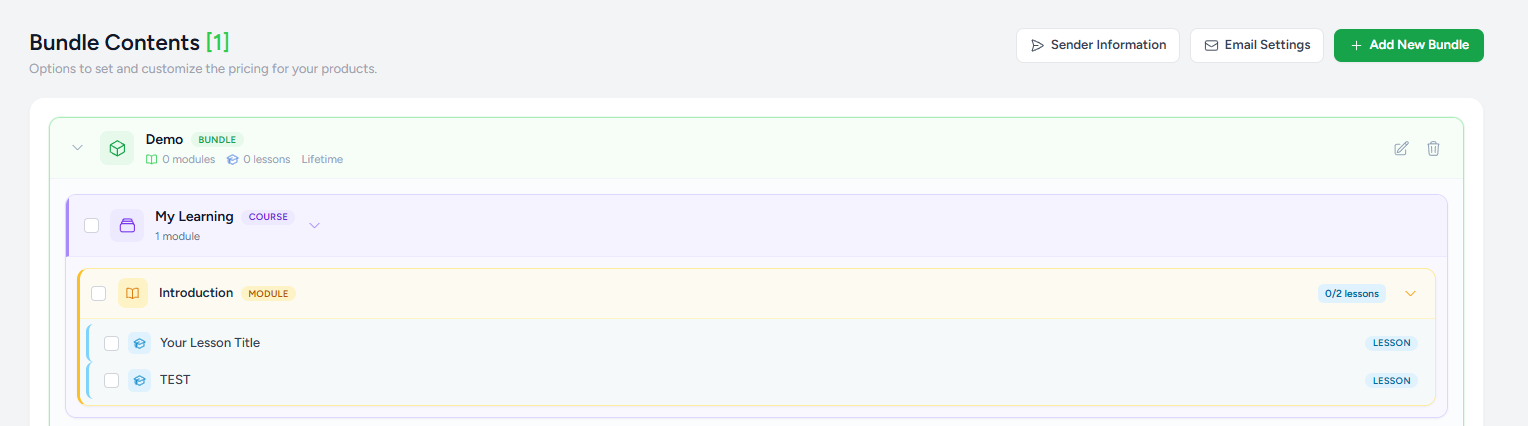
The bundle interface displays:
- Bundle Name
- Number of Modules
- Number of Lessons
- Access Duration
Within each bundle, you'll see all assigned courses.
Expanding a course displays:
- Course Name
- Modules
- Lessons
This hierarchy makes it easy to understand the complete learning structure contained within the bundle.
Assigning Courses to a Bundle
Bundles can contain one or more courses.
To assign courses:
- Open the bundle.
- Select the courses you want to include.
- Save your changes.
Any member who receives access to the bundle automatically receives access to every course included within it.
Editing a Bundle
You can edit a bundle at any time.
From the bundle list, click the Edit icon to update:
- Bundle name
- Access duration
- Assigned courses
- Email settings
- Sender information
Changes are applied immediately after saving.

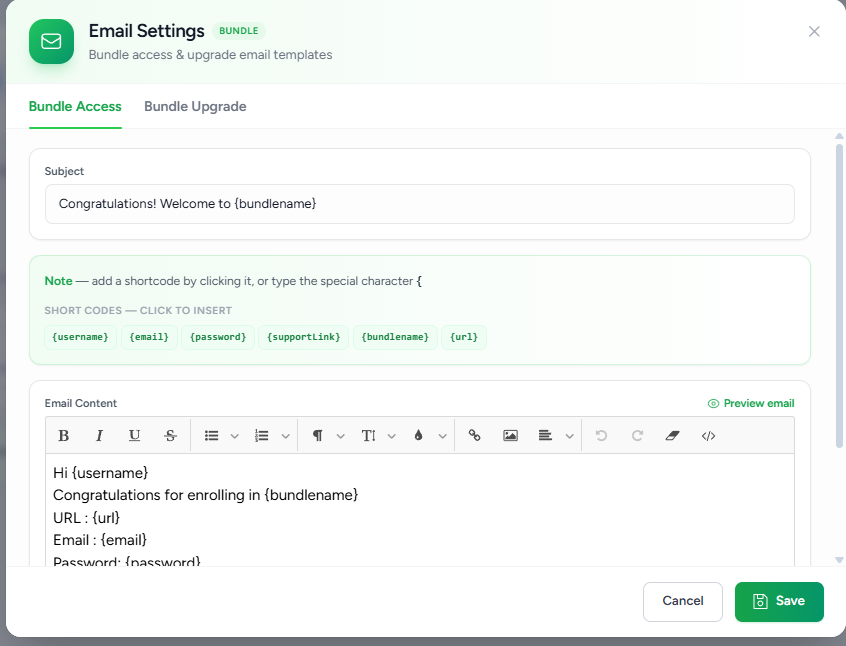
Configuring Bundle Email Settings
Flexi Membership allows you to customize the emails sent when members receive access to a bundle.
Two email templates are available:
- Bundle Access
- Bundle Upgrade
These templates are sent automatically based on the member's enrollment activity.
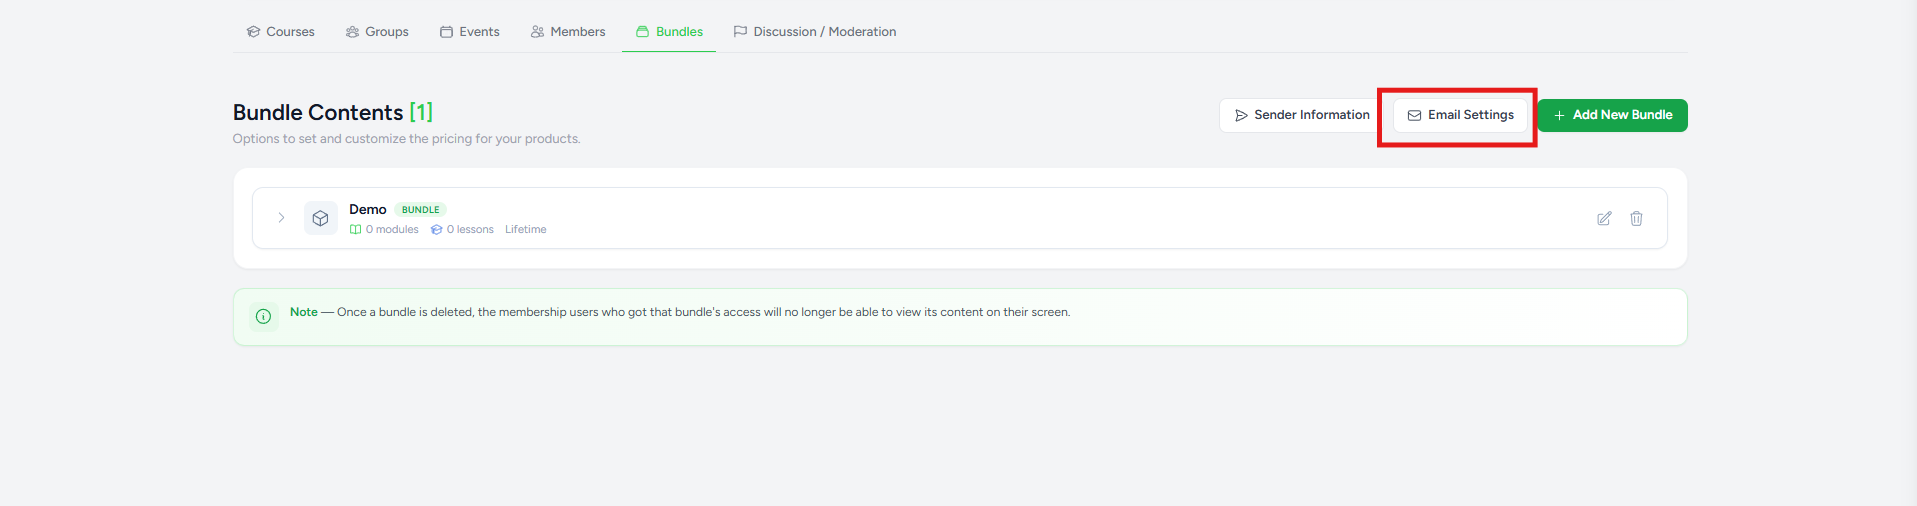
Configuring Sender Information
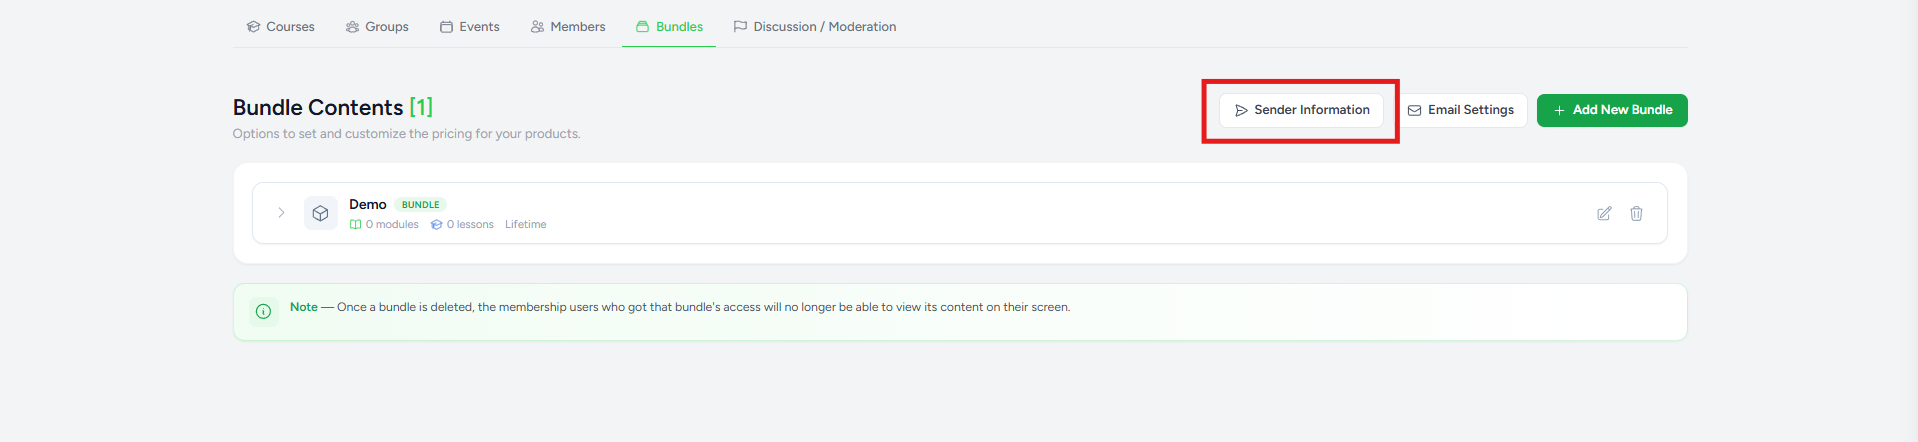
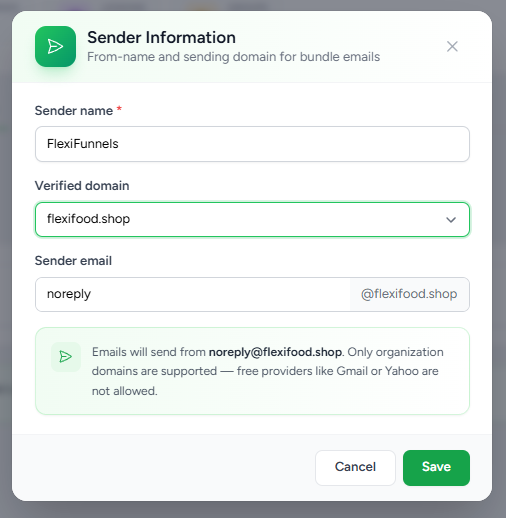
Bundle emails are sent using your configured sender details.
To configure the sender:
- Open Sender Information.
- Enter the Sender Name.
- Select a Verified Domain.
- Specify the Sender Email.
- Click Save.
Best Practices
- Use descriptive bundle names.
- Group related courses into a single learning path.
- Configure access durations based on your business model.
- Customize your bundle emails before publishing.
- Use a professional sender name and verified custom domain.
- Test your email templates before enrolling members.
Was this article helpful?
That’s Great!
Thank you for your feedback
Sorry! We couldn't be helpful
Thank you for your feedback
Feedback sent
We appreciate your effort and will try to fix the article