Modules and lessons help you organize your course content into a structured learning experience. A module acts as a container for related lessons, allowing you to group content by topic, chapter, or learning objective. Within each module, you can create multiple lessons that members complete as they progress through the course.
This guide explains how to create, manage, and organize modules and lessons in Flexi Membership.
Check this quick video to create a course using MCP/Flexi Genie:
Understanding Modules and Lessons
Courses in Flexi Membership are organized into two levels:
- Modules – Used to group related lessons into logical sections.
- Lessons – Individual learning units that contain your course content.
For example:
Digital Marketing Masterclass │
├── Module 1: Introduction │   ├── Lesson 1: Welcome │   ├── Lesson 2: Course Overview │   └── Lesson 3: Setting Expectations │
├── Module 2: Facebook Ads │   ├── Lesson 1: Campaign Objectives │   ├── Lesson 2: Audience Targeting │   └── Lesson 3: Budget Optimization
Organizing your course this way makes it easier for members to navigate and complete the content.
Creating a Module
To create a new module:
- Open the Flexi Membership app.
- Navigate to your membership project.
- Open the desired course.
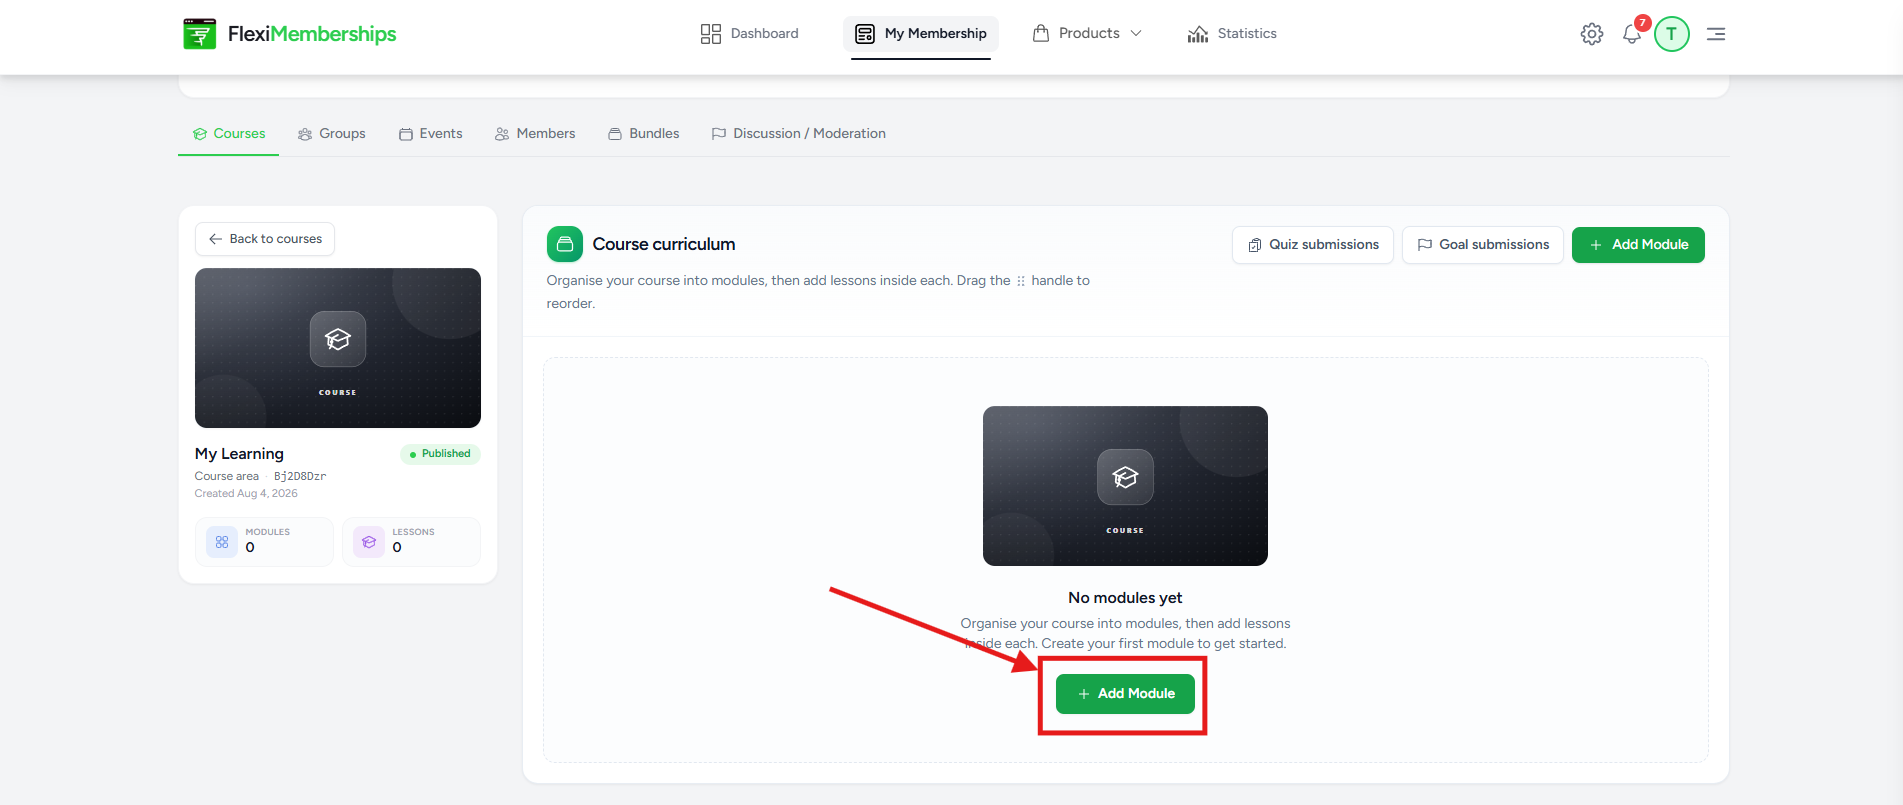
- Click Add Module.
- Enter a name for the module.
- Save the module.
Creating a Lesson
Once you've created a module, you can begin adding lessons to organize your course content. Each lesson can contain either written content or video content and includes options for visibility, cover images, and additional lesson details.
To create a lesson:
- Select the module where you want to add the lesson.
- Find and click on Add Lesson Option.
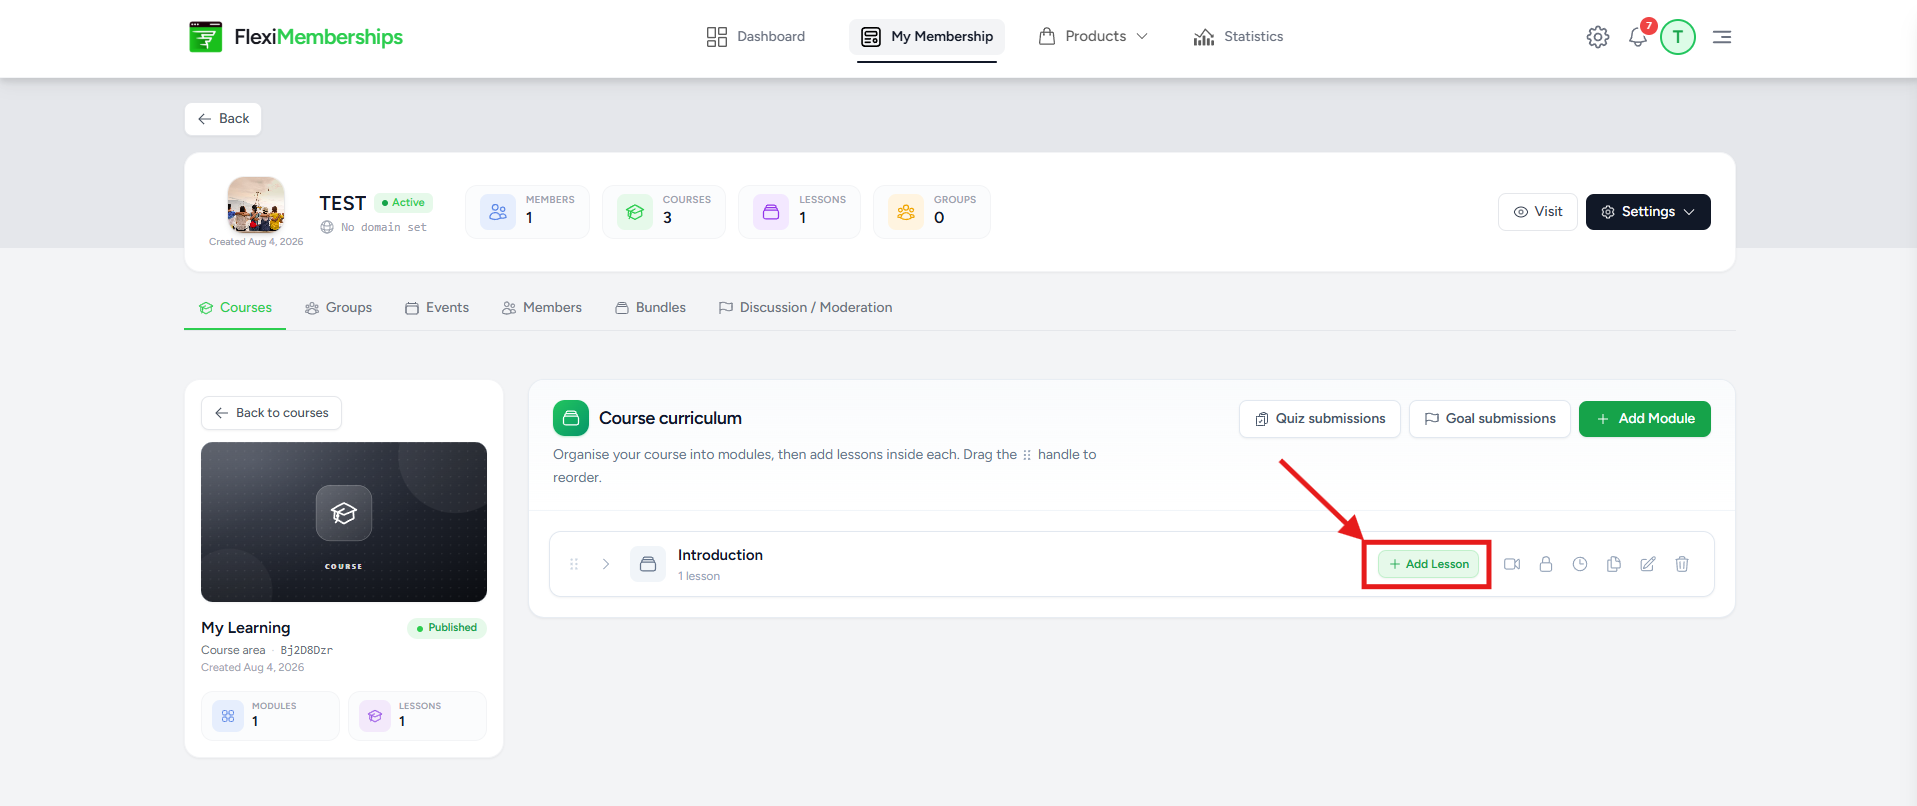
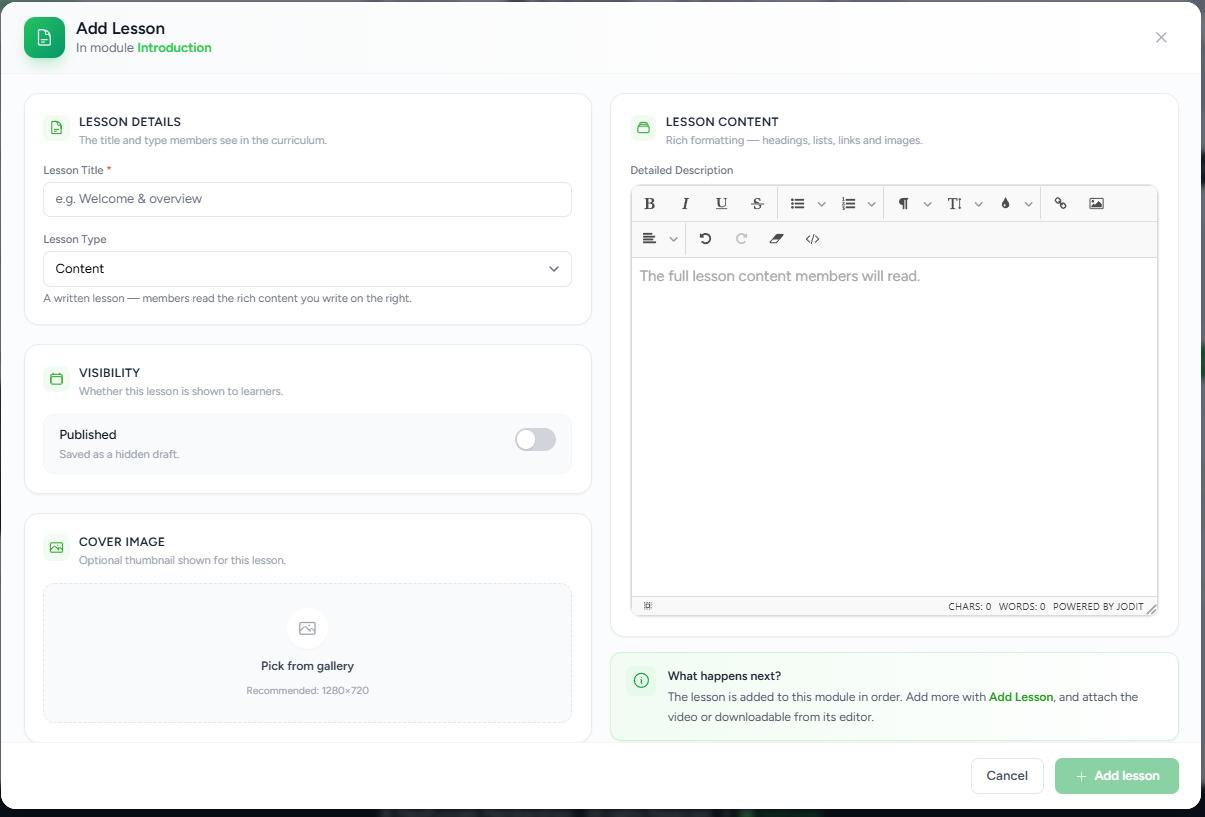
The Add Lesson window will open, allowing you to configure the lesson.
Lesson Details
The Lesson Details section defines how the lesson appears within your course curriculum.
Lesson Title
Enter a descriptive title for your lesson.
Choose a title that clearly communicates the topic, as this is what learners will see while navigating the course.
Example:
- Welcome & Overview
- Introduction to Facebook Ads
- Setting Up Your Workspace
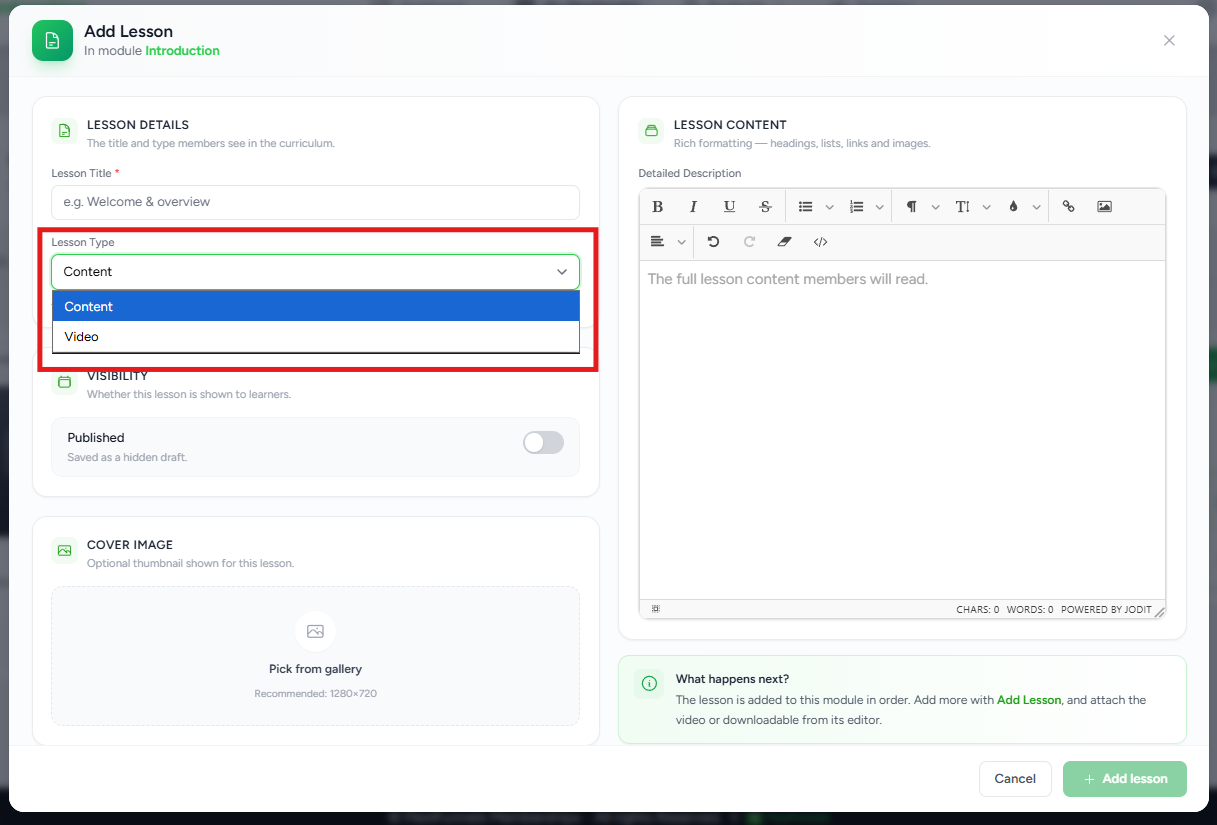
Lesson Type
Select the type of lesson you want to create.
Currently, Flexi Membership supports the following lesson types:
- Content – Create a text-based lesson using the built-in rich text editor.
- Video – Deliver your lesson using video content.
Choose the option that best fits your teaching style.
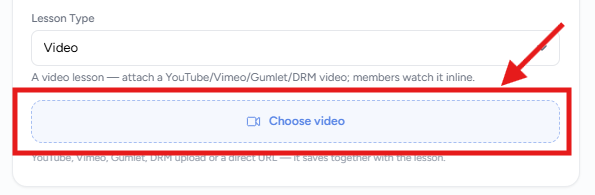
Video Lessons
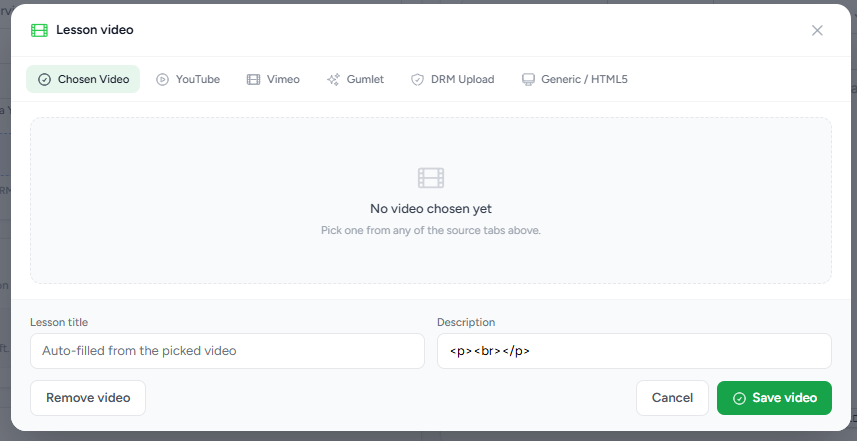
If you select Video as the lesson type, Flexi Membership opens the Lesson Video window, where you can attach video content to the lesson.
You can choose videos from multiple supported sources:
- Chosen Video – Select a previously uploaded video.
- YouTube – Embed a YouTube video.
- Vimeo – Use a Vimeo-hosted video.
- Gumlet – Attach videos hosted on Gumlet.
- DRM Upload – Upload DRM-protected videos.
- Generic / HTML5 – Use any HTML5-compatible video source.
After selecting a video, the lesson title and description can be automatically populated based on the selected video's metadata. You can edit these details before saving if required.
Once everything is configured, click Save Video to attach the video to the lesson.
Visibility
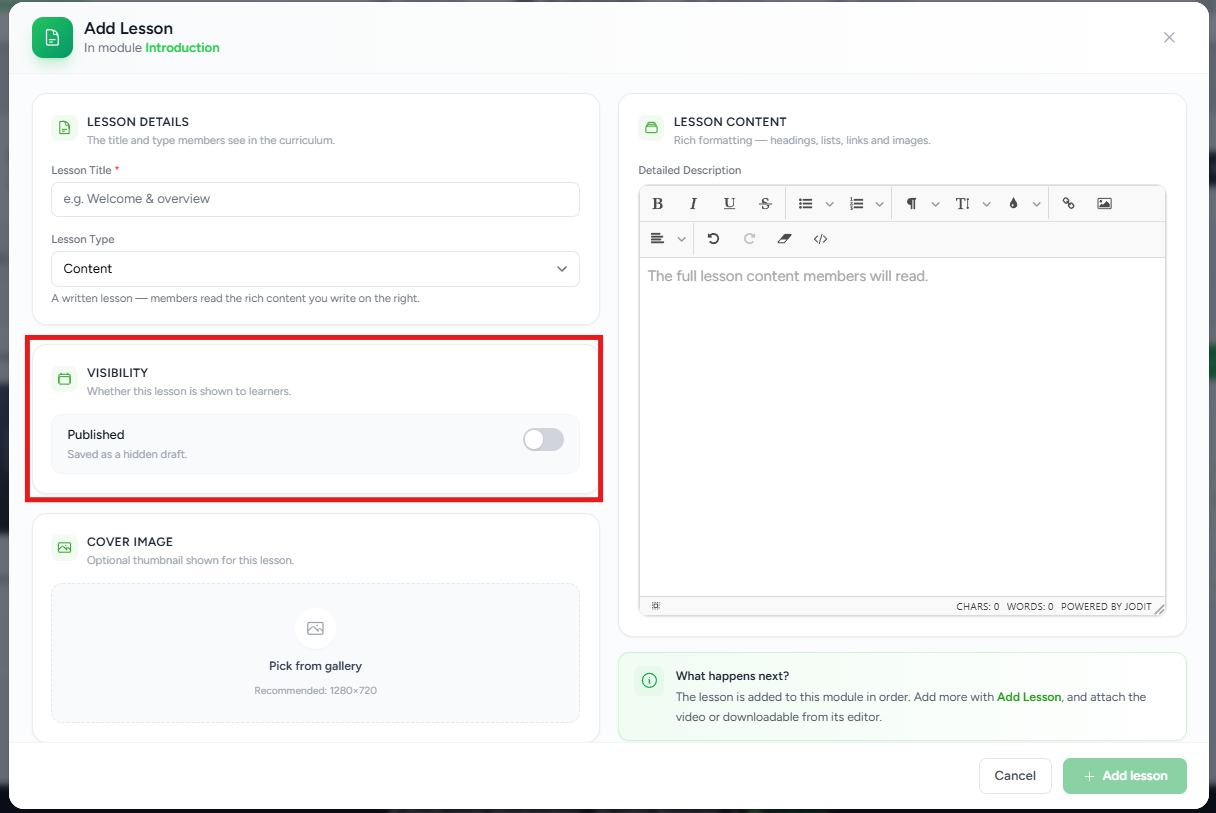
The Visibility section determines whether learners can access the lesson.
Published
Use the Published toggle to control the lesson's availability.
- Enabled – The lesson is published and visible to learners.
- Disabled – The lesson is saved as a hidden draft and remains inaccessible until it is published.
This allows you to prepare lesson content in advance before making it available to your members.
Cover Image
You can optionally upload a cover image for the lesson.
The cover image serves as the lesson thumbnail within the course and helps visually distinguish lessons.
To add a cover image:
- Click Pick from Gallery.
- Select an existing image or upload a new one.
- Save your selection.
For the best visual quality, use the recommended image size displayed in the uploader.
Lesson Content
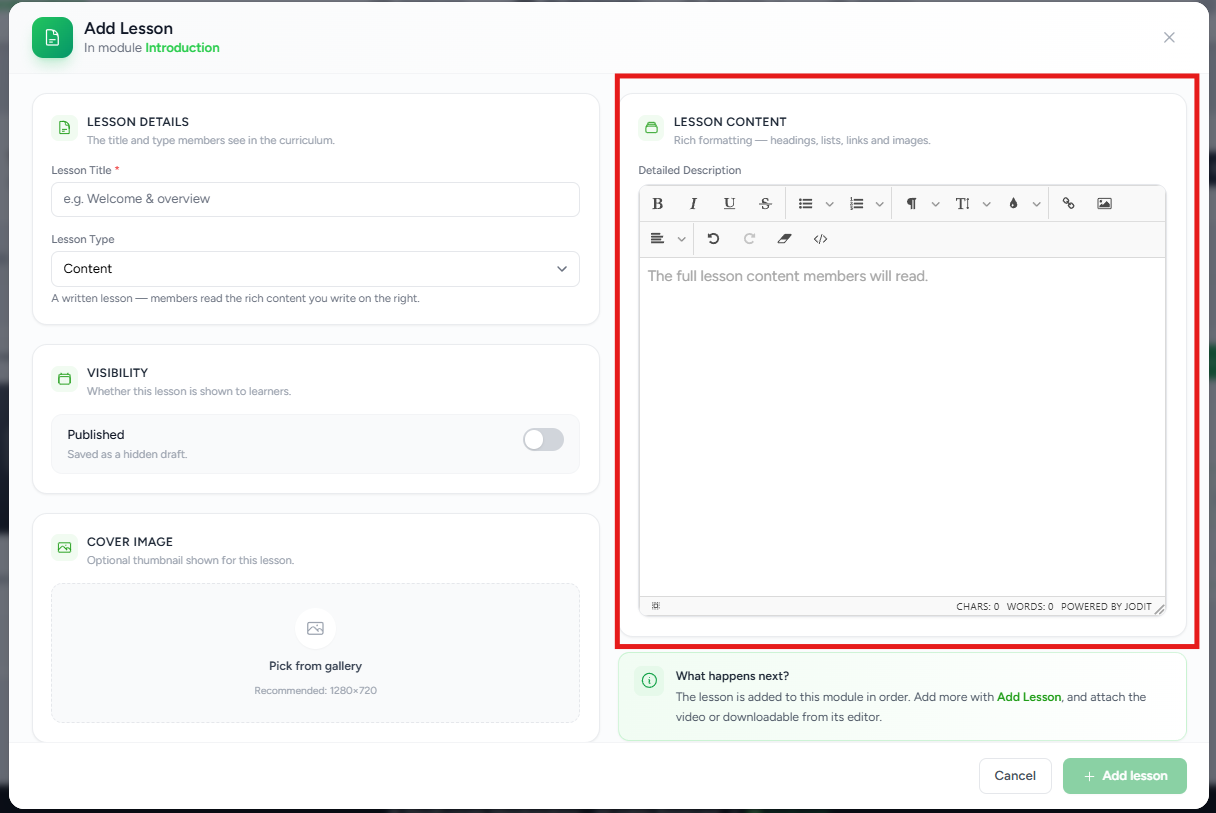
The Lesson Content section allows you to create the educational material that learners will consume.
Content Lessons
If you select Content as the lesson type, you can use the rich text editor to create written lessons.
The editor supports formatting options such as:
- Headings
- Bold, Italic, and Underlined text
- Bullet and numbered lists
- Hyperlinks
- Images
- Text alignment
- Code snippets
- Rich text formatting
This editor is ideal for tutorials, written guides, documentation, reference material, and supplementary learning content.
Tip: You can also include transcripts, notes, additional explanations, or supporting resources within the lesson description.
Save the Lesson
After completing the lesson configuration:
- Review the lesson details.
- Verify the lesson type and content.
- Configure visibility.
- Upload a cover image (optional).
- Click Add Lesson.
The lesson is immediately added to the selected module.
What's Next?
After the lesson is created, it is added to the selected module in the order it was created. You can continue building your course by adding additional lessons or attaching videos and downloadable resources to the lesson from its editor.
Best Practices
To create a better learning experience:
- Organize lessons into meaningful modules.
- Keep module names descriptive and easy to understand.
- Break lengthy topics into multiple lessons.
- Arrange lessons in a logical progression.
- Encourage members to complete each lesson before moving to the next.
Was this article helpful?
That’s Great!
Thank you for your feedback
Sorry! We couldn't be helpful
Thank you for your feedback
Feedback sent
We appreciate your effort and will try to fix the article