Courses are the foundation of your membership experience in Flexi Membership. Whether you're offering free educational content, premium training programs, or level-based learning paths, you can easily create and manage courses from a single workspace.
This guide walks you through the process of creating a new course in Flexi Membership.
Check this quick video to create a course using MCP/Flexi Genie:
Create a New Course
Follow these steps to create a course:
- Log in to your FlexiFunnels account.
- Launch the Flexi Membership app.
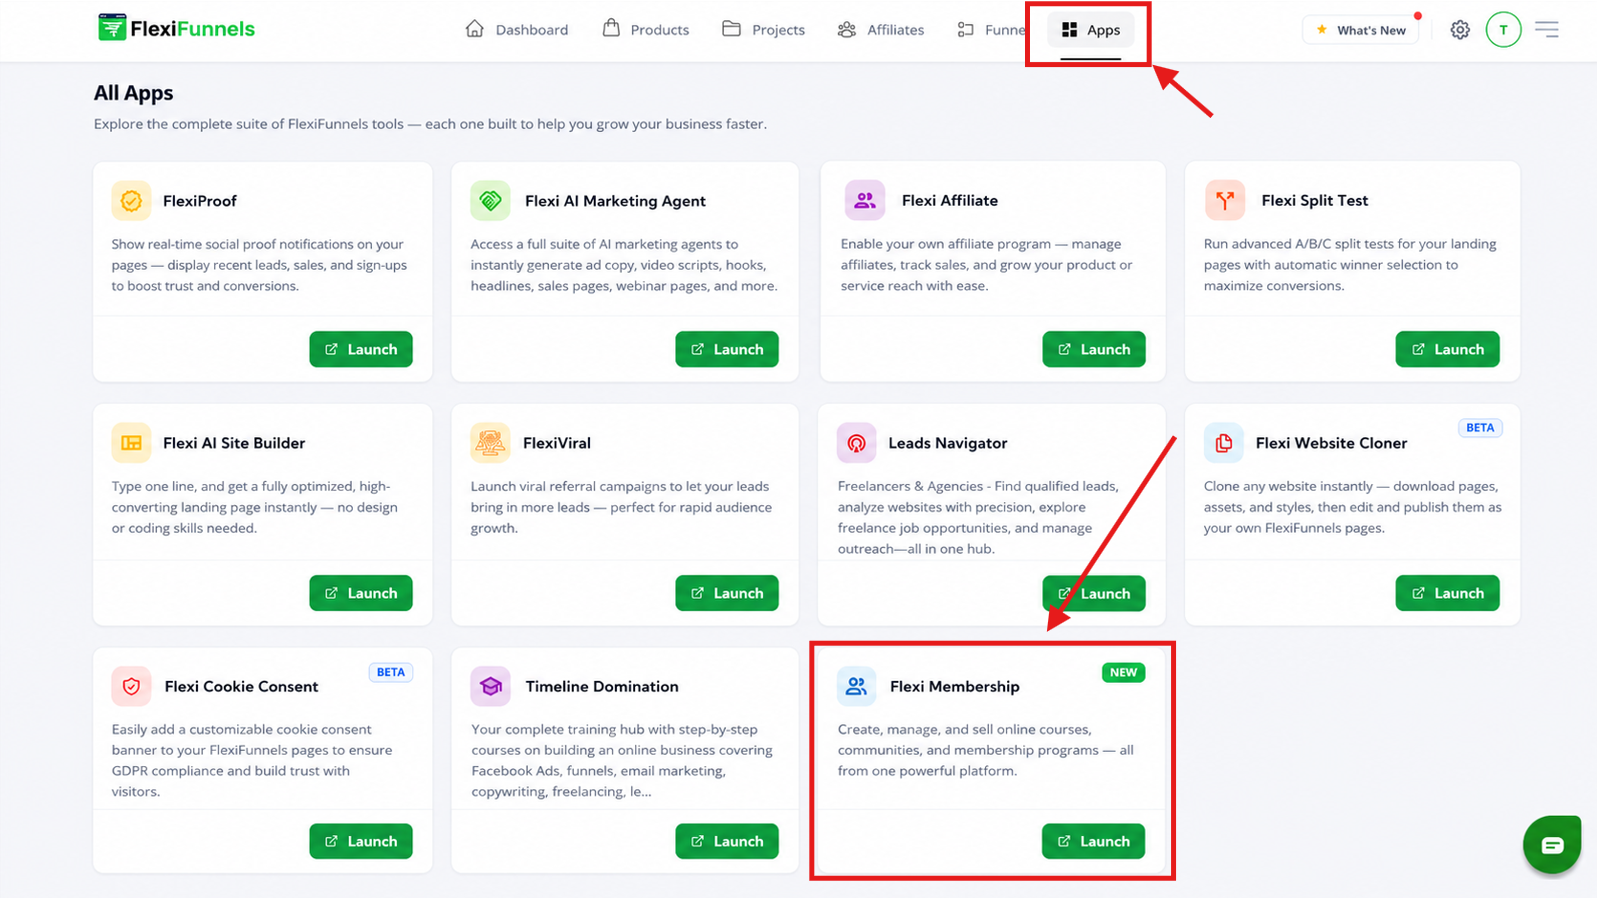
- Open the membership project where you want to add the course.
- From the left navigation menu, click Courses.
- Click Create Course.
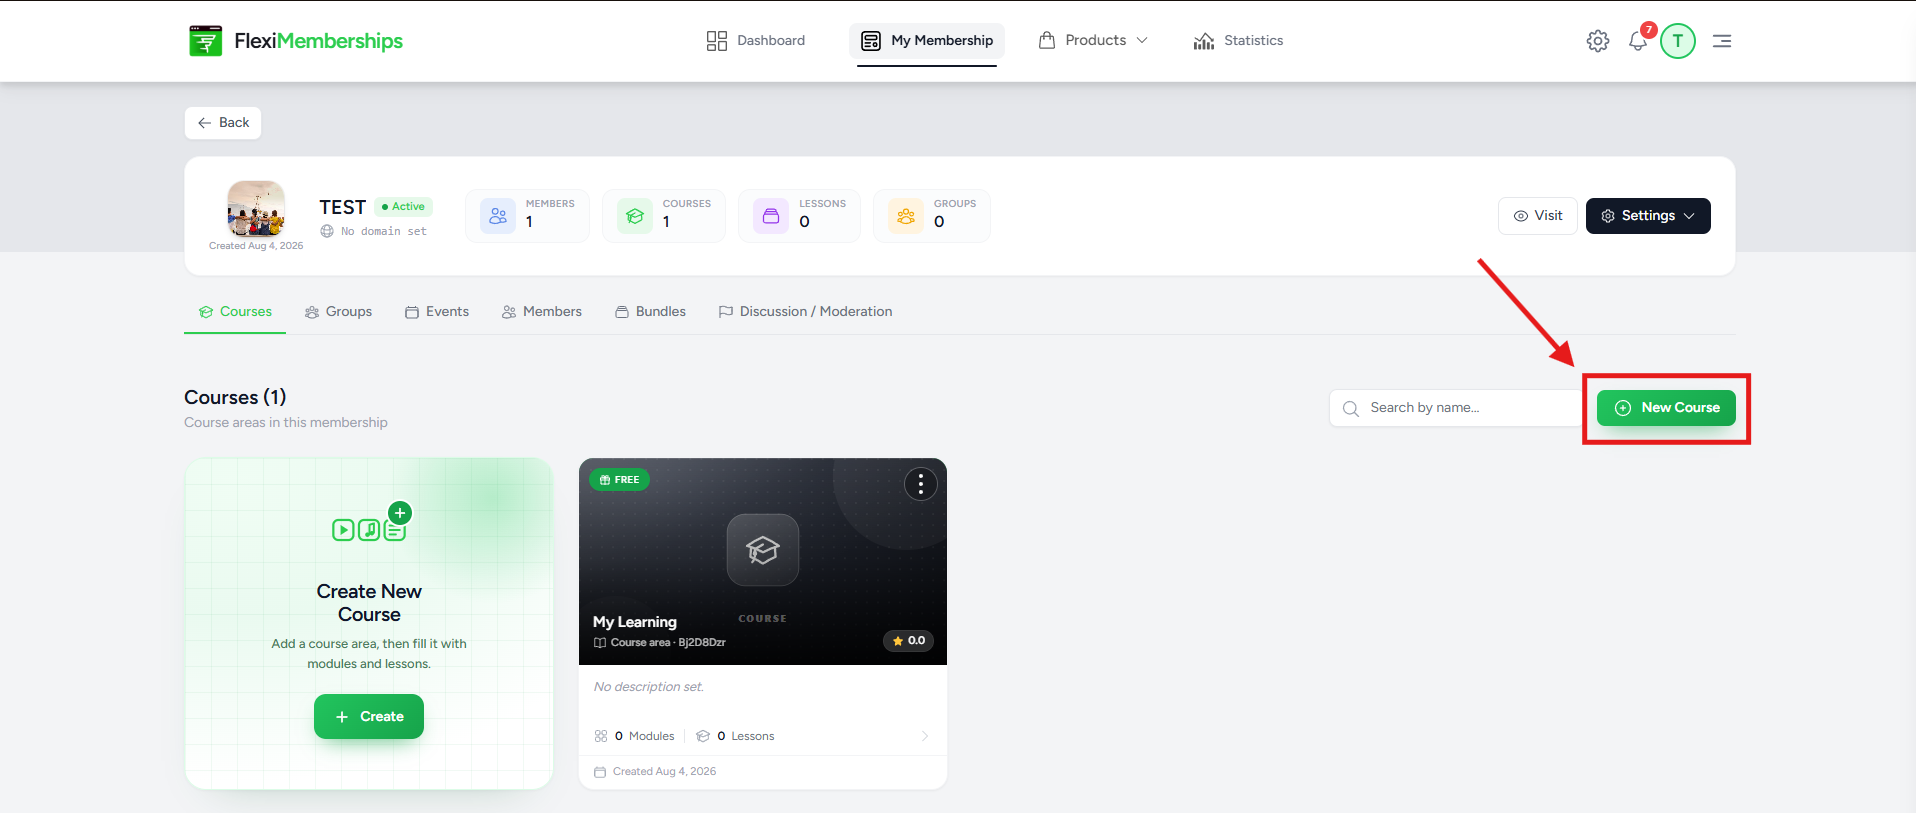
Configure the Course
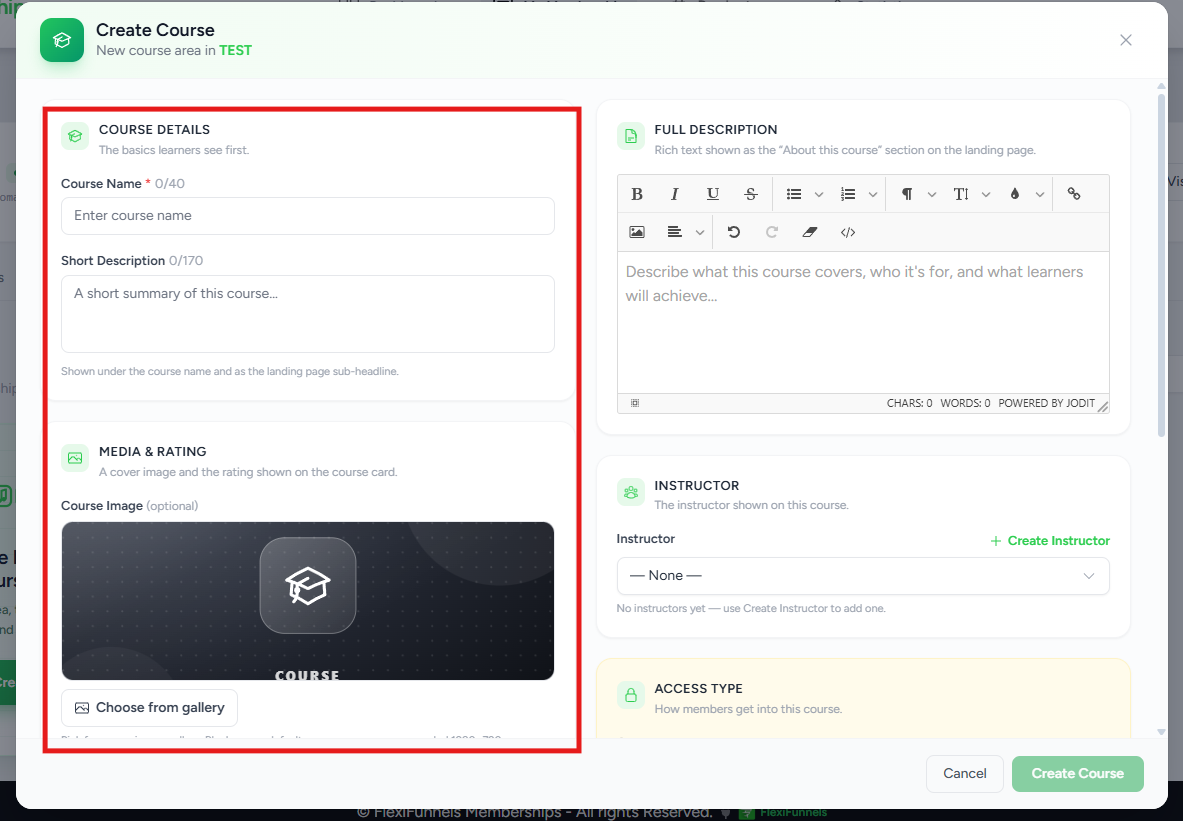
After clicking Create Course, configure the basic details for your course.
Course Information
Enter the required information, such as:
- Course Name
- Course Description
- Course Thumbnail (if applicable)
These details help members identify your course within the membership.
Select the Course Access Type
Choose how members will access your course.
Flexi Membership currently supports three access types:
Free
Anyone with access to the membership can enroll in the course without making a payment.
Paid
Members must purchase the associated course product before they can access the course.
Unlock by Level
The course becomes available only after a member reaches the specified gamification level.
This option allows you to progressively unlock content as members engage with your membership.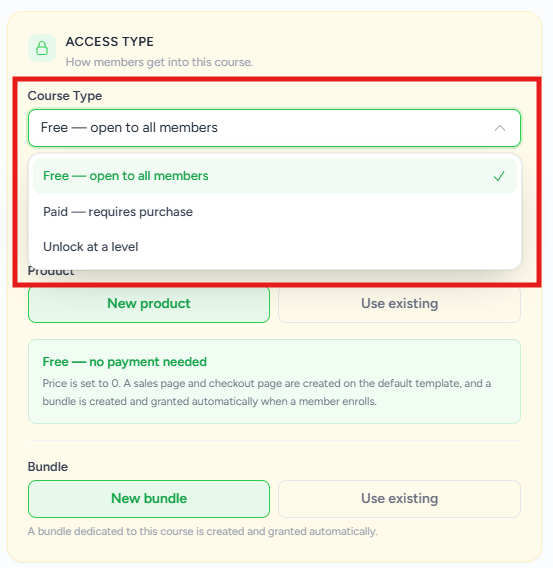
Product & Bundle Association
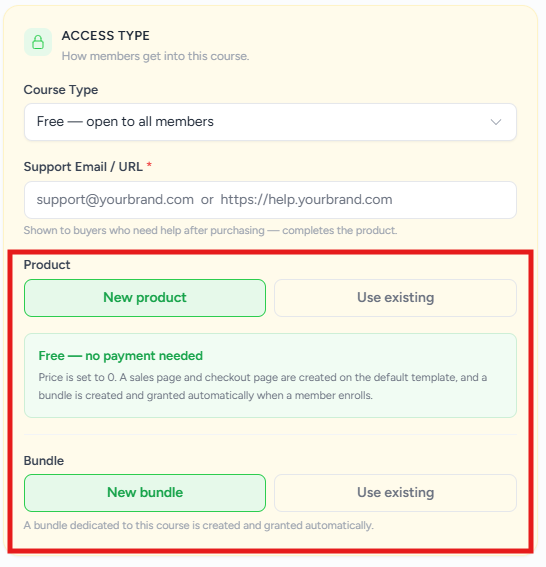
When you create a course, Flexi Membership automatically creates the corresponding Course Product and Bundle using the course name.
Alternatively, you can associate the course with an existing product or bundle if one already exists.
Note: Once a Course Product or Bundle has been created and saved, it becomes read-only within the course settings. To make changes, navigate to the respective Products or Bundles section.
Assign an Instructor
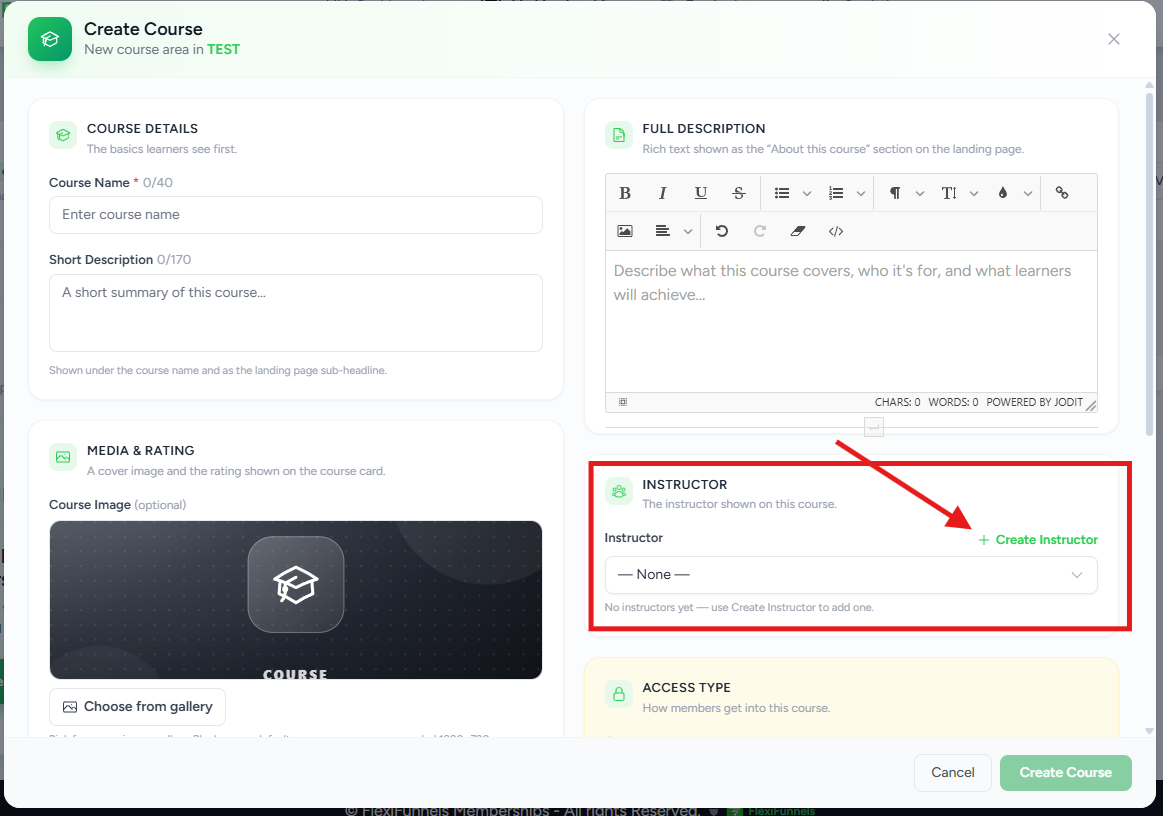
You can assign one or more instructors to the course.
If an instructor already exists, simply select them from the list. Otherwise, create a new instructor and assign them to the course.
Multiple courses can share the same instructor.
Save the Course
After completing the configuration:
- Review all course settings.
- Click Save.
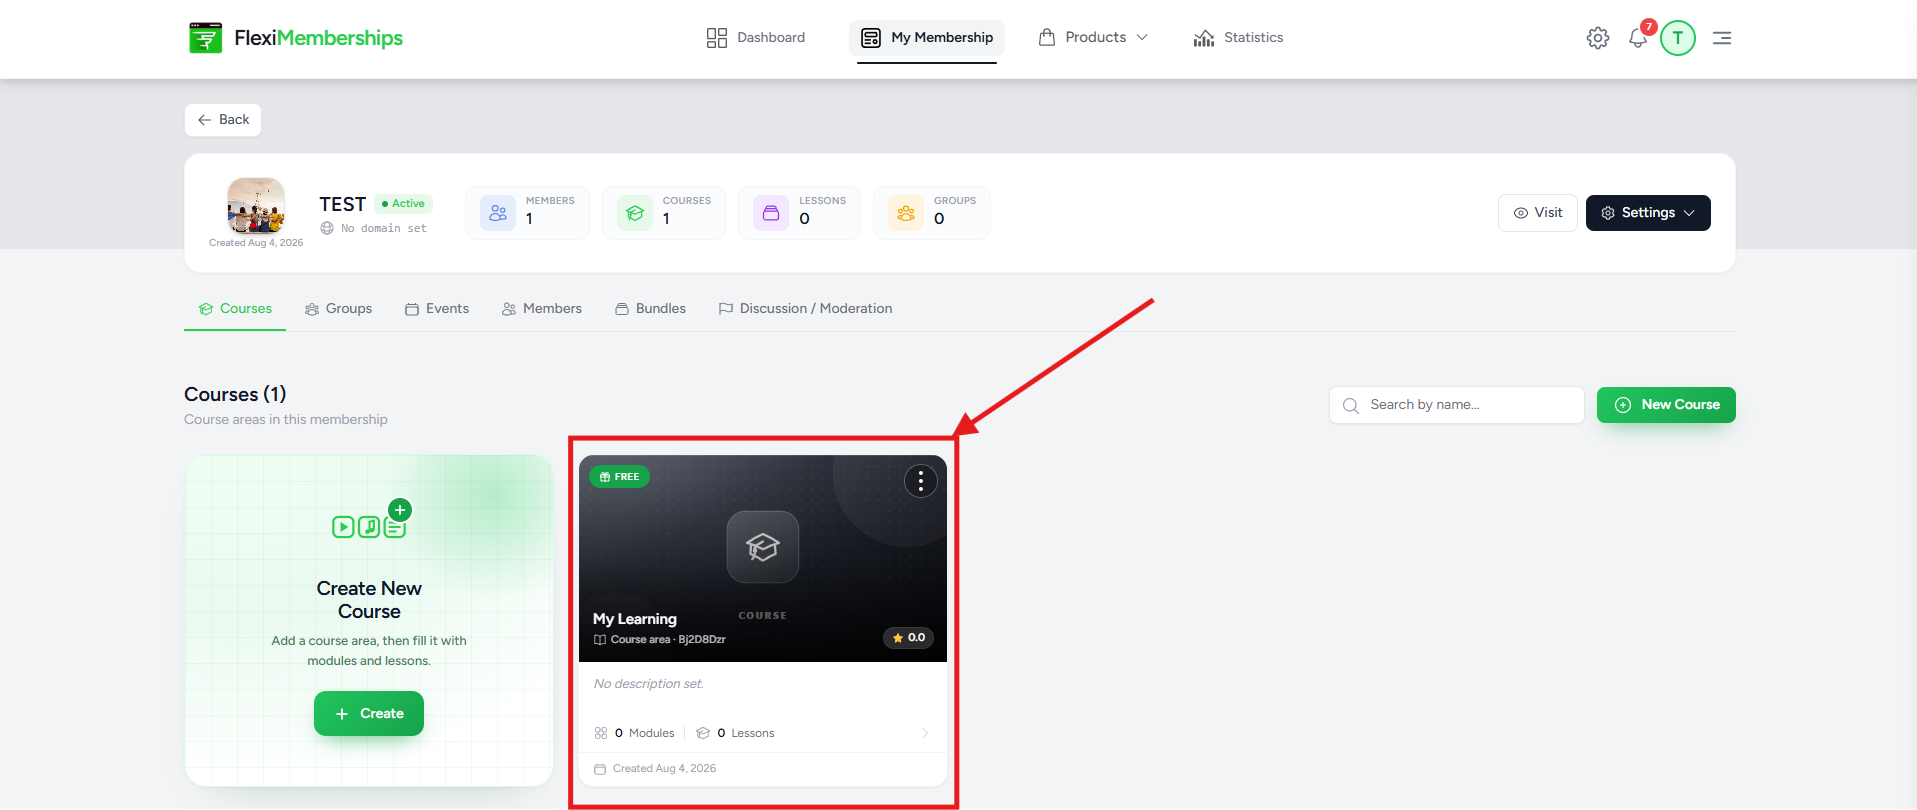
Your course will now appear in the Courses section and is ready for adding lessons and additional content.
What Happens After Creating a Course?
After saving the course:
- The course is added to your membership project.
- A corresponding Course Product is created (if a new product was selected).
- A corresponding Bundle is created (if applicable).
- The course becomes available for adding lessons and other learning resources.
- Members can access the course based on the configured access type.
Next Steps
Once your course has been created, you can continue by:
- Adding lessons
- Uploading learning materials
- Configuring course products
- Managing bundles
- Assigning member access
- Setting up level-based course unlocking
Tips
- Use descriptive course names so members can easily identify the content.
- Choose the appropriate access type based on your membership model.
- Use Unlock by Level to encourage member engagement through gamification.
- Review your Course Product and Bundle settings after creating the course to customize pricing, checkout, and access rules.
Was this article helpful?
That’s Great!
Thank you for your feedback
Sorry! We couldn't be helpful
Thank you for your feedback
Feedback sent
We appreciate your effort and will try to fix the article