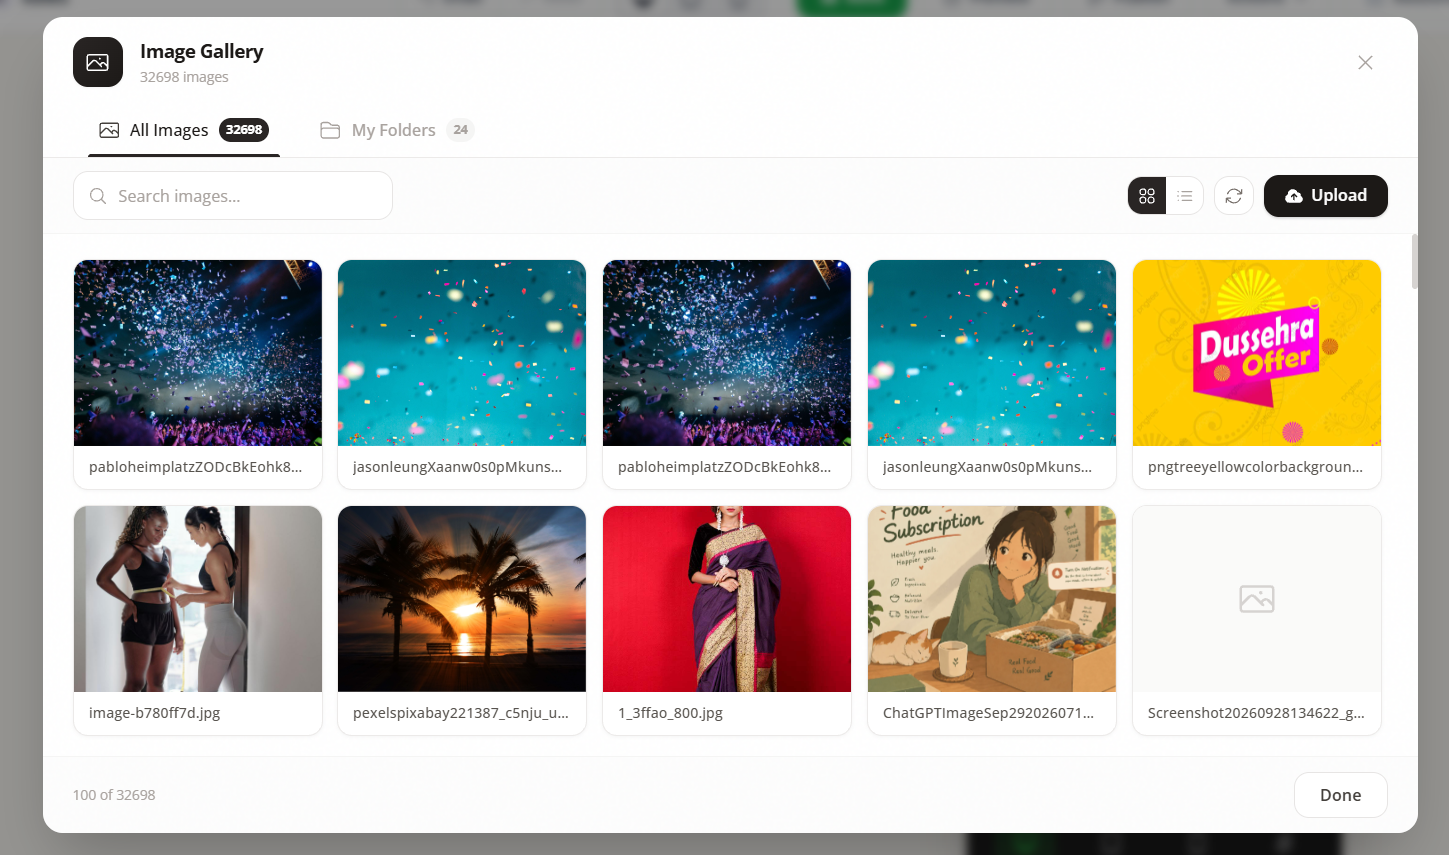
The FlexiFunnels Image Gallery lets you store and select images while building your pages. You can browse your existing images, search for an image, switch between grid and list views, upload new images, and create folders to organize your image library.
What You Can Do in the Image Gallery
- View images already available in your account.
- Search the image library.
- Switch between Grid view and List view.
- Upload new images.
- Open My Folders to organize images into folders.
- Create a new folder for your images.
Before You Begin
- Log in to your FlexiFunnels account.
- Open the project and page where you want to add an image.
- Keep the image file you want to upload ready on your computer.
How to Open the Image Gallery
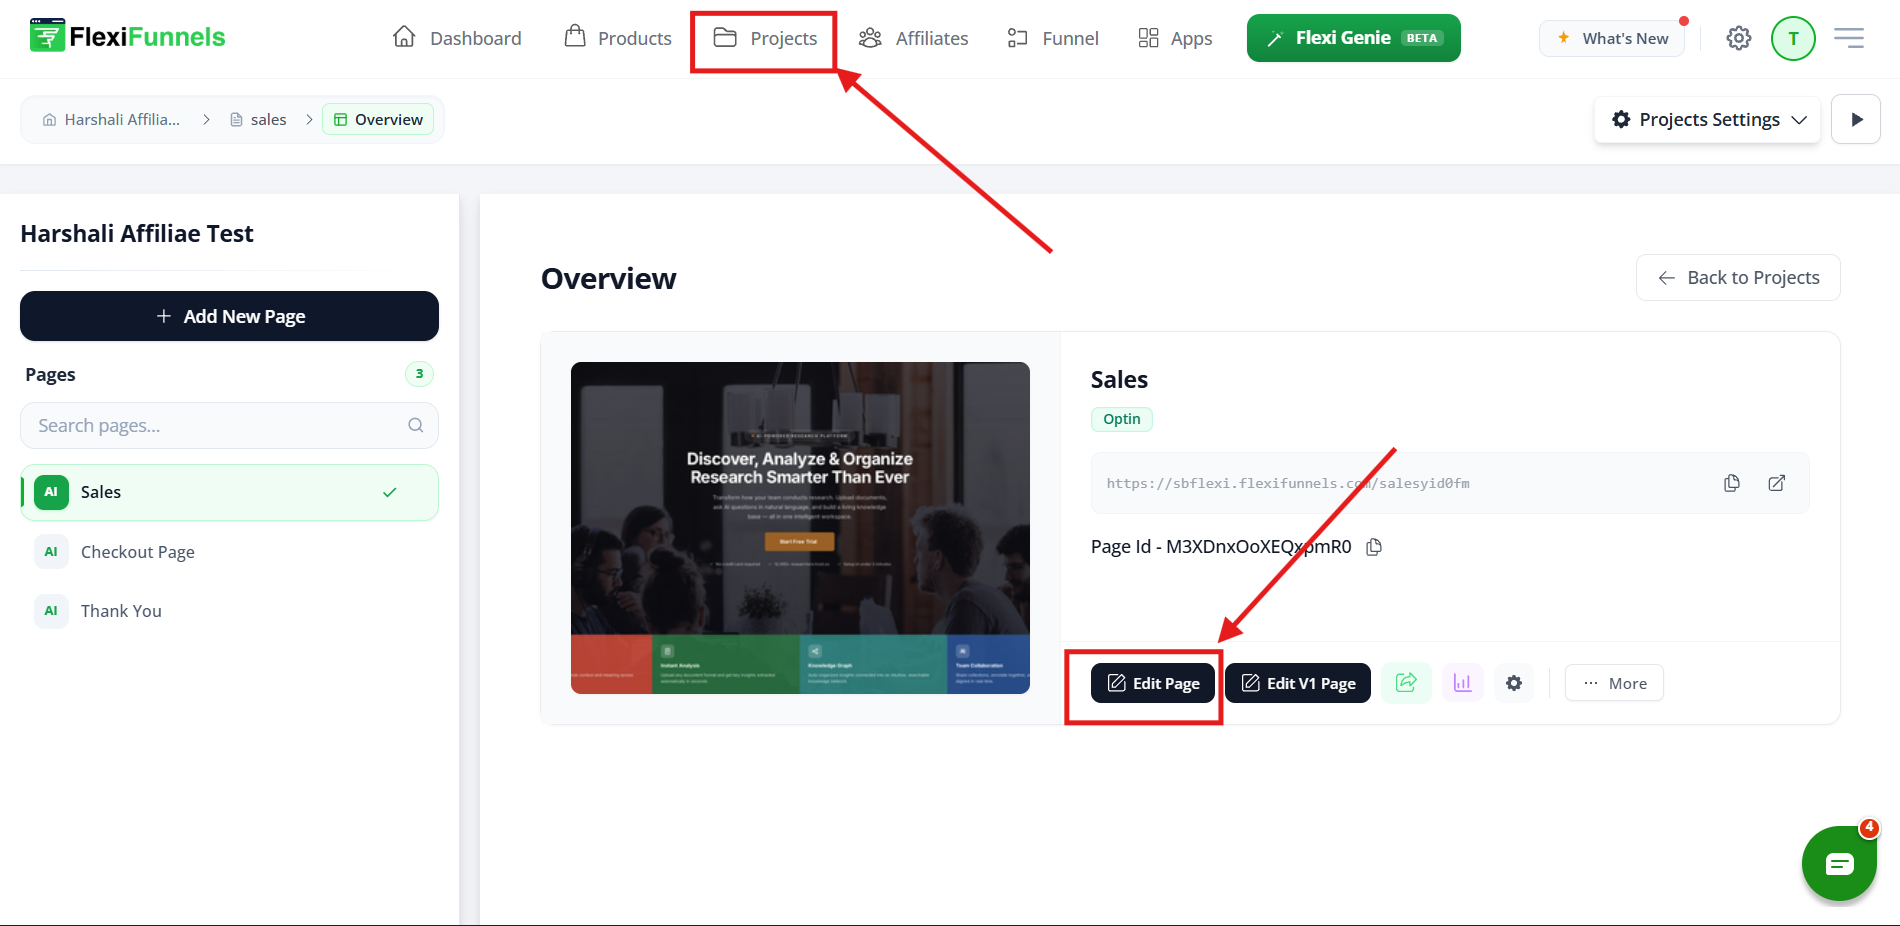
Step 1: Open Your Project and Page Editor
- Log in to your FlexiFunnels dashboard.
- Open Projects.
- Select the project where you want to add an image.
- Open the page in the page editor.
Step 2: Add an Image Element and Open the Gallery
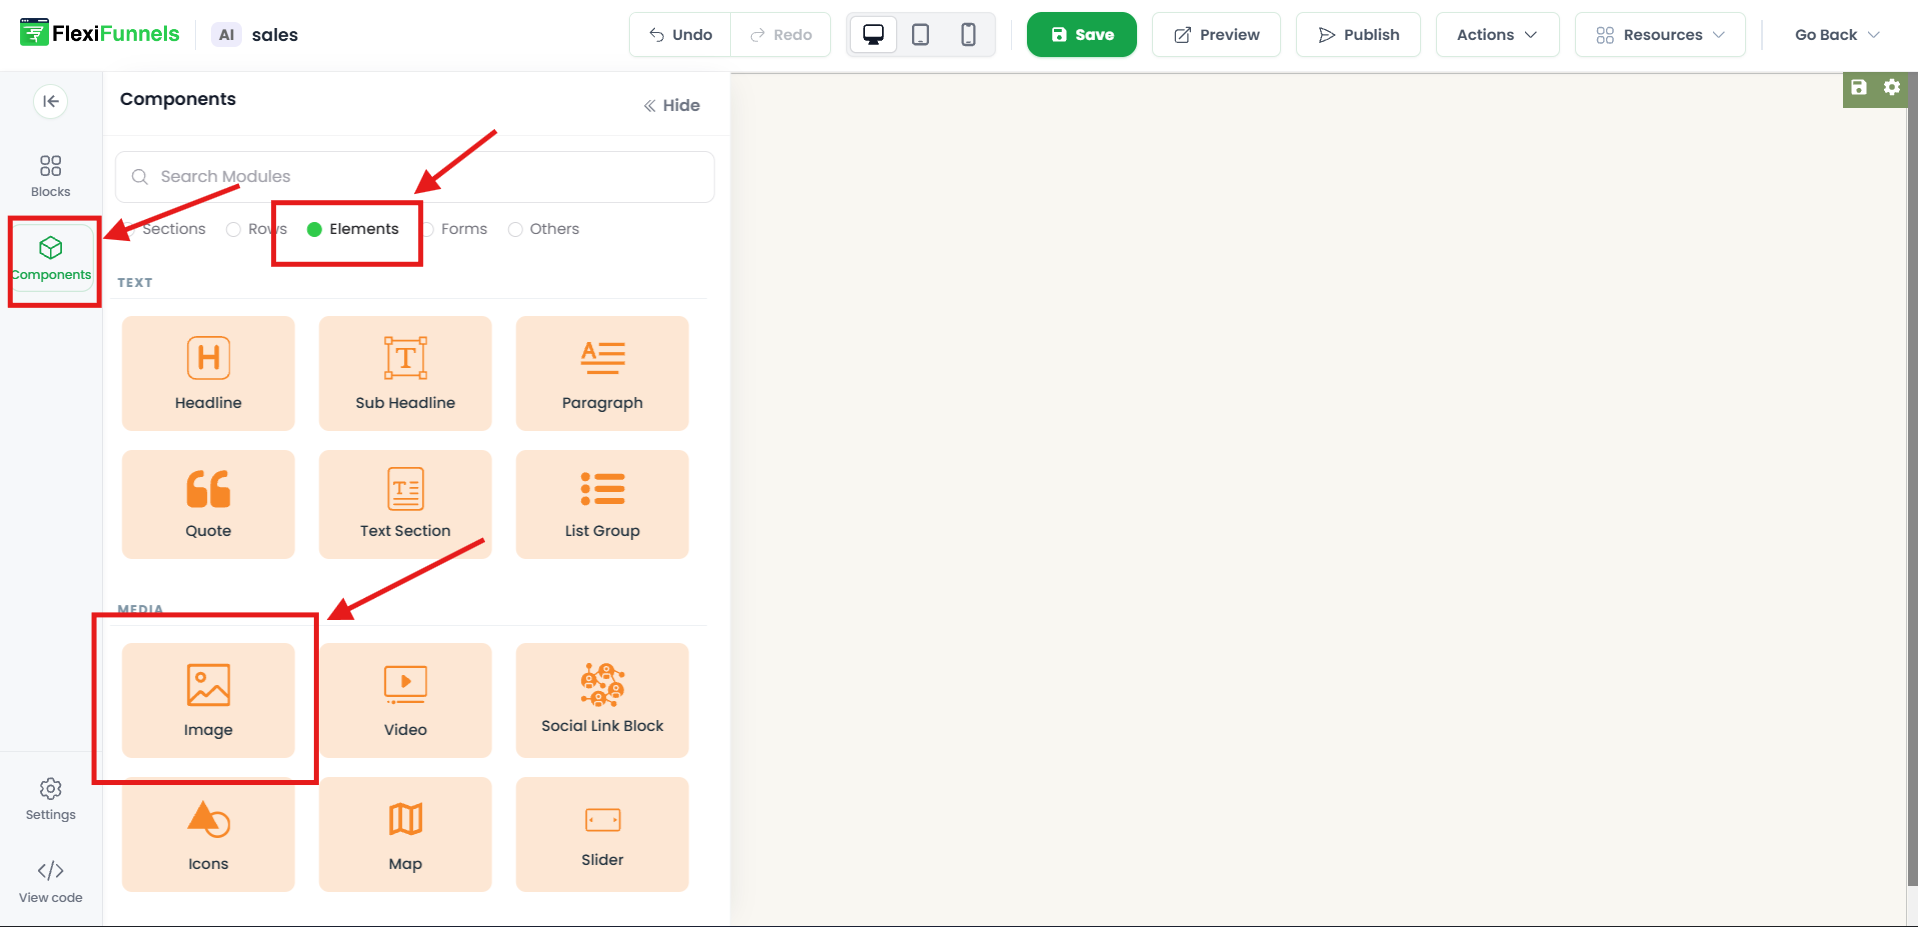
- In the page editor, open the Elements section.
- Select the Image element.
- Select or add the image element on your page.
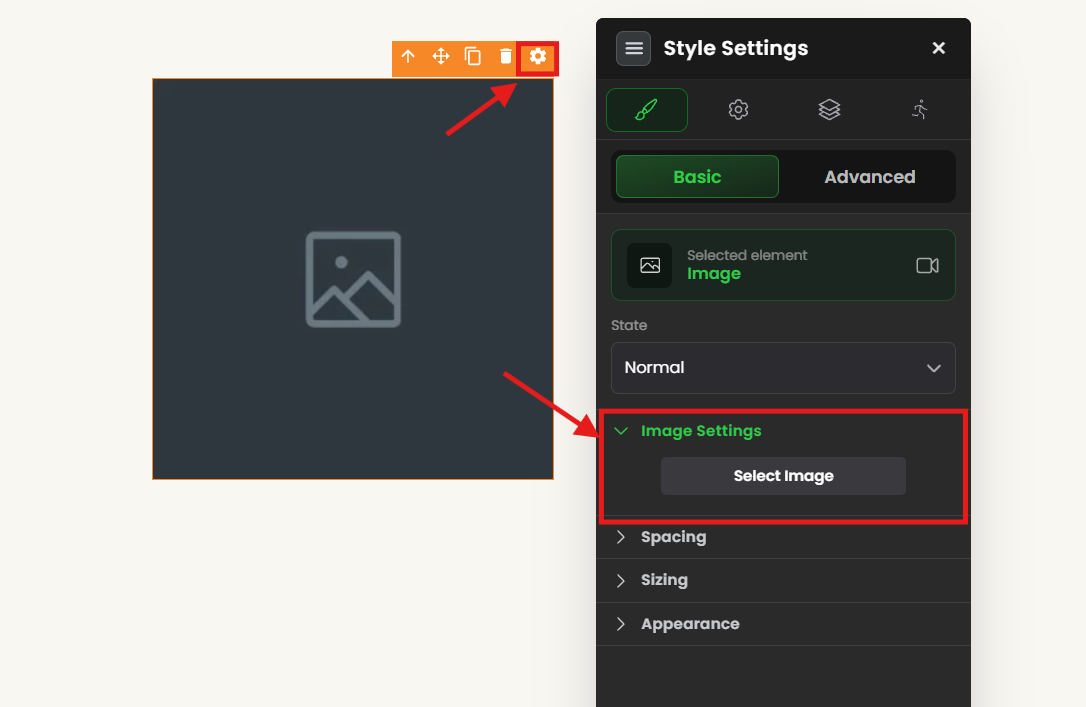
- Open the image element's settings.
- Under Image Settings, click Select Image.
Browse and Search Your Images
Use Grid View or List View
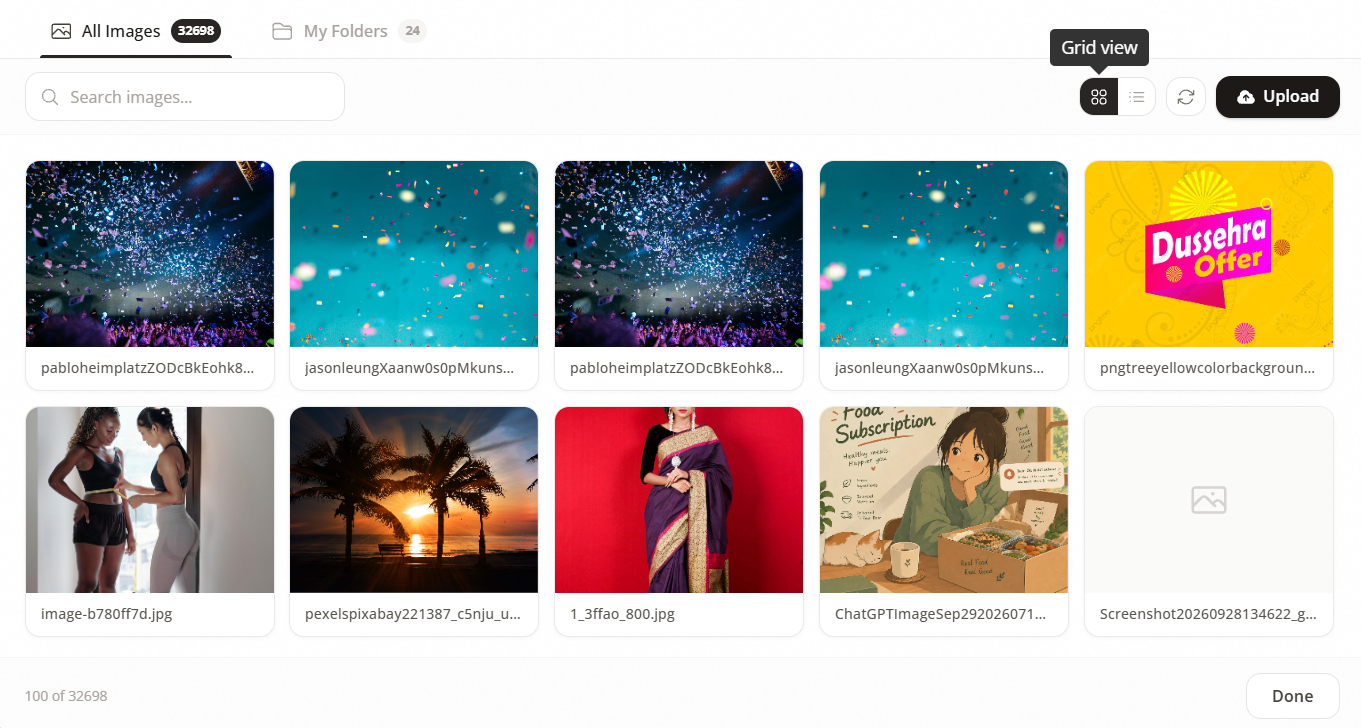
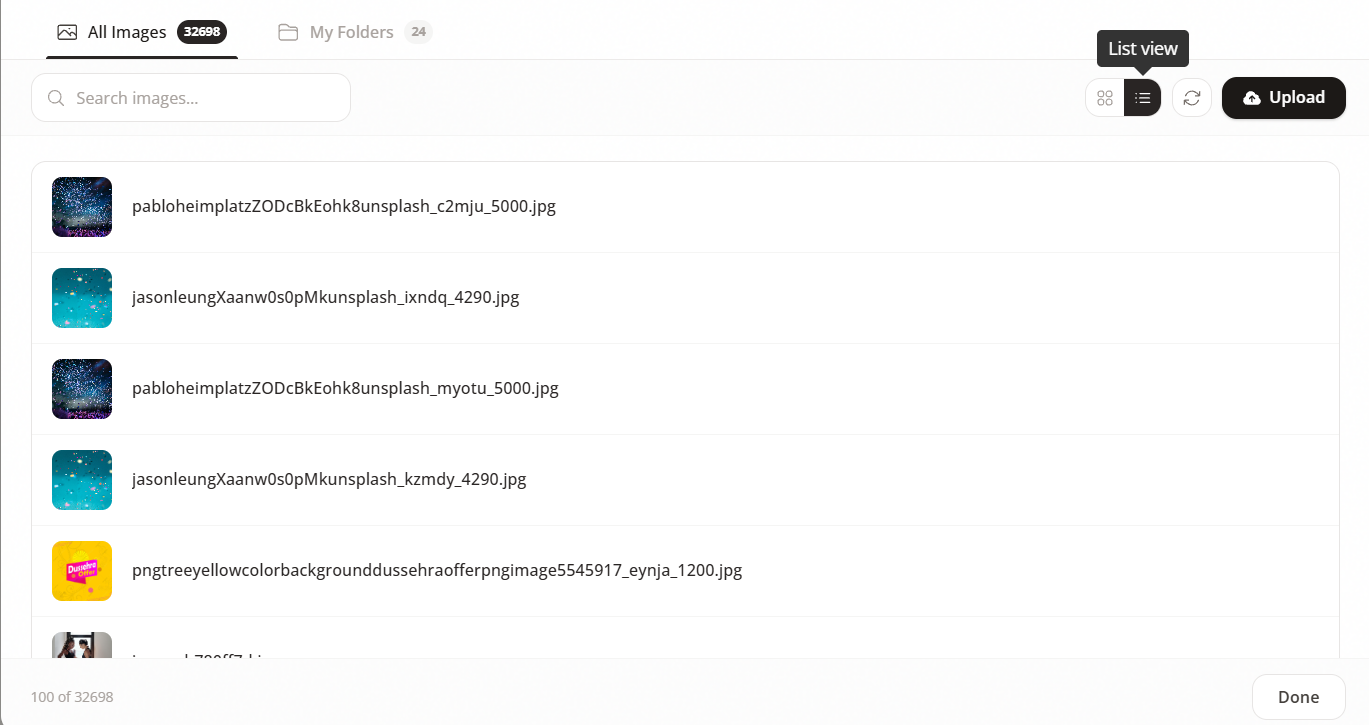
The Image Gallery provides two ways to view your images:
- Grid view: Displays image thumbnails in a visual grid.
- List view: Displays the images in a list with their filenames.
Use the view that makes it easier for you to find the image you need.
Search for an Image
If your gallery contains many images, use the Search images... field to find an image instead of scrolling through the complete library.
How to Upload Images
Step 3: Start the Upload
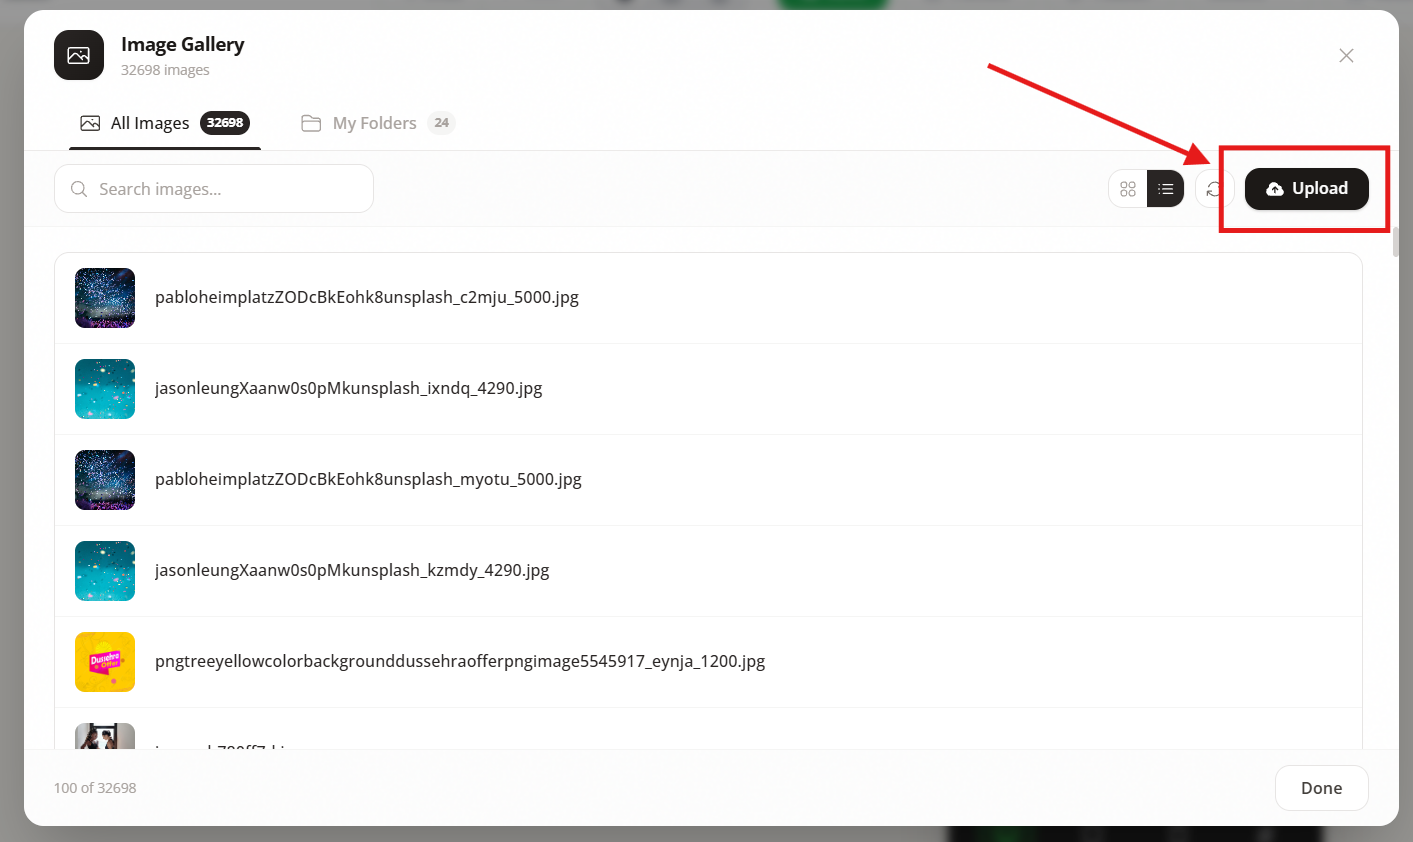
- Open the Image Gallery.
- Click Upload in the top-right corner.
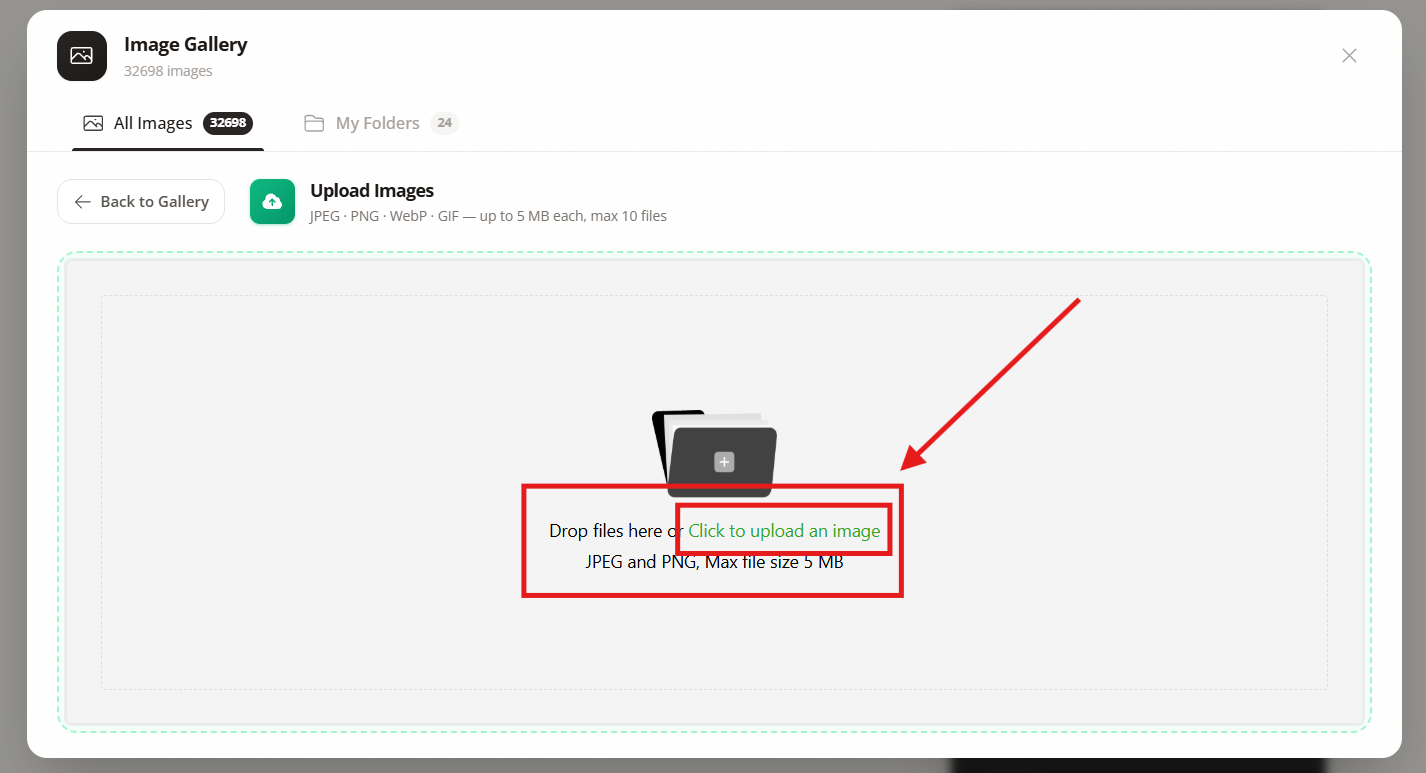
- The Upload Images screen opens.
- Click Click to upload an image, or use the upload area shown on the screen.
- Select the image file from your computer.
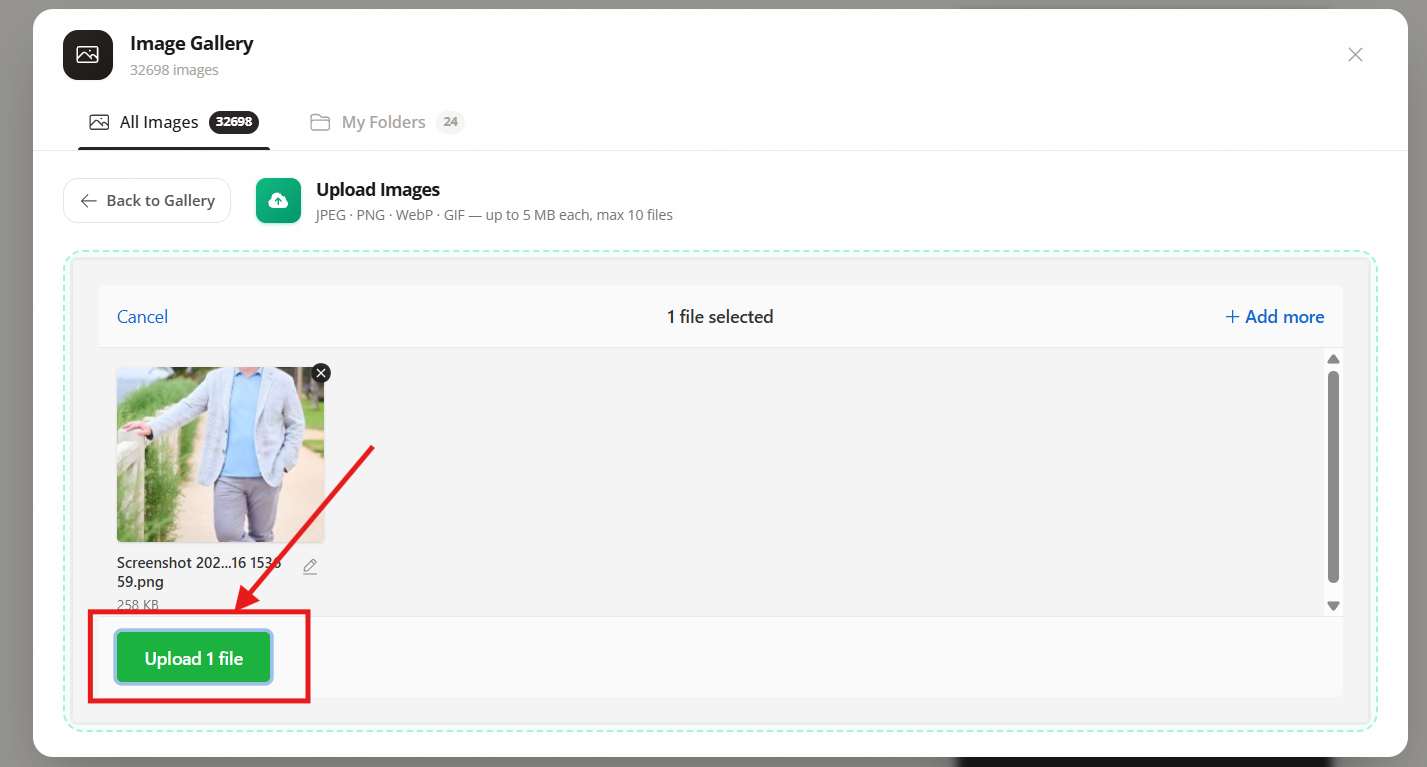
Step 4: Upload the Selected Image
- After selecting the file, review the selected image in the upload area.
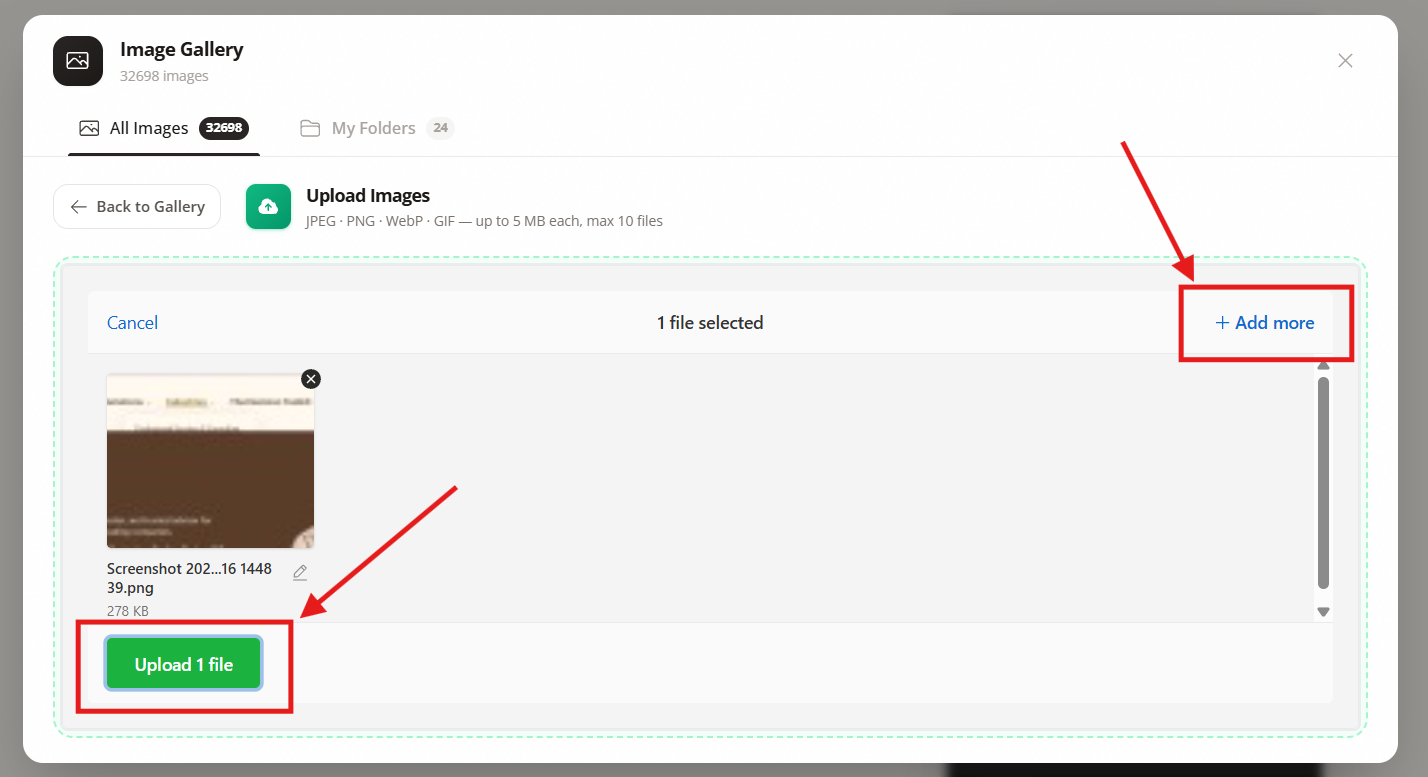
- Click Upload 1 file to upload the selected image.
- To upload additional images, click + Add more and select the additional files.
How to Create a Folder for Your Images
Step 5: Open My Folders
- Open the Image Gallery.
- Click My Folders.
- Click New Folder.
- Enter the folder name.
- Click Create to create the folder.


Creating separate folders can help you keep your image library organized—for example, you can create folders for different projects, campaigns, pages, or other groups of images.
Common Scenarios
You cannot find an image
- Use the Search images... field.
- Switch between Grid view and List view.
- Check whether the image is inside My Folders.
You want to upload a new image
- Open the Image Gallery.
- Click Upload.
- Select the file.
- Click Upload 1 file, or use + Add more to select additional files.
You have many images and want to keep them organized
Use My Folders and create separate folders with meaningful names. This makes it easier to organize your image library as the number of images grows.
Troubleshooting
- Upload option is not visible: Make sure you have opened the Image Gallery from the image element's Select Image option.
- Image cannot be uploaded: Check the file format and file size against the limits displayed on the Upload Images screen.
- Wrong image is being selected: Use the search field or switch to List view to identify the filename more easily.
- Folder cannot be found: Open My Folders and check the folder list.
Before Contacting Support
Before contacting FlexiFunnels Support, check the following:
- Confirm that you opened the correct project and page.
- Confirm that you are using the Image element and its Select Image option.
- Check the image file format and size.
- Try searching for the image by filename.
- Check My Folders if you cannot find the image in the main gallery.
- If an upload fails, capture a screenshot of the error and note the file format and size.
Frequently Asked Questions
Where do I find the Image Gallery?
Open a page in the FlexiFunnels editor, add or select an Image element, open its settings, and click Select Image.
Can I search for an image?
Yes. The Image Gallery includes a Search images... field.
Can I view images as a list?
Yes. The gallery provides both Grid view and List view.
Can I upload multiple images?
Yes. The supplied upload screen includes an + Add more option for adding additional files before uploading.
Can I create folders?
Yes. Open My Folders, click New Folder, enter a folder name, and create the folder.
Summary
- Open your FlexiFunnels project and page editor.
- Add or select an Image element.
- Open Image Settings > Select Image.
- Use the Image Gallery to search and browse your images.
- Use Upload to add new images.
- Use My Folders and New Folder to organize your image library.
Article prepared from the six supplied screenshots. UI labels and upload limits are described according to what is visible in those screenshots.
Was this article helpful?
That’s Great!
Thank you for your feedback
Sorry! We couldn't be helpful
Thank you for your feedback
Feedback sent
We appreciate your effort and will try to fix the article