Overview
Evergreen Date lets you display a dynamic date inside a text element on a FlexiFunnels landing page. You can show the current date or a date calculated by adding or subtracting a custom number of days.
Use Evergreen Date when your page needs to display date-based information that remains relevant over time, such as offer deadlines, webinar registration dates, trial expiry dates, or seasonal promotions.
Before You Begin
- Sign in to your FlexiFunnels account.
- Open the required landing page in the Editor.
- Decide whether the page should display today’s date or a date calculated from a custom number of days.
- Ensure you have permission to save and publish the landing page.
Video Tutorial
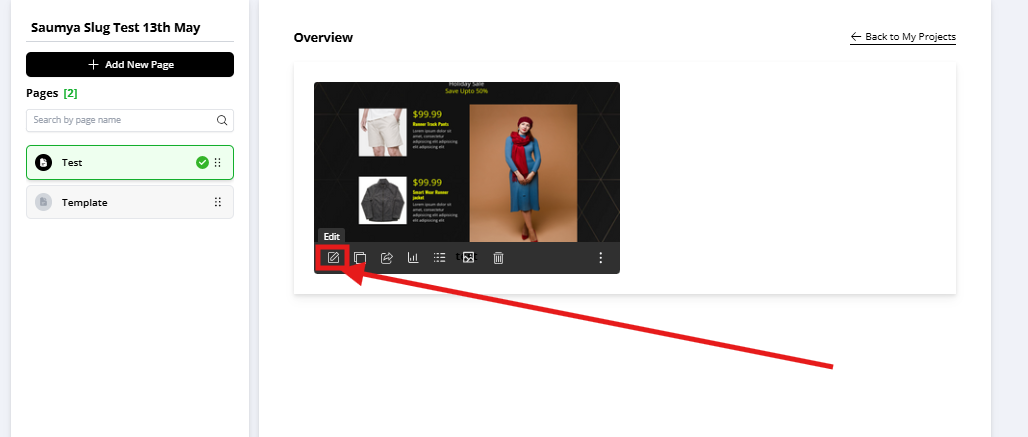
Step 1: Open the Landing Page Editor
Log in to FlexiFunnels, open the relevant funnel or landing page, and select the page you want to update. Open the page in the editor to add the Evergreen Date.
Step 2: Add or Select a Text Element
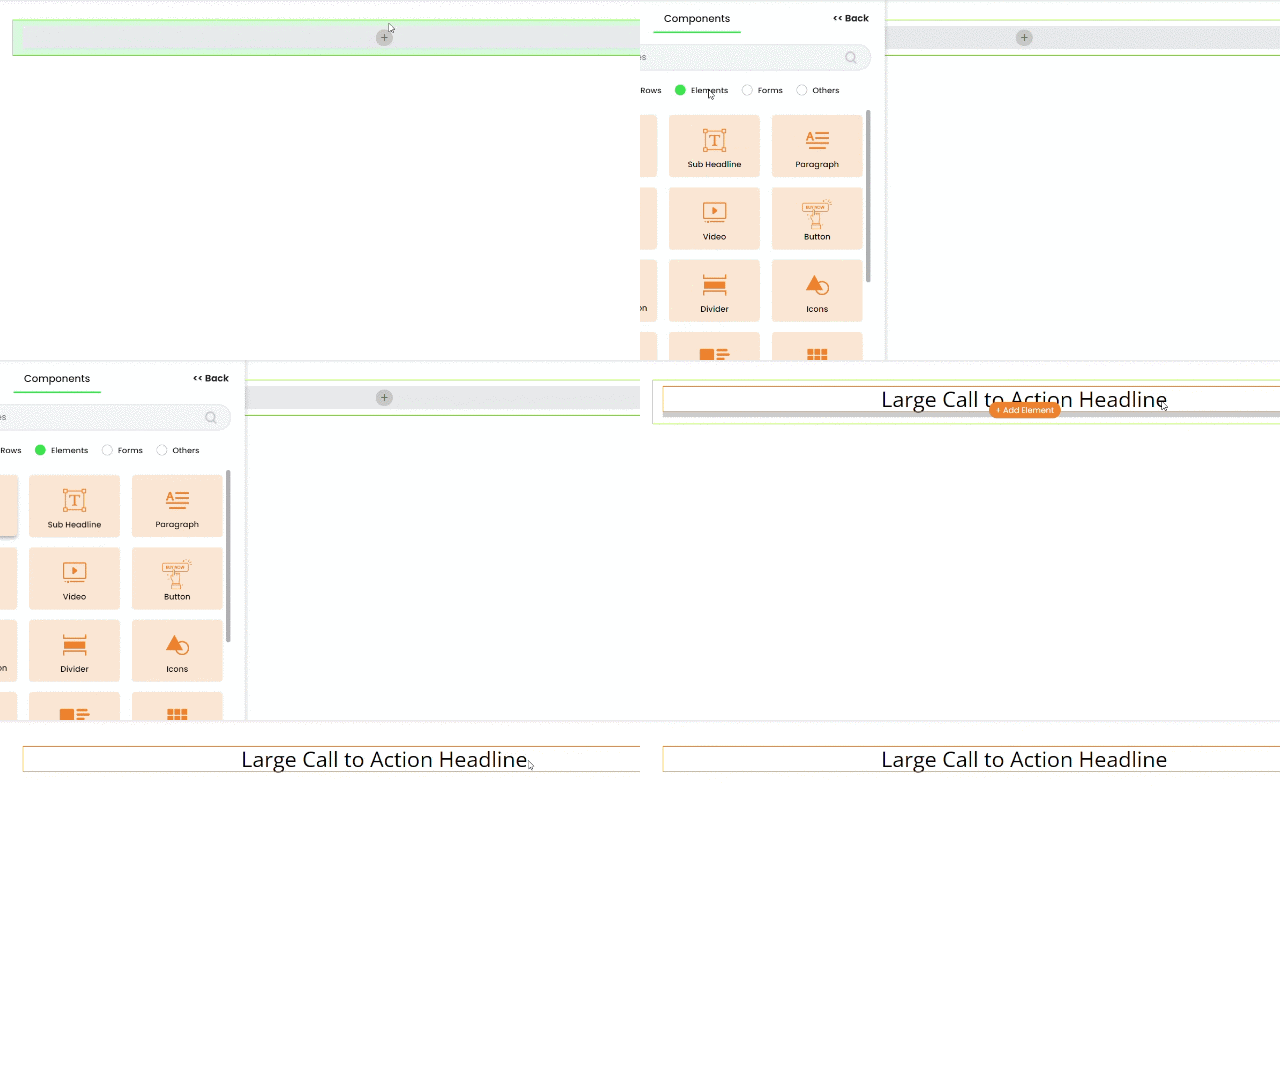
Select Add Element, then choose the Element that contains the Text option. Add a text element to the page, or select an existing text element where the date should appear.
Double-click the text element to open the text editing toolbar.
Step 3: Open the Evergreen Date Option
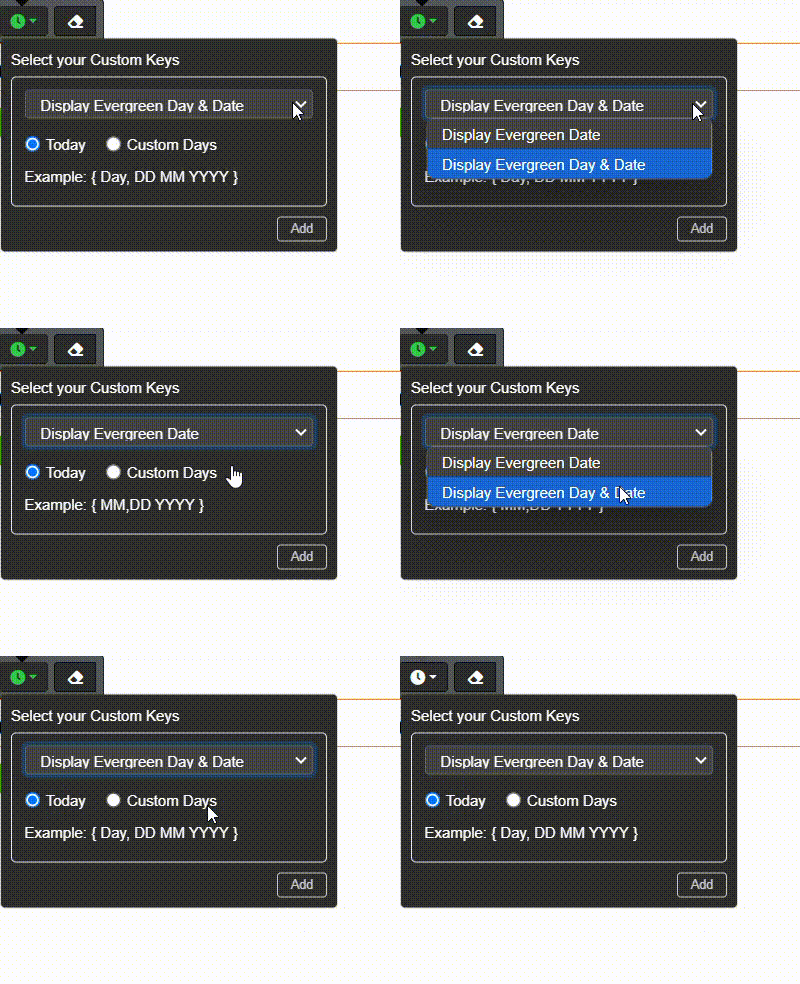
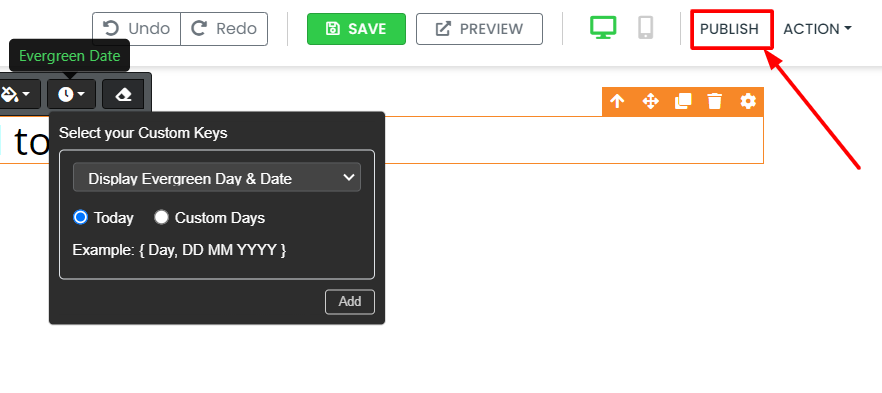
In the black text editing toolbar, select Evergreen Date. This opens the settings used to define how the dynamic date is displayed.

Step 4: Choose the Date Display Format
Select the format that matches the information you want to show to visitors.
- Display Evergreen Date and Day: Shows both the calculated date and the day of the week.
- Display Evergreen Date: Shows only the calculated date.
Step 5: Select Today or Custom Days
Choose the date calculation method for the text element.
- Today: Displays the current date.
- Custom Days: Displays a date based on the number of days you enter. Use this option to show a future or past date.
If you select Custom Days, enter the required number of days before adding the date to the text element.

Step 6: Insert the Evergreen Date
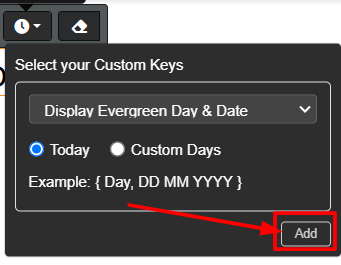
Select Add to insert the configured Evergreen Date into the text element. The date is added at the selected position in the text.
Step 7: Save and Publish the Page
Select Save to apply the changes in the editor. Then select Publish to make the Evergreen Date available on the live landing page.
Verify the Configuration
Open the published landing page and confirm that the text element displays the correct date and, if selected, the correct day. For Custom Days, verify that the displayed date matches the number of days configured in the editor.
Common Scenarios
- Flash sale: Display an offer date a few days from the current date to keep a time-sensitive promotion current.
- Webinar registration: Show a registration closing date that adjusts according to when visitors access the page.
- Product launch: Display an early-bird pricing date for a launch campaign.
- Free trial: Display a calculated expiry date for a time-limited trial offer.
- Seasonal promotion: Keep an ongoing seasonal offer date current without manually editing the date each day.
Best Practices
- Use Evergreen Date only when the displayed date accurately reflects the campaign terms.
- Choose the display format that is easiest for visitors to understand.
- Use Custom Days when the campaign requires a date relative to the day a visitor views the page.
- Keep the surrounding text clear about what the displayed date represents.
- Preview the date on the published page before promoting the campaign.
- Update associated offer copy when you change the Evergreen Date calculation.
- Ensure the displayed date is consistent with any countdown timers, emails, or advertisements used in the campaign.
Before Contacting Support
- Confirm that a text element is selected in the page editor.
- Verify the selected display format and Today or Custom Days option.
- Check the number of days entered for a Custom Days configuration.
- Confirm that the changes were saved and the page was published.
- Refresh the published page before retesting.
- Compare the displayed date with the intended date calculation.
Expected Outcome
After saving and publishing the page, the selected text element displays an Evergreen Date based on the configuration you selected. The page shows either today’s date or a calculated custom date, with the day of the week included when that display option is selected.
Related Articles
For additional background on time-sensitive digital marketing campaigns, see OdinSchool.
Was this article helpful?
That’s Great!
Thank you for your feedback
Sorry! We couldn't be helpful
Thank you for your feedback
Feedback sent
We appreciate your effort and will try to fix the article