Overview
FlexiFunnels allows you to deliver digital content without attaching downloadable files to your emails. Instead, you can create an email-only Digital Asset that sends an opt-in confirmation email containing welcome messages, instructions, access links, or onboarding information. This guide explains how to create an email-only Digital Asset and connect it to either an Opt-in Form or a Product Purchase workflow.
Before You Begin
- An active FlexiFunnels account.
- A verified sender domain configured in FlexiFunnels.
- Access to either an Opt-in Form or a Product.
- Your email content prepared in advance.
Step 1: Create an Email-Only Digital Asset
Begin by creating a Digital Asset that contains only the email content.
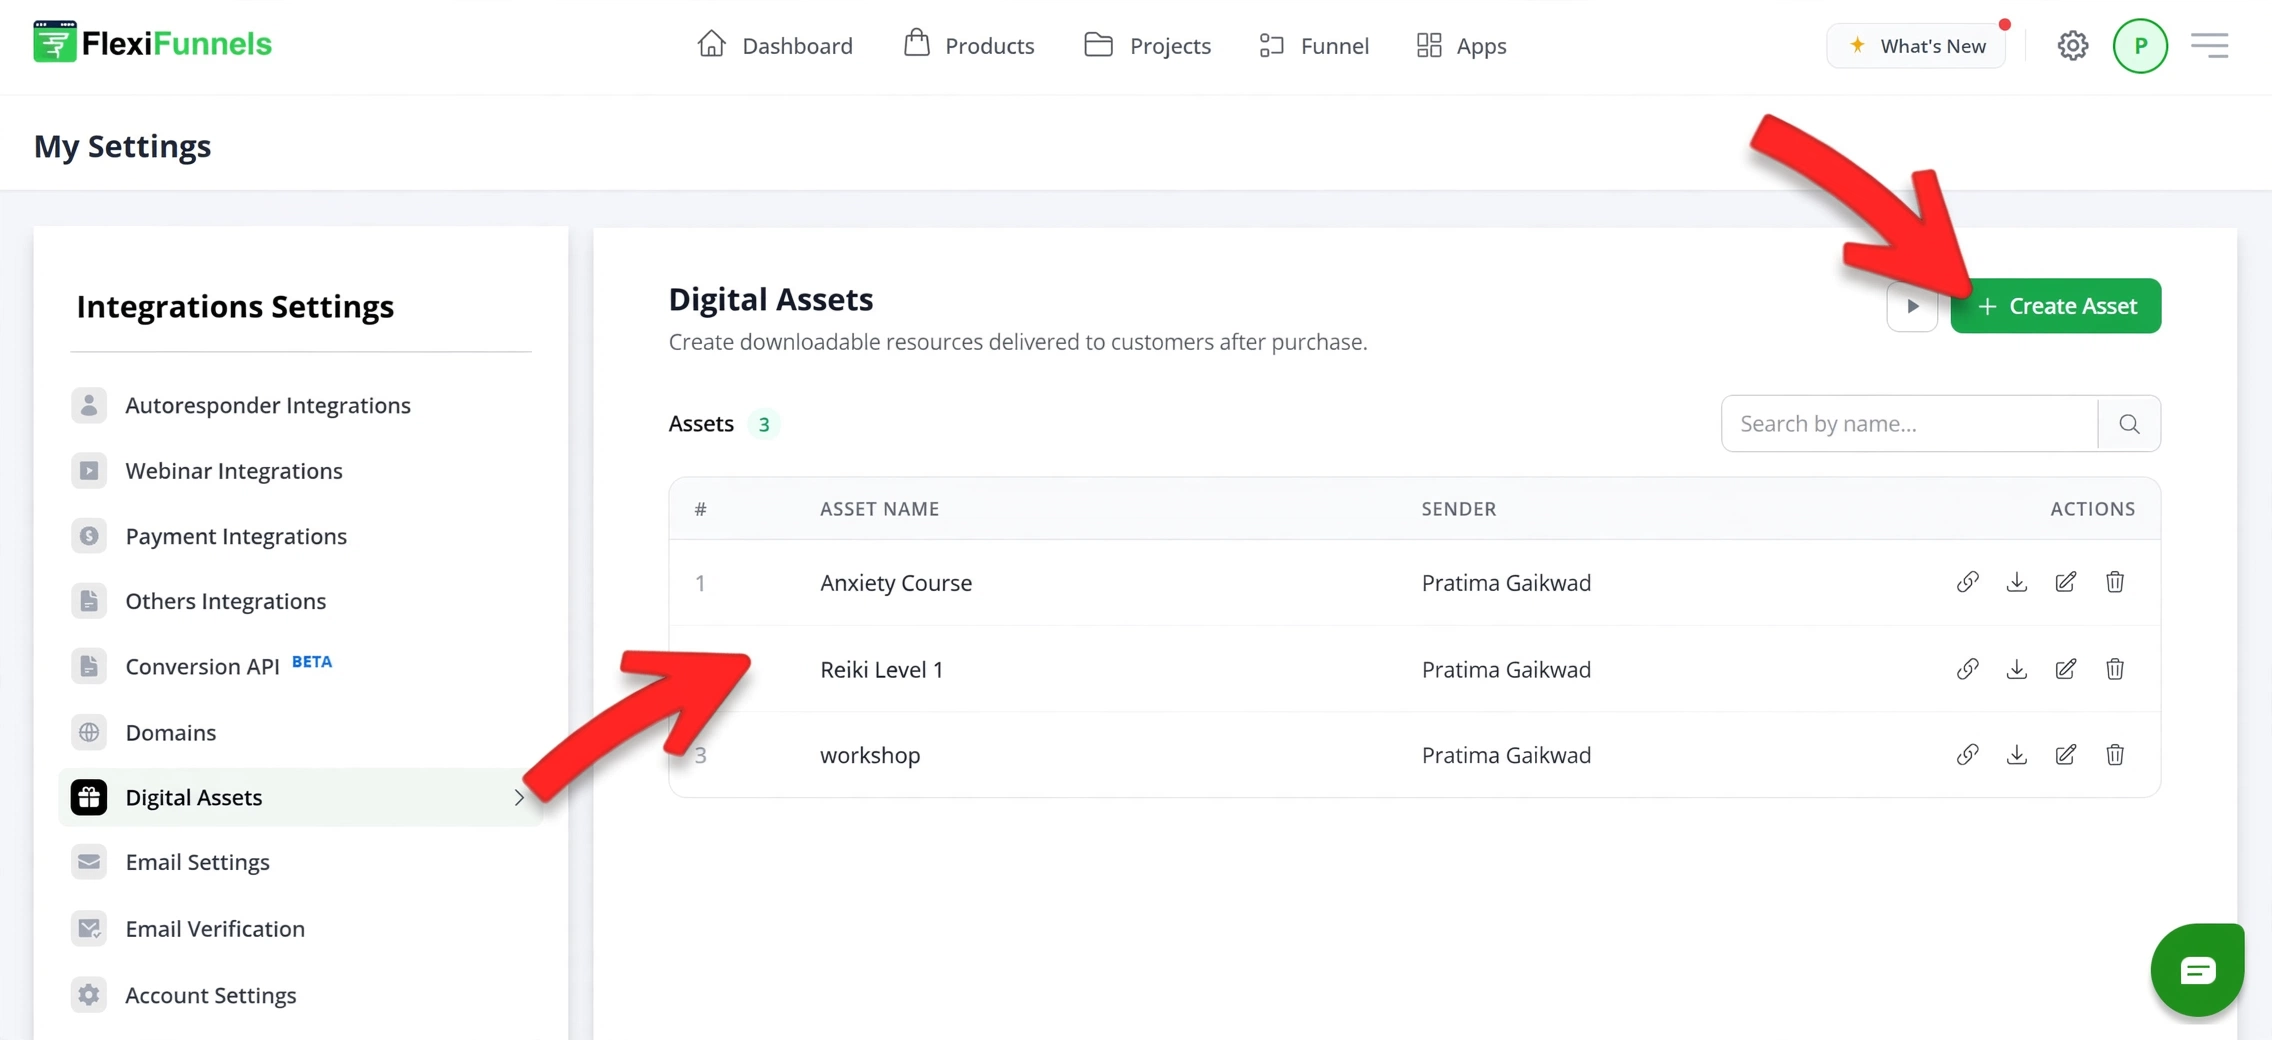
- Navigate to Settings (Gear Icon).
- Open Integration Settings.
- Select Digital Assets.
- Click Create Asset.
Configure the Asset Details
Asset Name
Enter an internal name to identify the Digital Asset.
Example: Opt-in Confirmation Email
Sender Name
Enter the name recipients will see in their inbox.
Verified Domain (Sender Email)
Select a verified sender email associated with your domain.
Example: info@yourdomain.com
Email Subject
Enter the subject line for your confirmation email.
Example: Your Access Is Confirmed
Email Content
Compose the email that users will receive after submitting the form or purchasing your product.
Typical content includes:
- Welcome message
- Next steps
- Access links
- Instructions
You can personalize the email using the available shortcodes:
{name}— Inserts the recipient's name.{email}— Inserts the recipient's email address.
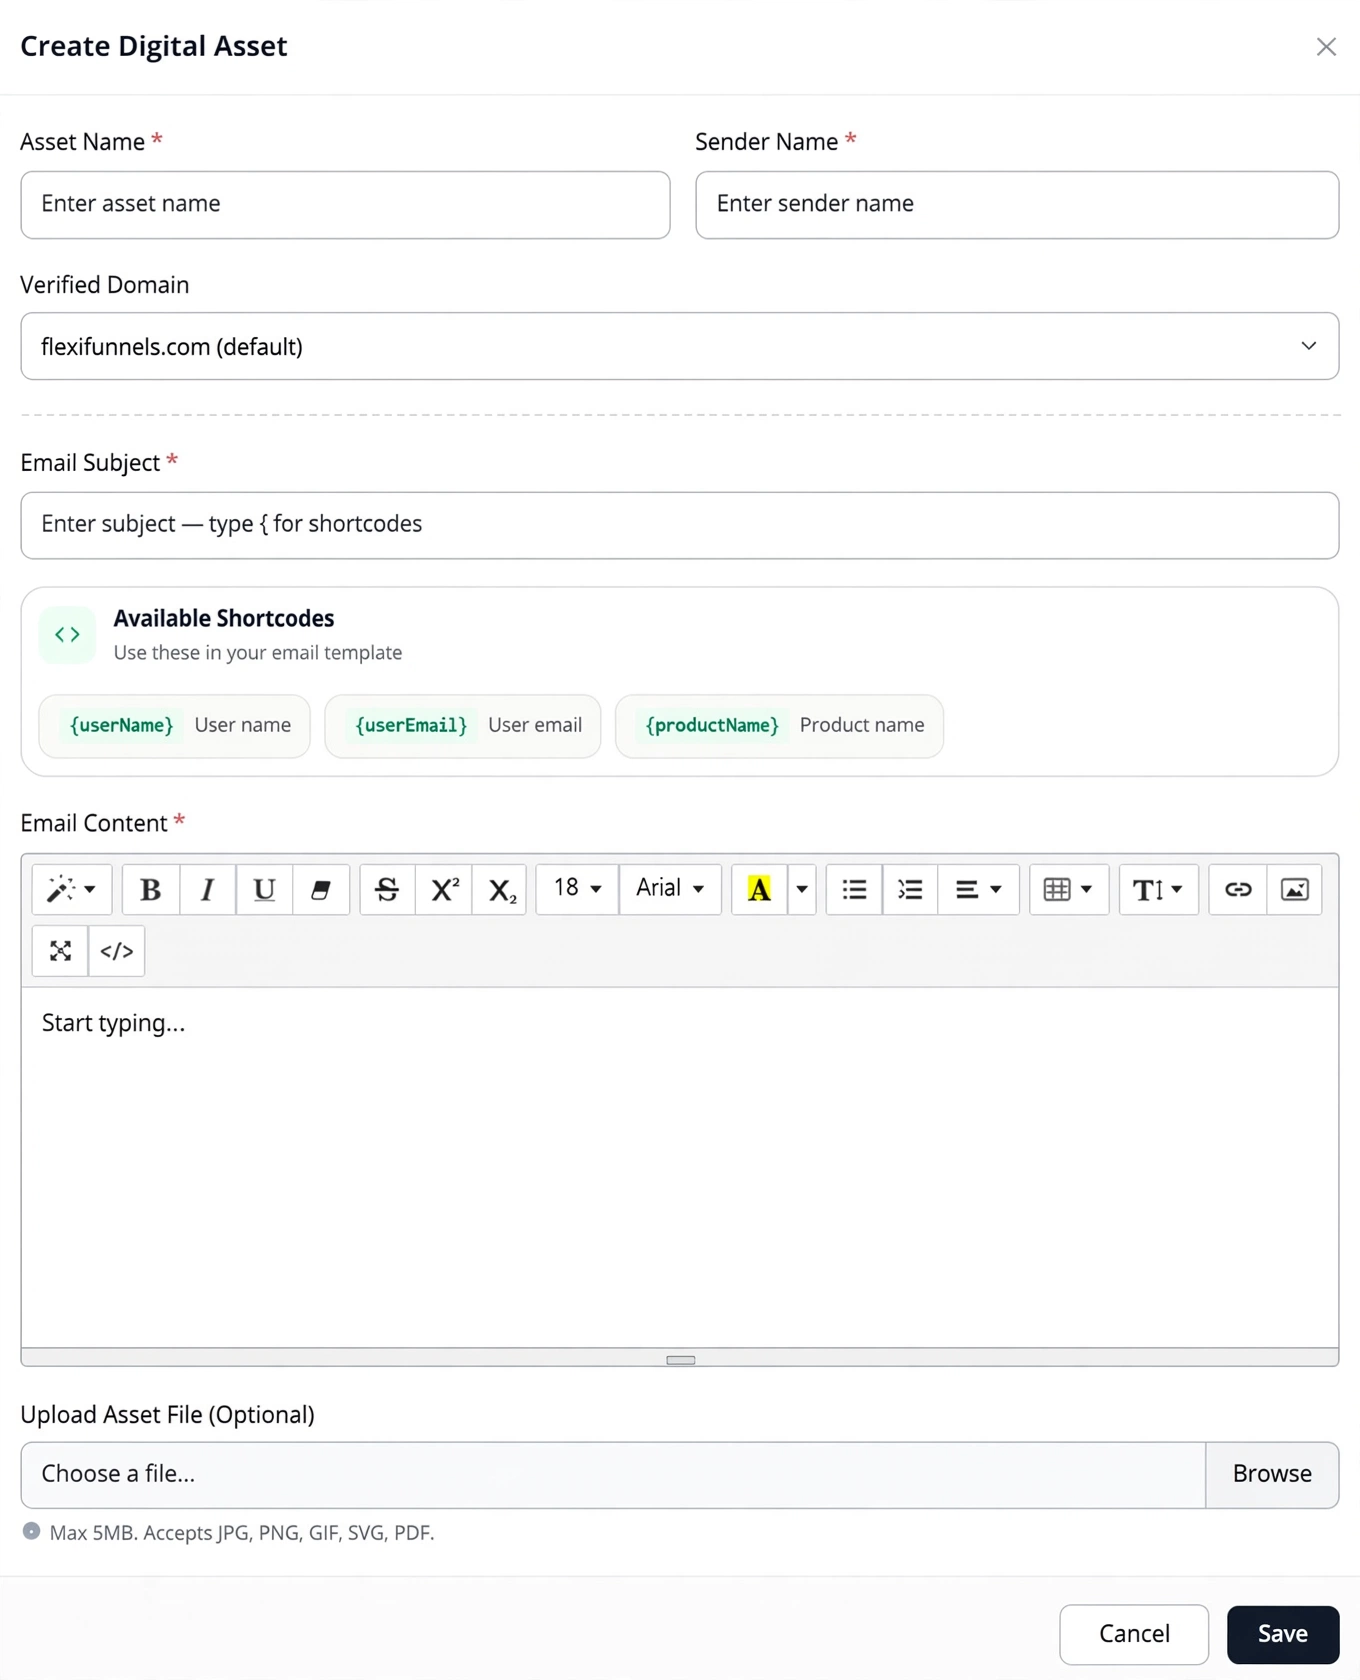
Once you've completed all the required fields, click Save.
Step 2: Choose Where to Use the Email-Only Digital Asset
After creating the Digital Asset, you can attach it to either:
- Opt-in Forms
- Product Purchase Flows
This allows you to automatically send confirmation emails at different stages of your funnel.
Step 3: Connect the Digital Asset
Option A: Connect to an Opt-in Form
- Open your Opt-in Funnel Step.
- Select the form and open Advanced Settings.
- Click Connect Here.
- Select Digital Asset.
- Choose the email-only Digital Asset you created.
- Click Save.


Option B: Connect to a Product Purchase
- Open the desired product from the Products section.
- Navigate to the After Purchase settings.
- Select the email-only Digital Asset.
- Click Save.

Verify the Configuration
- Confirm the Digital Asset has been saved successfully.
- Verify the correct sender name and verified domain are selected.
- Submit a test Opt-in Form or complete a test purchase.
- Ensure the confirmation email is delivered successfully.
- Verify all links and instructions inside the email work correctly.
Common Scenarios
Email is Not Delivered
- Verify the sender email belongs to a verified domain.
- Ensure the Digital Asset has been connected correctly.
- Check that the form or product configuration has been saved.
Personalization Tags Don't Display Correctly
- Verify the shortcodes are entered exactly as supported.
- Submit another test using a valid contact.
Confirmation Email Doesn't Trigger
- Confirm the correct Digital Asset is selected.
- Verify the workflow is connected to the intended Opt-in Form or Product.
Best Practices
- Use a verified business email address.
- Keep your confirmation email concise and easy to understand.
- Personalize emails using supported shortcodes.
- Test the workflow before publishing your funnel.
- Include clear access instructions if users need to visit another page.
Before Contacting Support
- Verify the Digital Asset has been saved.
- Confirm the verified sender email is configured.
- Test the workflow using your own email address.
- Capture screenshots of your configuration.
- Share your Funnel URL or Product name with the Support Team.
Expected Outcome
After completing the setup, FlexiFunnels will automatically send your email-only Digital Asset whenever a visitor submits the connected Opt-in Form or successfully purchases the associated product, providing instant confirmation without requiring downloadable file attachments.
Related Articles
- Create a Digital Asset
- Connect a Digital Asset to a Lead Form
- Connect a Digital Asset to a Product
- Verified Sender Domains
- Email Automations
Was this article helpful?
That’s Great!
Thank you for your feedback
Sorry! We couldn't be helpful
Thank you for your feedback
Feedback sent
We appreciate your effort and will try to fix the article