Overview
Digital Assets in FlexiFunnels allow you to automatically deliver downloadable resources such as eBooks, PDFs, guides, templates, images, and other files to your customers via email after they sign up or complete a purchase. This guide walks you through creating, configuring, and activating a Digital Asset for seamless content delivery.
Check this quick video to create a Digital Asset using MCP/Flexi Genie:
Before You Begin
- An active FlexiFunnels account.
- The digital file you want to deliver (PDF, JPG, PNG, GIF, or SVG).
- An official business email address to send the asset.
- The file size must not exceed 5 MB.
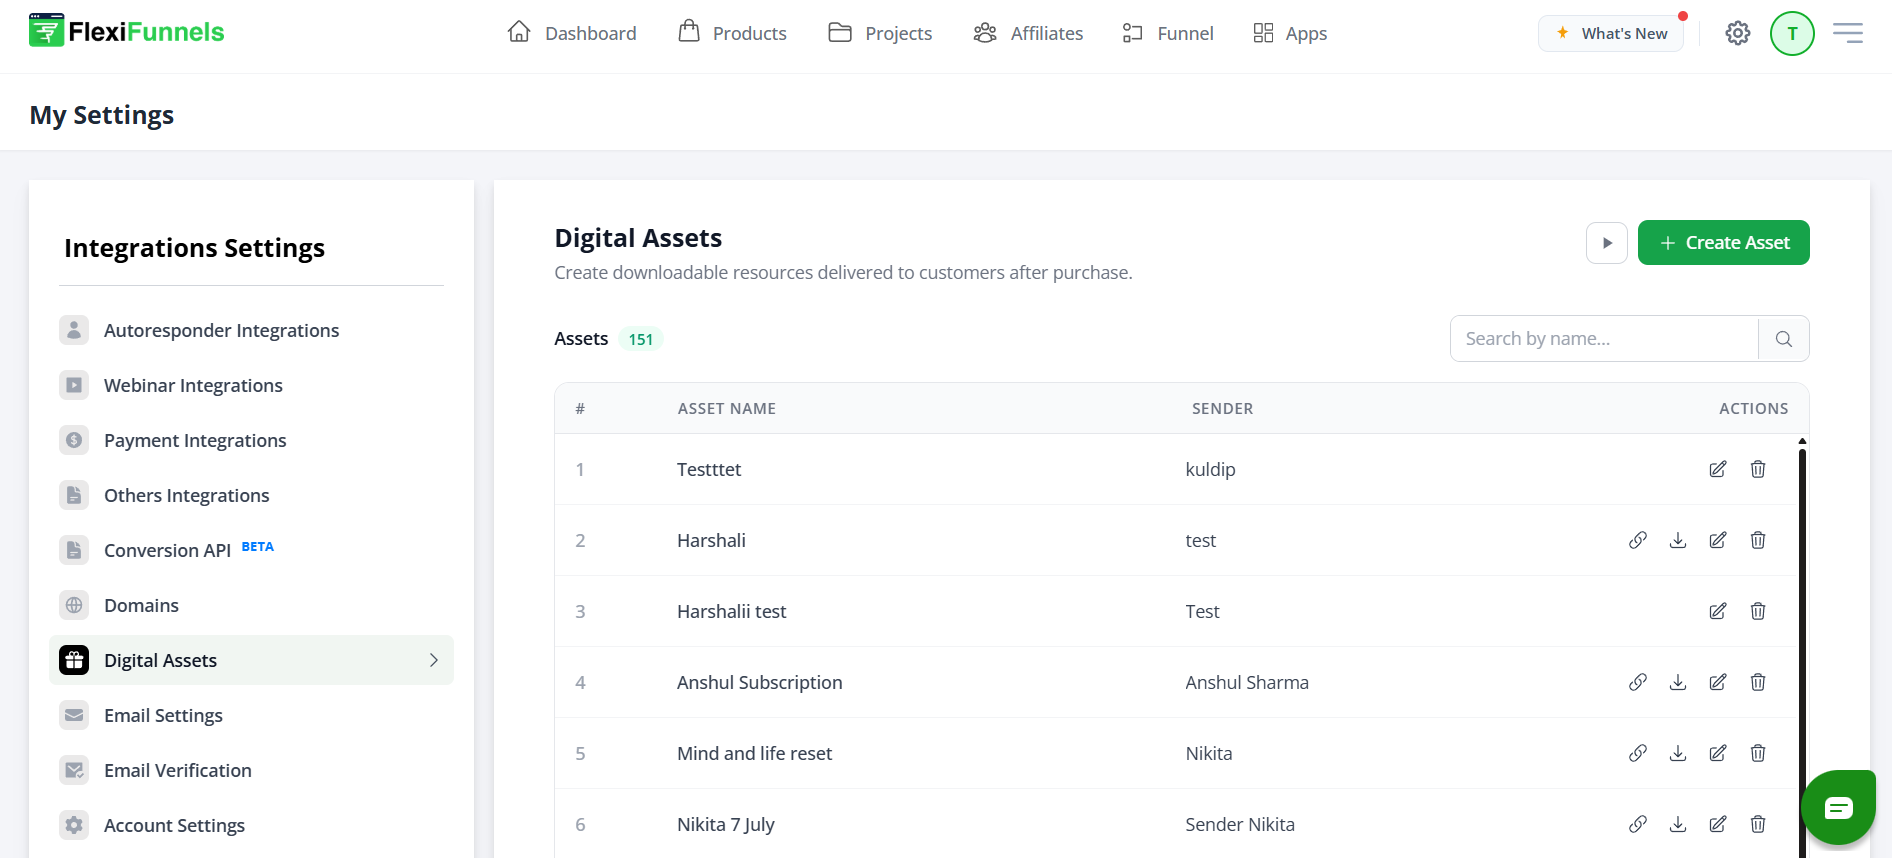
Step 1: Navigate to the Digital Assets Section
Begin by accessing the Digital Assets section from your FlexiFunnels account.
- Click the Settings (Gear) icon in the top-right corner.
- Open the Integration Settings section.
- Select Digital Assets.
- Click Create Asset.
Step 2: Enter the Asset Details
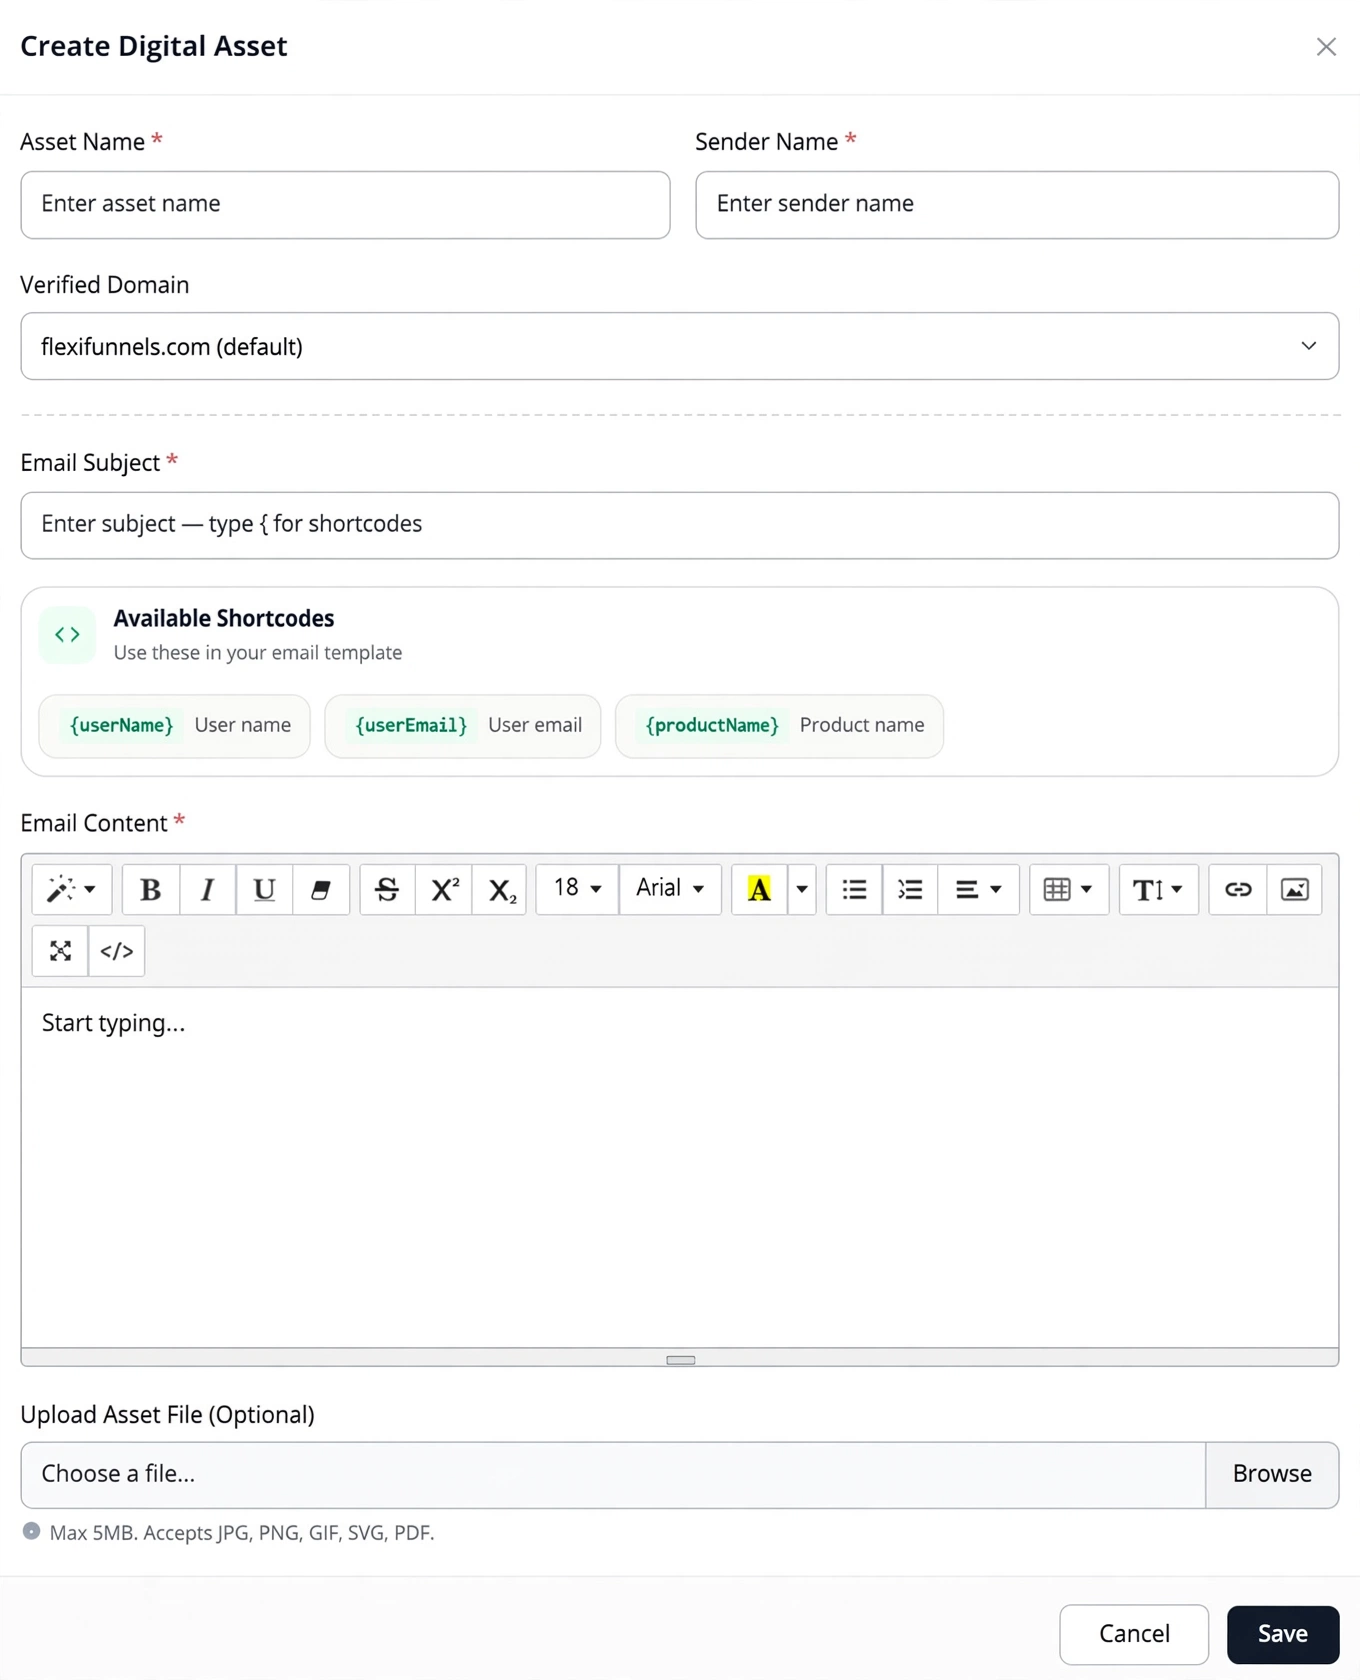
A popup window will appear where you'll configure the Digital Asset information.
Asset Name
Provide a descriptive name for your Digital Asset (for example, Free SEO Guide or Instagram Growth Checklist).
Sender Name
Enter the name that recipients will see in their inbox when the email is delivered.
Example: Tanishka from FlexiFunnels
Sender Email
Use an official business email address associated with your domain.
Example: info@yourdomain.com
Email Subject
Enter the subject line recipients will see in their inbox.
Example: Here's Your Free Guide!
Email Content
Write the email message that will accompany the downloadable asset.
You can personalize your email using the available shortcodes:
{name}— Inserts the recipient's name.{email}— Inserts the recipient's email address.
Step 3: Upload Your Digital Asset
Attach the file that will be delivered to your customers.
- Click Upload Asset File.
- Select the file from your computer.
- Supported file formats include:
- JPG
- PNG
- GIF
- SVG
- Ensure the uploaded file does not exceed 5 MB.
Step 4: Save and Activate the Asset
After completing all required fields:
- Review the asset details for accuracy.
- Verify the sender information and uploaded file.
- Click Save or Create Asset.
Once saved, your Digital Asset is ready to be used in your funnels, forms, automations, or product delivery workflows.
Verify the Asset
Before using your Digital Asset in a live funnel, verify that everything is working correctly.
- The asset appears in your Digital Assets list.
- The correct file is attached.
- The sender name and sender email are accurate.
- The email subject and content display correctly.
- The download link works as expected.
Common Scenarios
Unable to Upload the File
- Verify the file size is under 5 MB.
- Ensure the file format is supported.
- Try compressing the file if necessary.
Email Not Delivered
- Confirm the sender email address is valid.
- Check your email content for formatting issues.
- Verify the customer's email address is correct.
Wrong File Delivered
- Open the Digital Asset and verify the uploaded file.
- Replace the asset if the incorrect file was attached.
Best Practices
- Use descriptive asset names.
- Always use an official business email address.
- Personalize emails using available shortcodes.
- Optimize downloadable files to reduce their size.
- Test the Digital Asset before publishing your funnel.
Before Contacting Support
- Verify the asset has been saved successfully.
- Confirm the uploaded file is under 5 MB.
- Check the sender email address.
- Test the download link.
- Capture screenshots of any error messages.
Expected Outcome
After completing these steps, your Digital Asset will be available within FlexiFunnels and can be automatically delivered to customers through funnels, automations, lead forms, or product purchases.
Was this article helpful?
That’s Great!
Thank you for your feedback
Sorry! We couldn't be helpful
Thank you for your feedback
Feedback sent
We appreciate your effort and will try to fix the article