Your opt-in (lead) form can now send every submission to more than one webhook URL at the same time — not just one. This means the same lead can be POSTed to your CRM, a Slack alert, an automation tool like Zapier or Make, and your own server, all at once, straight from a single form.
Think of it like one form filling out several copies of the same envelope — instead of stuffing one envelope and hoping it reaches everywhere it needs to, the form now stuffs one envelope per destination and mails them all the instant someone hits Submit.
Follow These Steps
1 Open the Editor
Go to Projects, open the project containing your page, and open that page in the editor.
2 Add the Form Element
Add a Form element to your page (this works the same way for an opt-in / lead form as it does for any other form — if you already have one on the page, just select it).
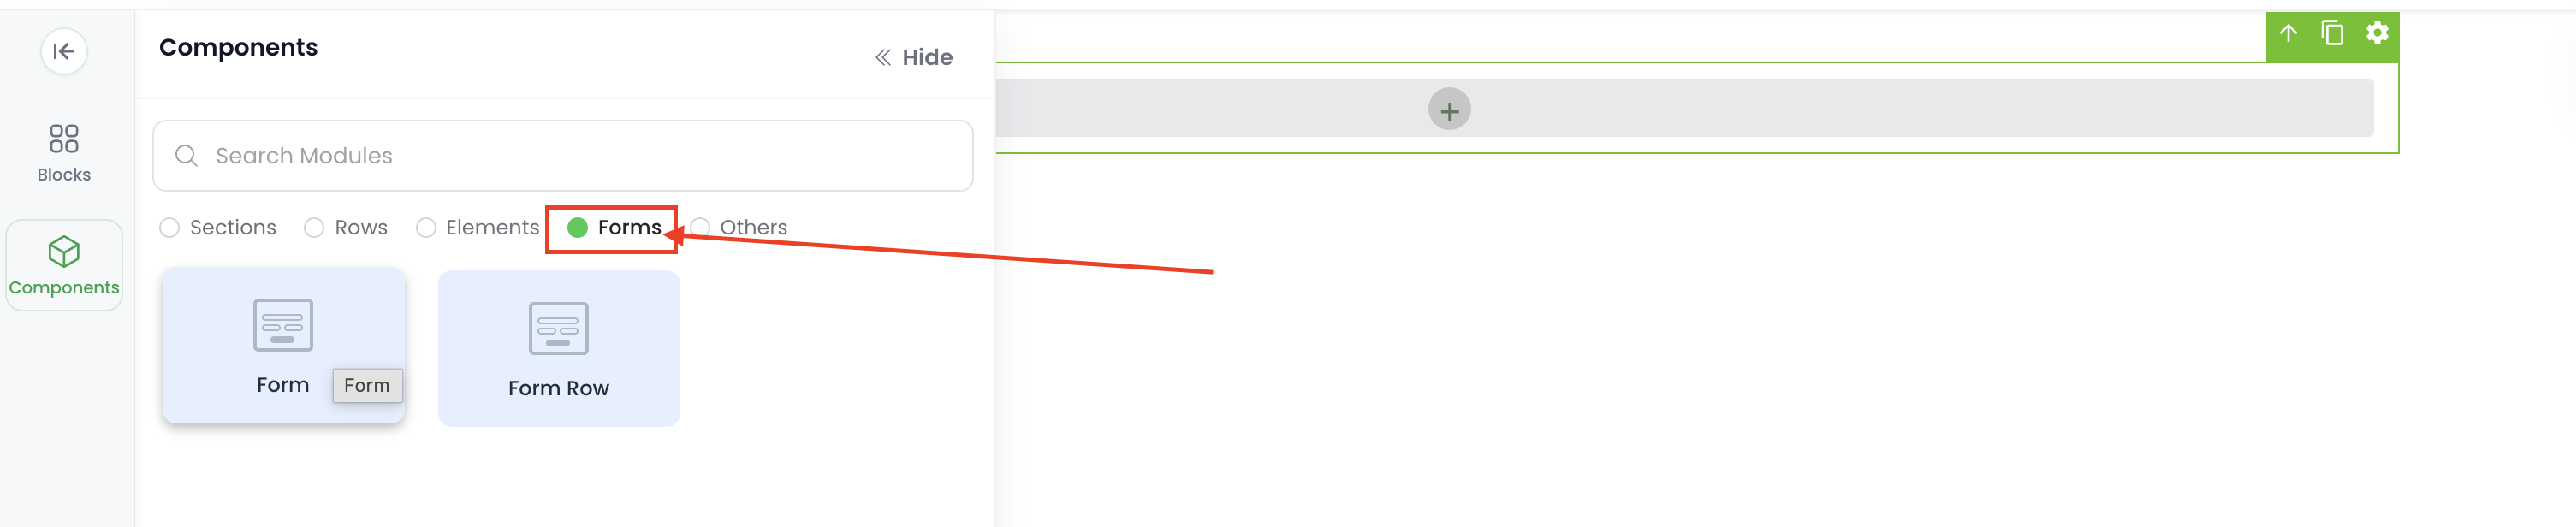
3 Open the Form's Advanced Settings
Select your form on the page, then click the gear (Settings) icon in the toolbar above it. This opens the Advanced Settings panel on the right.
4 Click "Connect here"
In the Advanced Settings panel, under Auto Responder, click the Connect here button.
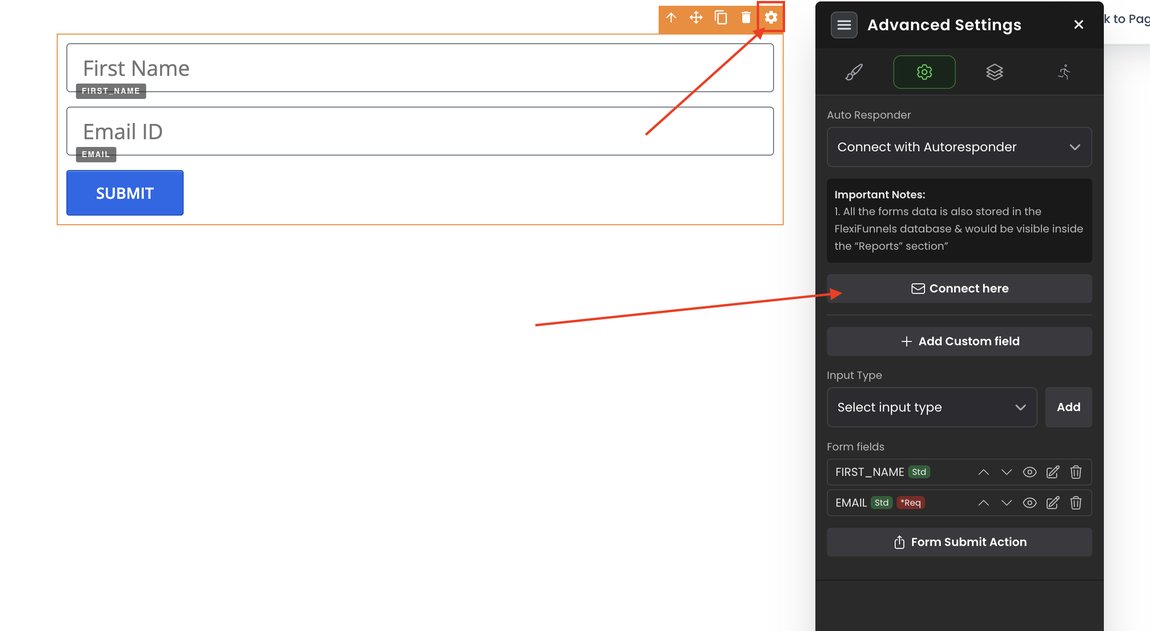
Form selected → gear icon → Advanced Settings → Connect here
5 Go to the Webhook Tab
Clicking Connect here opens the Integrations window: "Connect this form to your services." Along the top you'll see tabs for Autoresponder, Webinar, Digital Assets, and Webhook. Click Webhook.
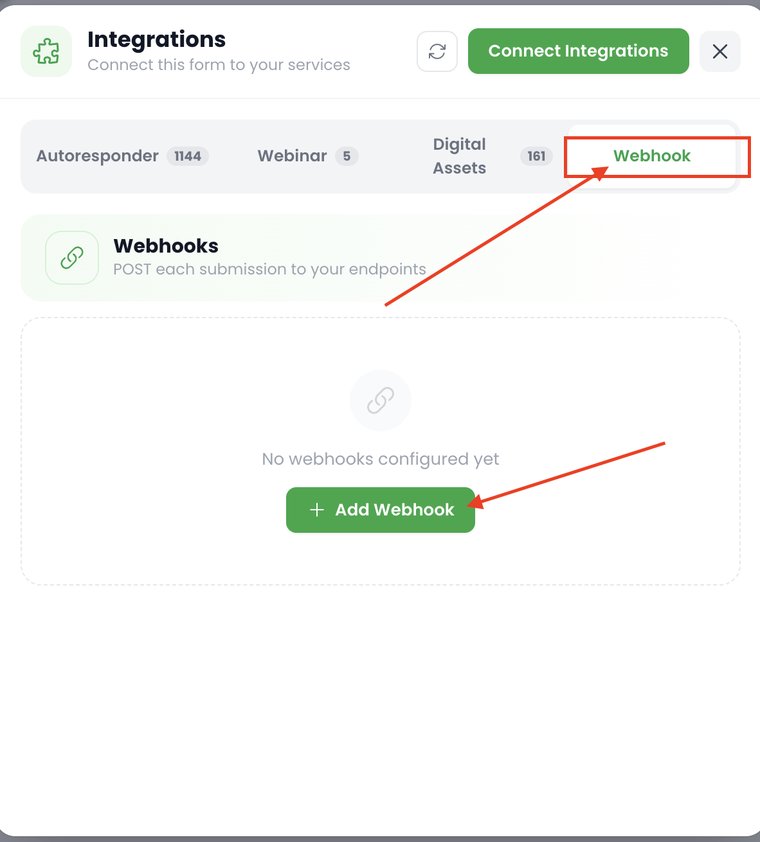
Integrations → Webhook tab. Before you add one, it shows "No webhooks configured yet"
This tab explains what it does: "Webhooks — POST each submission to your endpoints." Every time someone submits this form, its data will be sent as a POST request to whichever URL(s) you add here.
6 Click "Add Webhook"
Click the green + Add Webhook button and enter the destination URL for that webhook.
7 Repeat to Add More Webhooks
Click + Add Webhook again for each additional destination you want this form's submissions sent to. There's no need to choose just one — add as many as your workflow needs.
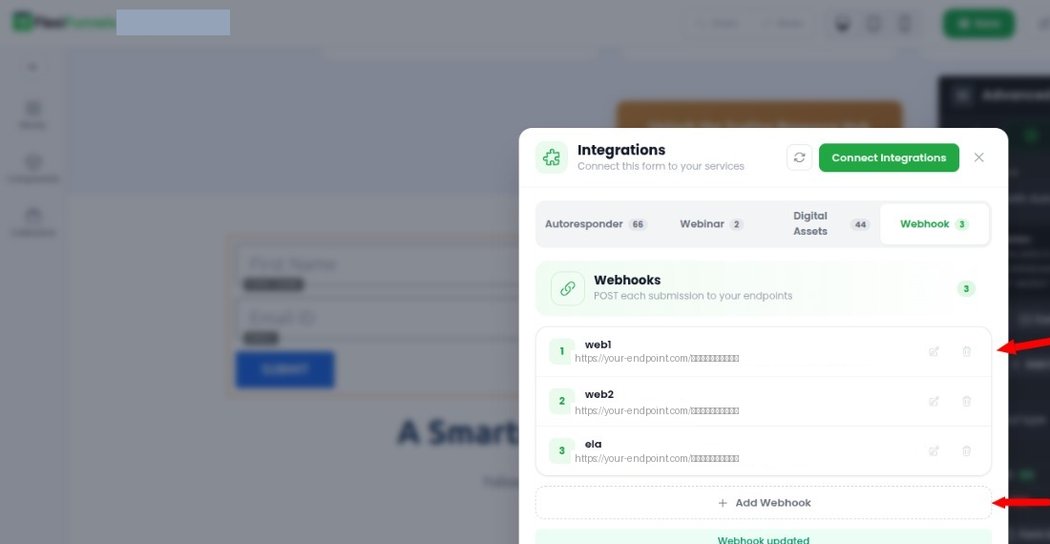
Three webhooks configured on the same form — each one gets its own copy of every submission. (Webhook URLs blurred for privacy in this example.)
Each webhook row shows:
- A number — its position in the list
- A name you gave it (e.g. "web1," "web2," "ela") — purely for your own reference
- Its destination URL — where the submission data gets POSTed
- An edit (pencil) icon — to change the name or URL later
- A delete (trash) icon — to remove that webhook entirely
After adding or editing a webhook, a confirmation message — "Webhook updated" — briefly appears to confirm it saved.
What Happens After Setup
Common Use Cases
Common Situations & Quick Fixes
https://, no trailing typos). Use a test endpoint like webhook.site to confirm your form is actually sending data before pointing it at your real destination.Was this article helpful?
That’s Great!
Thank you for your feedback
Sorry! We couldn't be helpful
Thank you for your feedback
Feedback sent
We appreciate your effort and will try to fix the article