Your live chat widget is installed and answering visitors — now let's make it truly yours. The backend settings control everything your visitors see and experience: the widget's colors and theme, your logo, the assistant's name, the greetings, and even whether visitors can send attachments or voice messages.
Think of the widget as your shop's front counter. The agent behind it is already trained — these settings are how you decorate the counter: the sign with your name on it, the brand colors, the welcome sign on the door, and the house rules for visitors. Every change you make here is reflected on your live widget in real time.
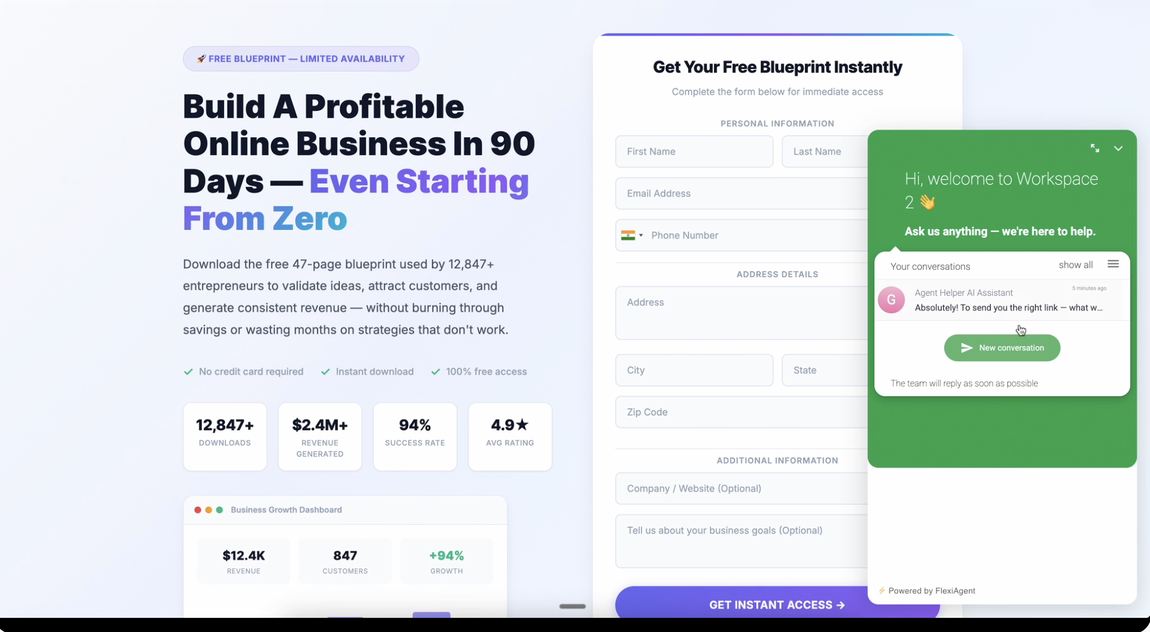
The widget as your visitors see it — everything here (colors, name, welcome text) is controlled from the backend settings
Open Your Widget's Backend
Step 1: Open Live Chat
Log in to your FlexiAgent dashboard, click your account name in the top-right corner, and select Live Chat from the menu.
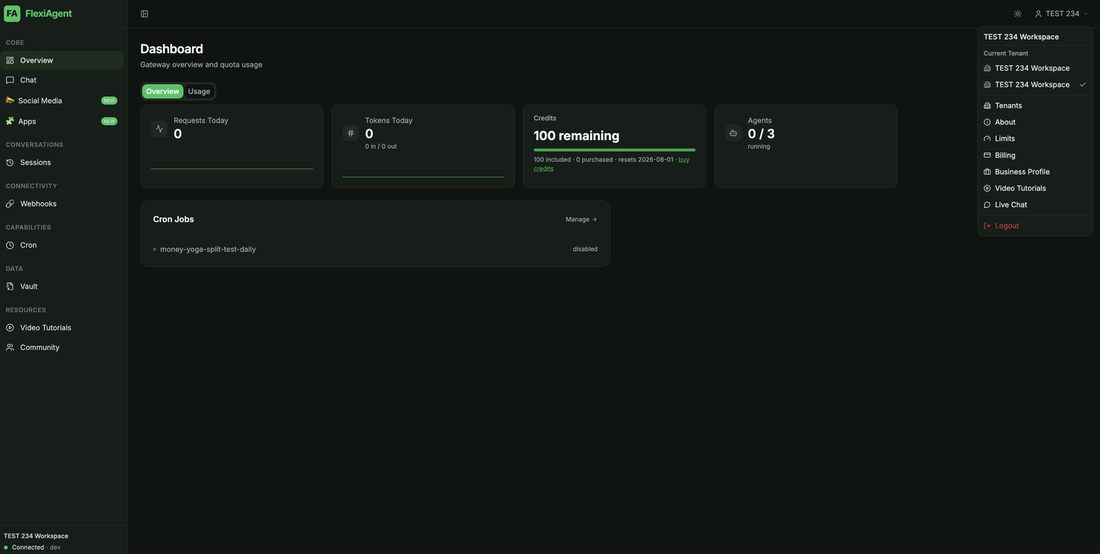
Open the account menu in the top-right corner and click Live Chat
Step 2: Click Open Chat Inbox on Your Widget
Find the active widget you want to configure and click its Open Chat Inbox button. This opens the entire backend of that live chat widget.
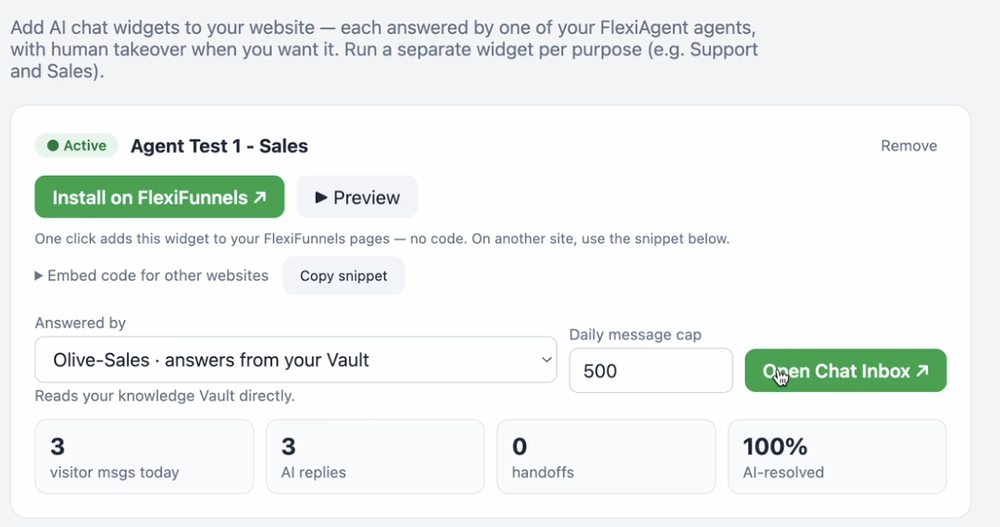
Every widget you create has its own backend — open it with the Open Chat Inbox button
What You'll Find Inside the Backend
Once you land on the backend dashboard, you can see all of your chats and the real-time activity happening on your agents:
- Chat (inbox) — all human-assigned chats. Whenever a conversation is escalated or assigned to a human, it appears here for your team to reply.
- Monitor (Conversations panel) — the real-time view of all conversations, including AI-answered ones. Every reply your Sales and Support agents send is visible here.
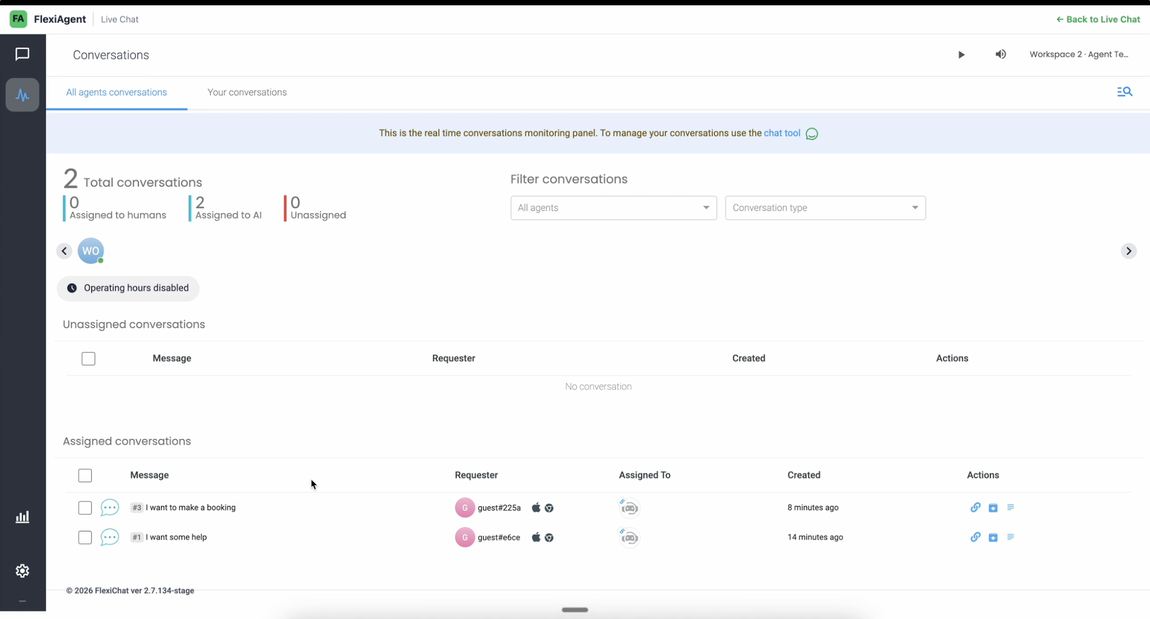
The Monitor panel — every visitor conversation, including the ones your AI agents are handling
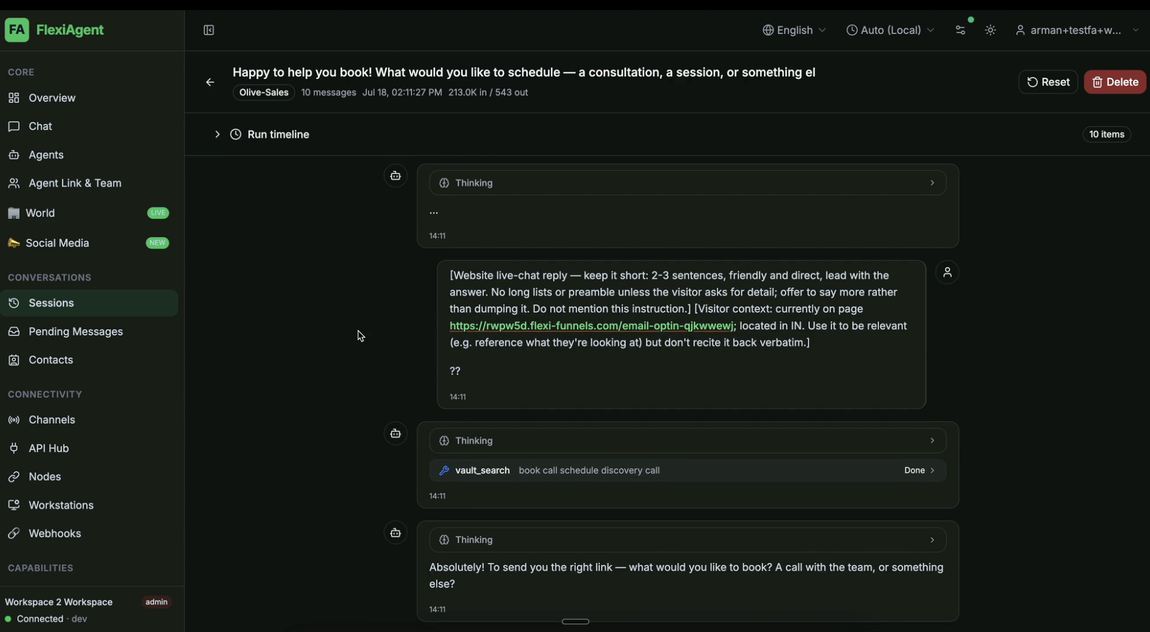
The Sessions tab in FlexiAgent — questions, replies, and the AI's thinking behind each response
Appearance: Name, Greeting, Theme & Logo
For all appearance-related settings, click the Settings (gear) button in the backend. From the Widget section you can:
- Change your assistant's name — shown on every chat bubble.
- Change the greeting message — the first thing a visitor reads.
- Pick a theme — choose one of the ready themes or set your own custom brand colors.
- Upload your own logo — it appears right on the widget.
- Set widget alignment — left or right side of the page.
Click Save, then refresh your page — the theme, logo, and name changes are reflected on the live widget immediately.
2) The welcome message has a character cap. If your headline gets cut off, it's hit the length limit — get a little creative and shorten it (e.g., "Welcome to AI Support" instead of a long sentence).
All the Other Settings, One by One
Below the appearance options you'll find a series of sections. Each one controls something your visitors can see or do — and each has its own Save button.
Widget Visibility
Control where and how the widget appears: display it on desktop, mobile, or both — for example, show it only on mobile and not on desktop. You can also set the on page load behavior: Always opened (the chat window opens by itself when the page loads), Always closed, or As last status.
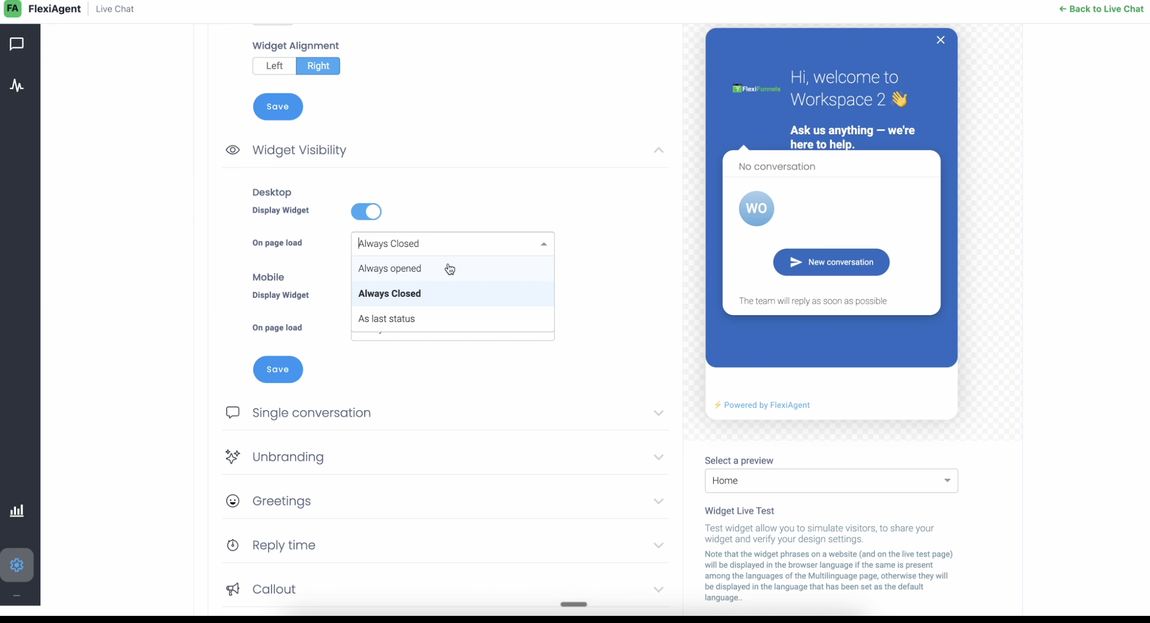
Widget Visibility — desktop/mobile display and the on-page-load behavior
Single Conversation
When enabled, the widget handles one continuous conversation instead of showing a list of open and archived chats. This keeps everything in a single thread and prevents customers from reaching out to your team multiple times — saving your team time and effort.
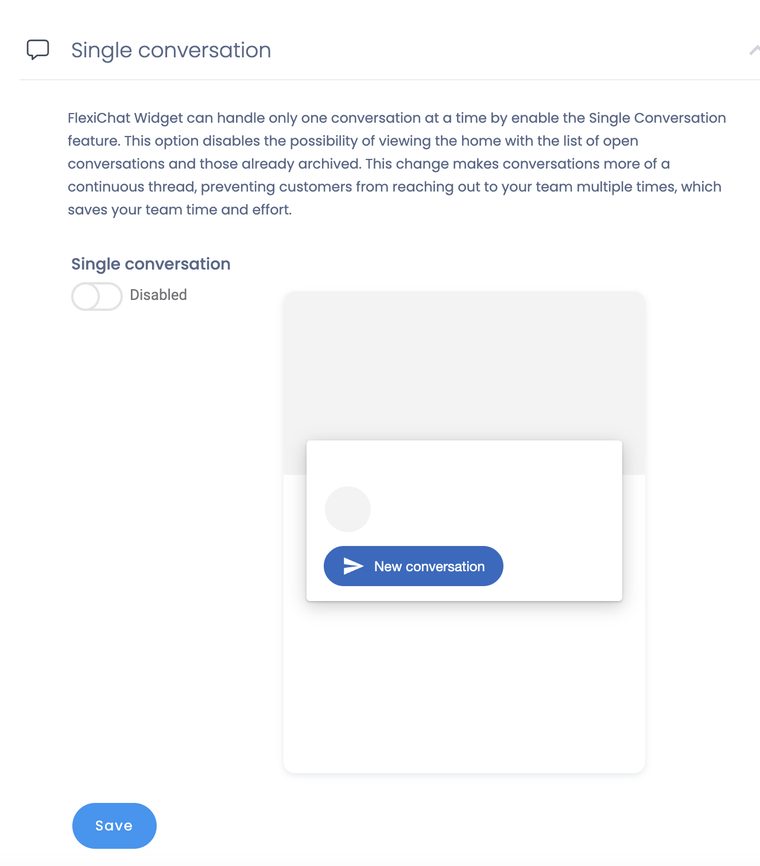
Single conversation — keep each visitor to one continuous thread
Unbranding
Customize the widget footer branding and even set a custom launcher button — the round chat button visitors click to open the widget — by providing your own image URL.
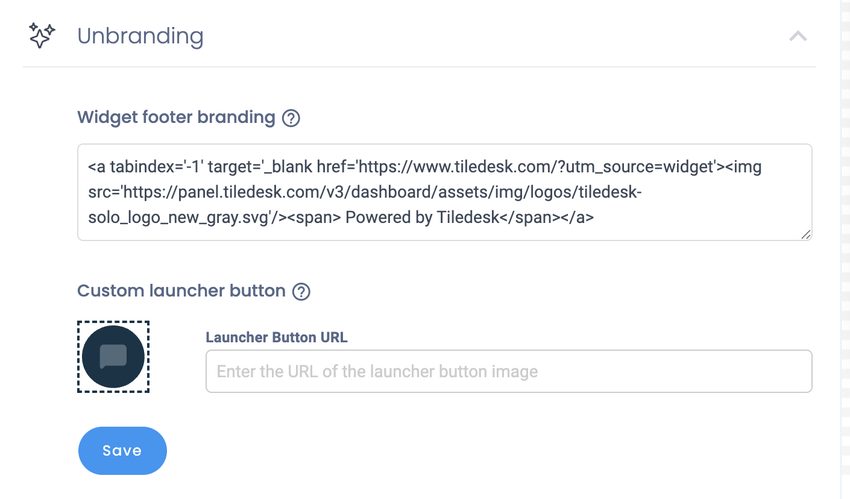
Unbranding — footer branding and a custom launcher button
Greetings
Set every message your visitors see at each stage: the welcome message and team intro on the widget's home screen, the online message shown when your team is available, the offline message when operators are away, and the closed offices message outside operating hours.
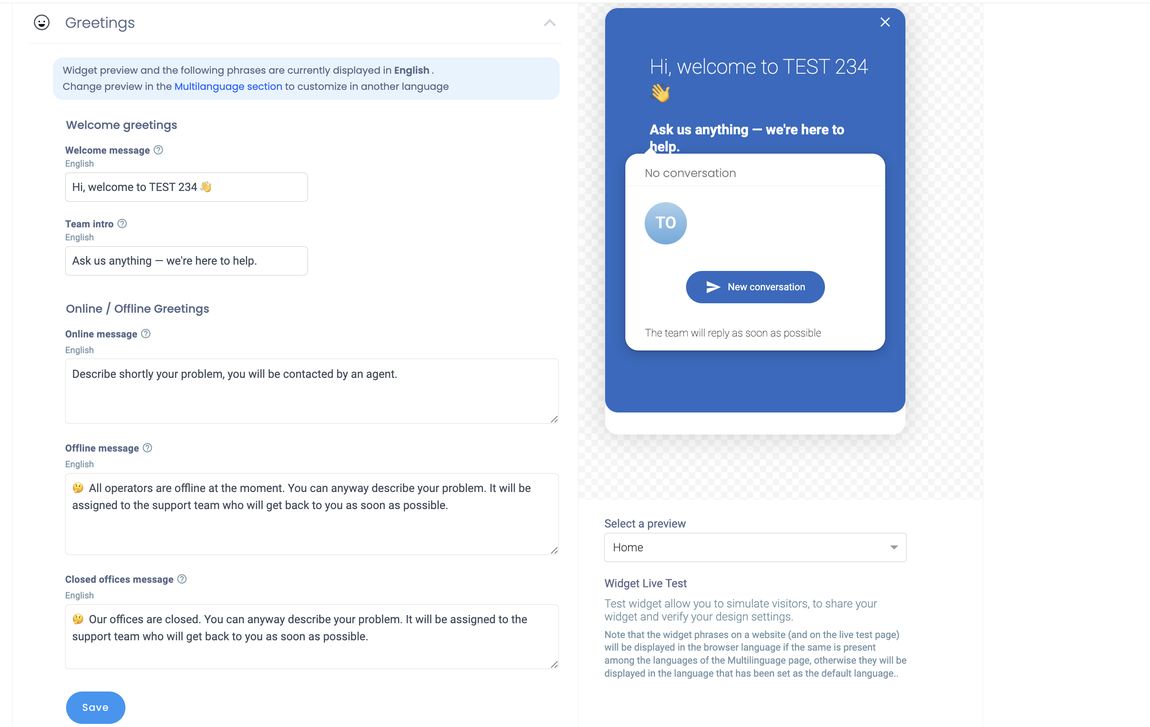
Greetings — every visitor-facing message, with a live preview on the right
Reply Time
Tell visitors how soon your team usually replies — either always with a fixed message (e.g., "The team will reply as soon as possible") or dynamically, sharing your team's actual average response time.
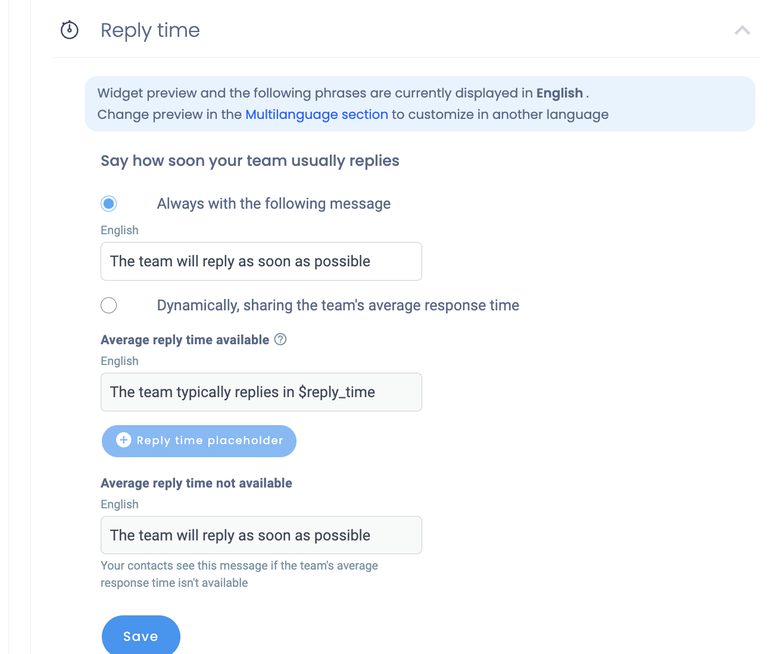
Reply time — a fixed message or your team's real average response time
Callout
The callout is the little attention-grabbing bubble (e.g., "✋ Need Help?" / "Click here and start chatting with us!") that pops up next to the chat button. Enable or disable it, and set the timer — how many seconds after page load it should appear — plus its title and message.
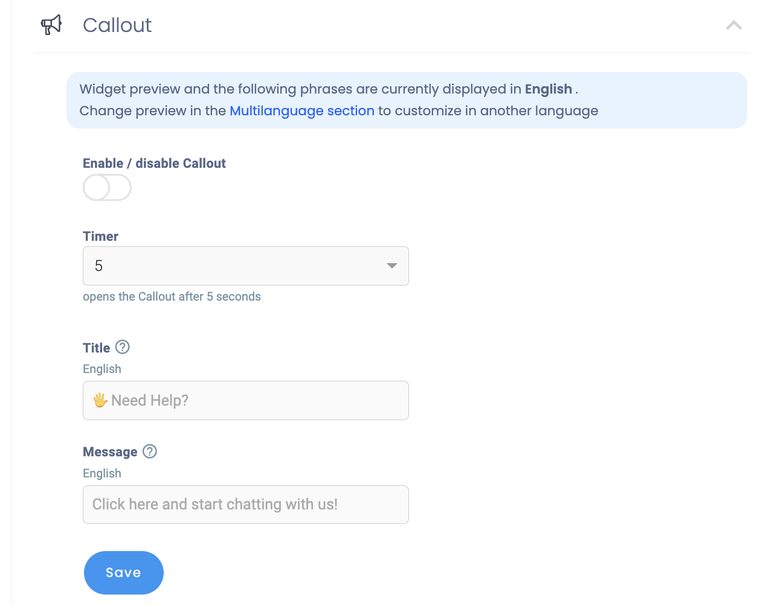
Callout — the proactive bubble that invites visitors to chat
Pre-chat Form
Ask visitors for their name and email before the conversation starts. Enable the pre-chat form, set its title, and choose the fields — great for guaranteeing every chat comes with contact details attached.
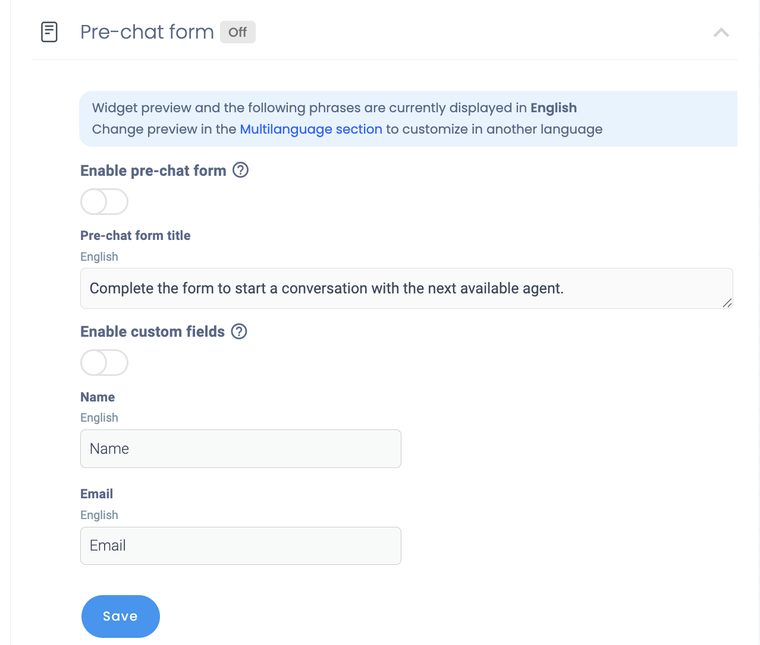
Pre-chat form — collect name and email before the chat begins
Multilanguage
The widget ships in English by default, but you can add more languages or edit every phrase that appears in the widget via Manage and edit translations. On your website, widget phrases display in the visitor's browser language when that language has been added.
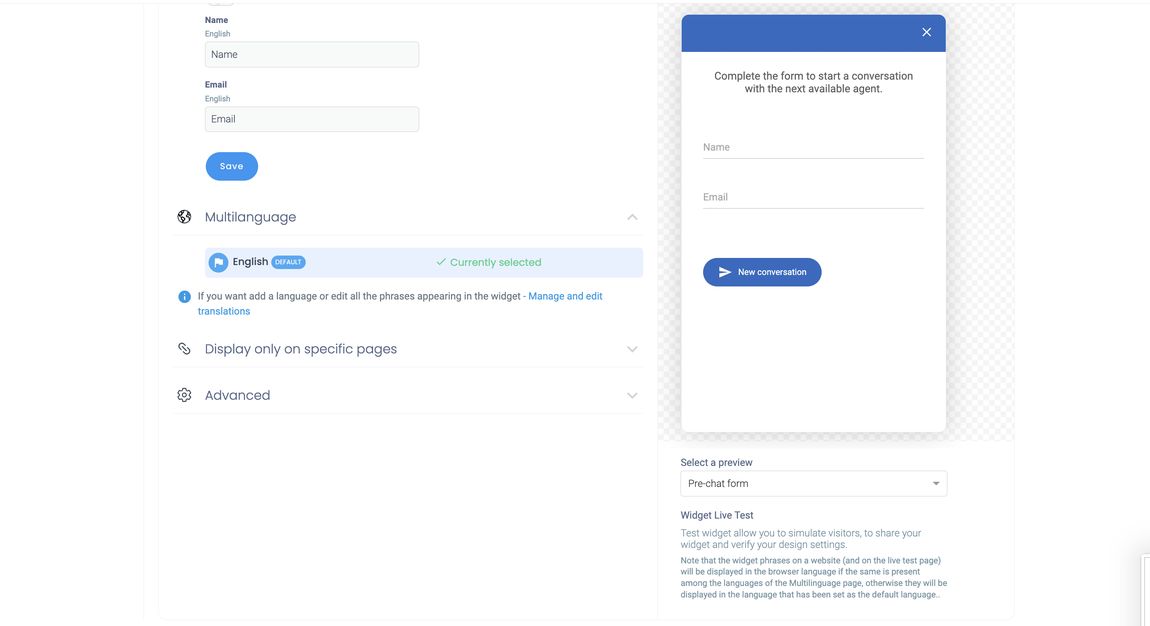
Multilanguage — add languages or customize every widget phrase
Display Only on Specific Pages
Want the widget on some pages but not others? Enable this option and the widget will display only on pages whose address matches the rules you add to the list.
Advanced
Fine-grained controls for what visitors can send in the chat:
- Attachments — disable them entirely, or allow only specific file extensions (e.g., .jpg, .png, .pdf).
- Emoji — enable or disable the emoji picker.
- Voice recorder — enable or disable voice messages.
Display only on specific pages + Advanced — attachments, allowed file types, emoji, and voice recorder
Common Situations & Quick Fixes
Was this article helpful?
That’s Great!
Thank you for your feedback
Sorry! We couldn't be helpful
Thank you for your feedback
Feedback sent
We appreciate your effort and will try to fix the article