Live Mock Test lets you build timed exams for your members, pulled from a shared question bank inside your course. Members get a clock-ticking test experience — with instructions, a pass mark, and optional score review — all without leaving your membership site.
This guide walks you through the complete process: opening the Live Mock Test settings, creating a new test, configuring how it behaves, adding questions, and where member results will show up once people start taking it.
1. Opening Live Mock Test Settings
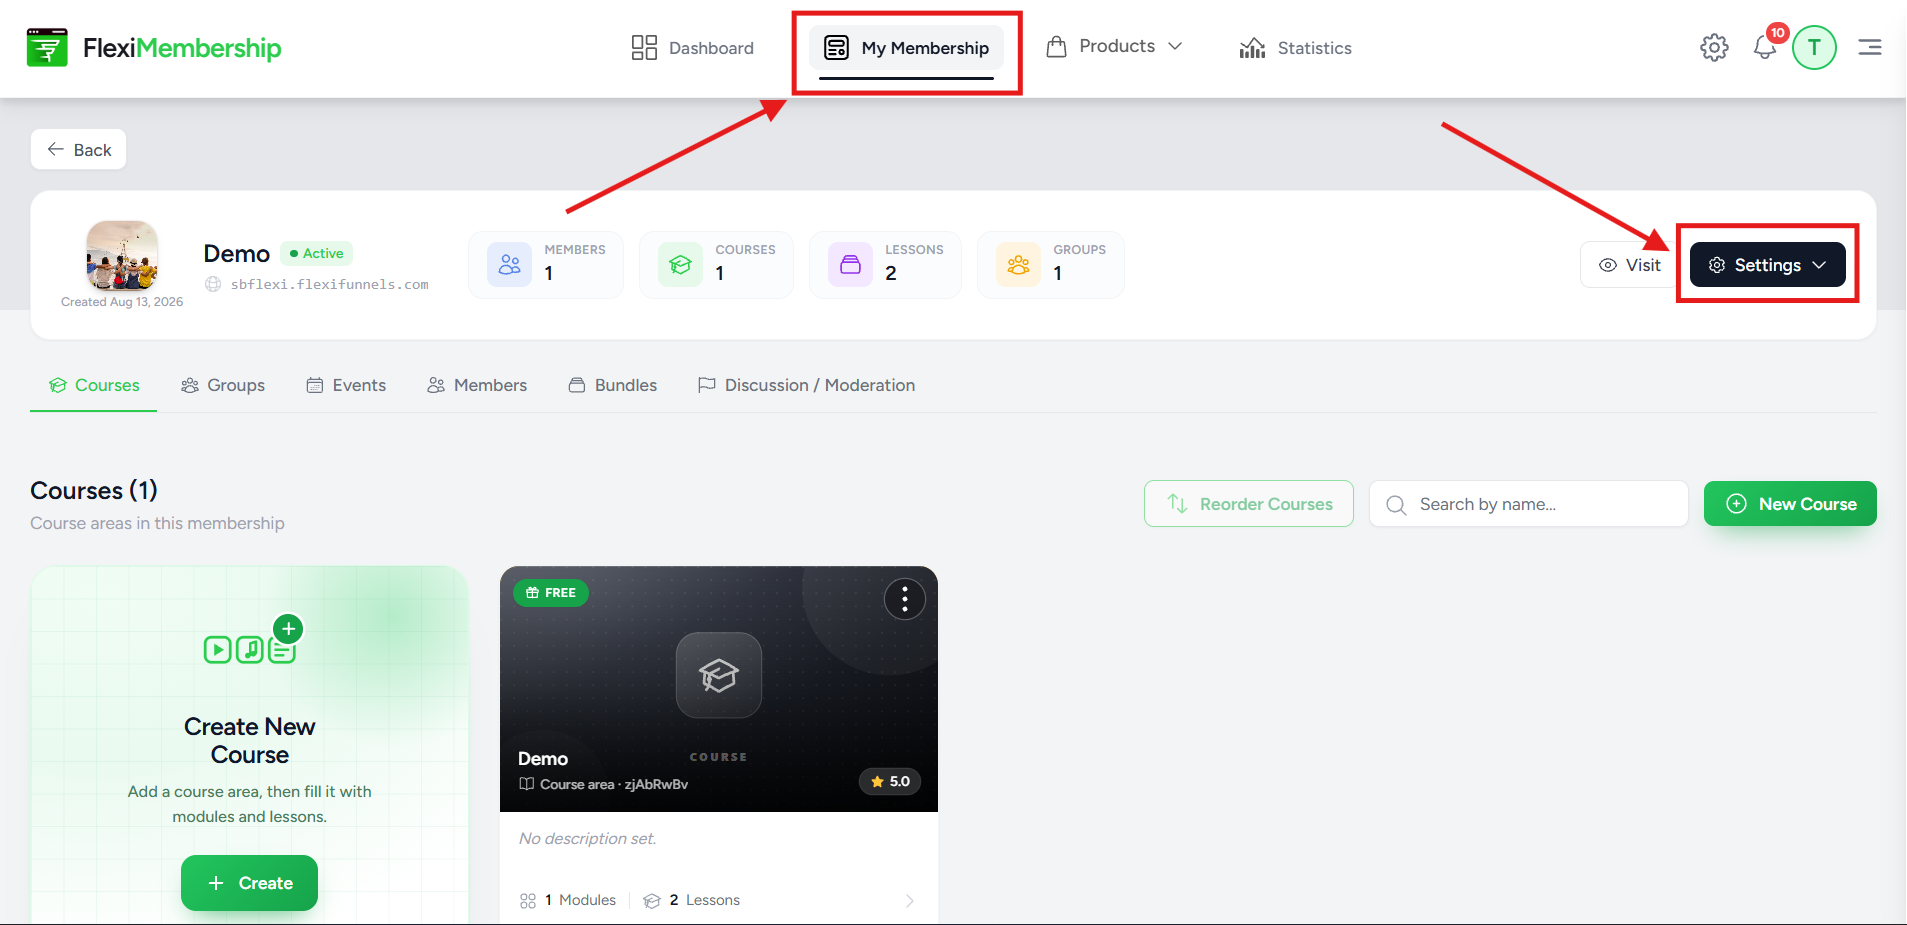
Go to My Membership, then click Settings on your membership
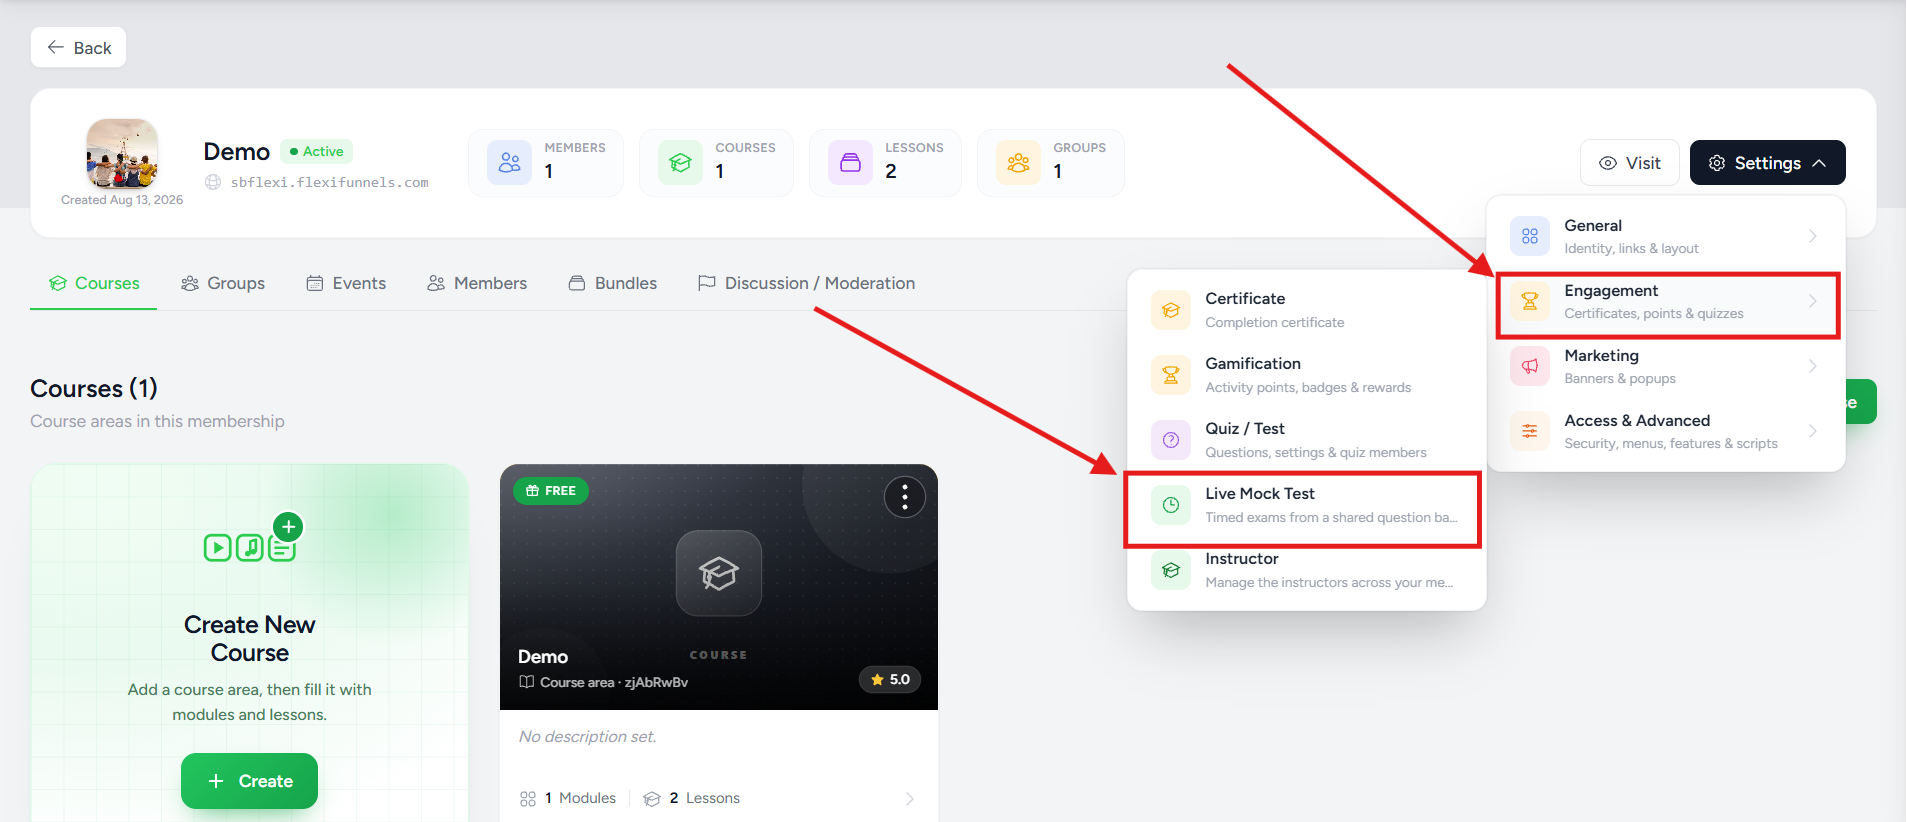
Settings → Engagement → Live Mock Test
2. The Live Mock Test Panel
Clicking Live Mock Test opens a panel with two tabs: Tests and Question Bank. On the Tests tab, you'll see a "Your mock tests" list — empty at first, since no test has been created yet — and a + New Mock Test button in the top-right corner.
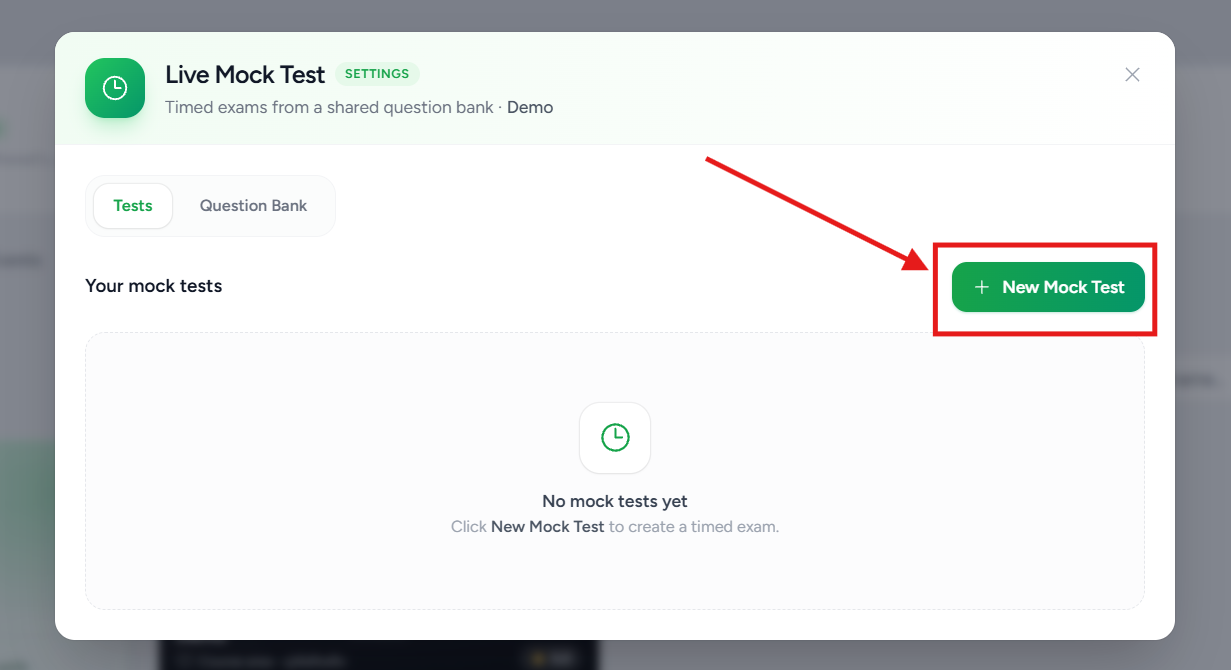
The Live Mock Test panel — click + New Mock Test to create your first test
3. Filling in the Test Details
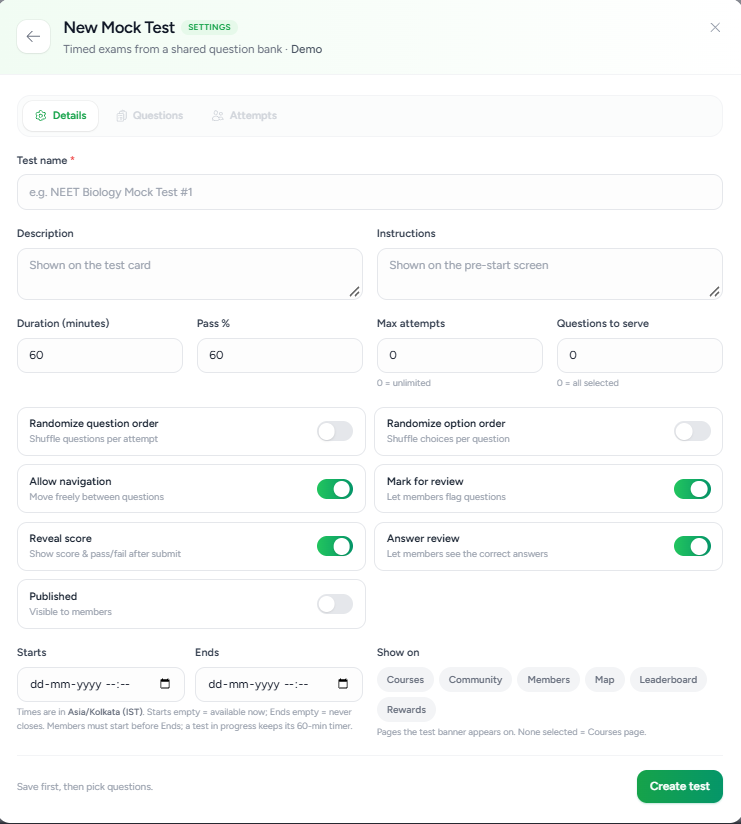
Clicking + New Mock Test opens the New Mock Test window with three tabs: Details, Questions, and Attempts. You'll land on the Details tab first.
Basic Information
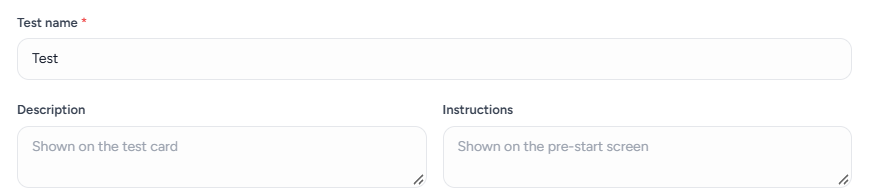
Test name, Description, and Instructions fields
| Field | What it's for |
|---|---|
| Test name * | The name of your test (required). Example placeholder: "NEET Biology Mock Test #1". |
| Description | Shown on the test card — a short summary members see before opening the test. |
| Instructions | Shown on the pre-start screen — the last thing members read before the timer begins. |
Timing and Question Limits

Duration, Pass %, Max attempts, Questions to serve, and the two randomize toggles
| Field / Toggle | Default | What it does |
|---|---|---|
| Duration (minutes) | 60 | How long members have to complete the test once they start. |
| Pass % | 60 | The score percentage a member needs to pass. |
| Max attempts | 0 | How many times a member can attempt the test. 0 = unlimited attempts. |
| Questions to serve | 0 | How many questions are pulled into each attempt. 0 = all selected questions are used. |
| Randomize question order | Off | Shuffle questions per attempt, so members don't all see them in the same order. |
| Randomize option order | Off | Shuffle the answer choices per question. |
Test Behaviour, Scheduling, and Visibility
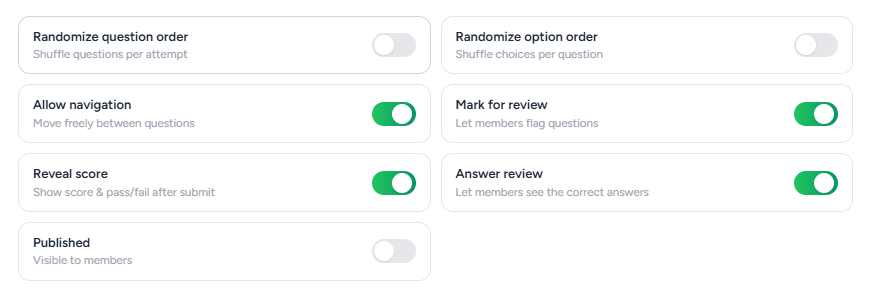
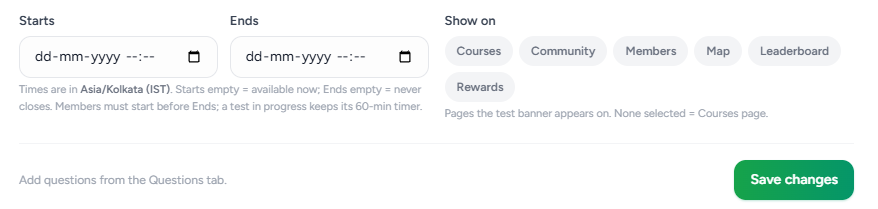
Behaviour toggles, scheduling, visibility, and the Create test button
| Field / Toggle | Default | What it does |
|---|---|---|
| Allow navigation | On | Lets members move freely between questions instead of a strict one-way flow. |
| Mark for review | On | Lets members flag a question to revisit before submitting. |
| Reveal score | On | Shows the member's score and pass/fail result immediately after they submit. |
| Answer review | On | Lets members see the correct answers after submitting. |
| Published | Off | Controls whether the test is visible to members. Leave this off while you're still setting up the test, and turn it on when you're ready to publish it live. |
| Starts | Empty | When the test becomes available. Left empty, it's available immediately ("available now"). |
| Ends | Empty | When the test closes. Left empty, it never closes. Members must start the test before the Ends time — but a test already in progress keeps running for its full duration even if Ends passes. |
| Show on | None selected | Chip selector for which pages show the test banner: Courses, Community, Members, Map, Leaderboard, Rewards. If none are selected, the banner defaults to the Courses page. |
4. Adding Questions to Your Test
After you click Create test, the window updates to Edit Mock Test. Click the Questions tab, then click + Add new.
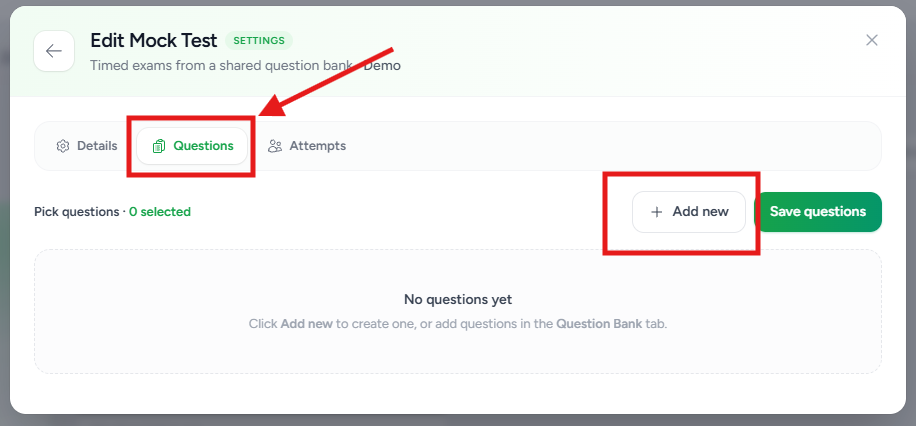
Once the test is created, switch to the Questions tab and click + Add new
The Question Builder
Clicking + Add new opens an inline question form. First, choose the question type from the chips at the top: Single choice, Multiple select, True / False, or Numerical.
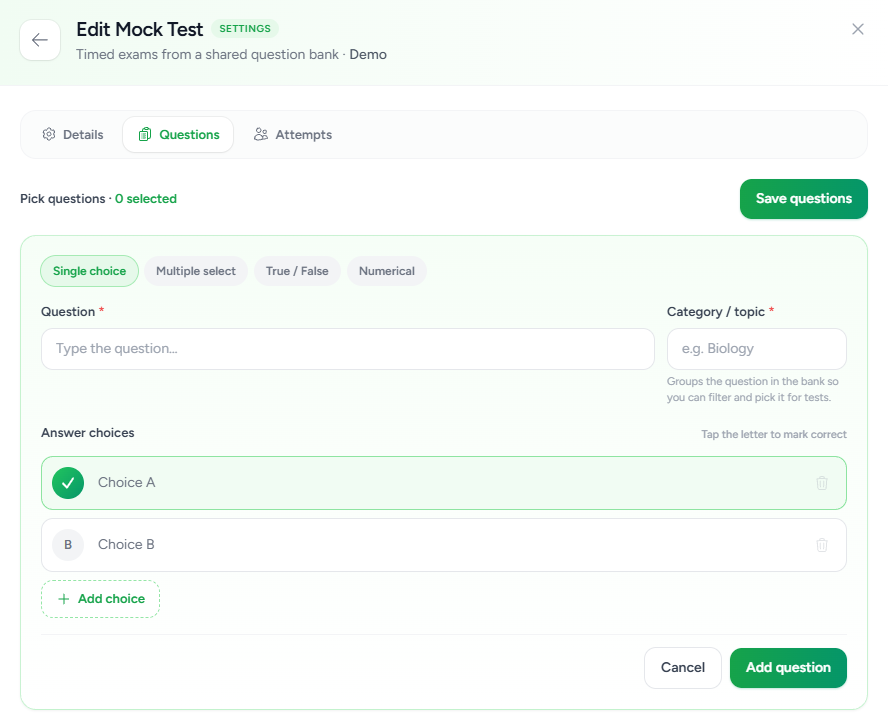
Pick a question type, then fill in the question text and category/topic
Answer choices — tap the letter circle to mark the correct answer, then click Add question
5. Viewing Member Attempts
The third tab in the Edit Mock Test window is Attempts. Before anyone takes the test, this tab shows an empty state.
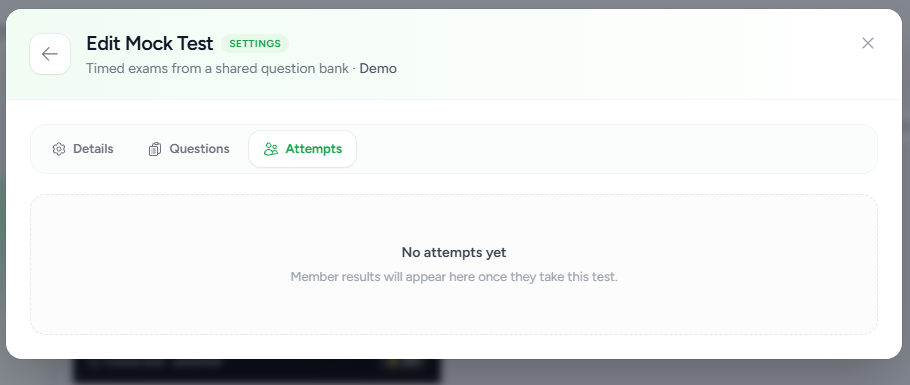
The Attempts tab — member results will appear here once people start taking the test
Quick Summary
- Go to My Membership and open your membership.
- Click Settings → Engagement → Live Mock Test.
- Click + New Mock Test.
- Fill in the Test name, description, instructions, duration, pass %, and other settings on the Details tab.
- Click Create test to save it.
- Switch to the Questions tab and click + Add new to build questions (or pull from the Question Bank).
- Mark the correct answer for each question, then click Add question and Save questions.
- Turn on Published (Details tab) when you're ready for members to see the test.
- Check the Attempts tab later to see member results.
Common Questions
Was this article helpful?
That’s Great!
Thank you for your feedback
Sorry! We couldn't be helpful
Thank you for your feedback
Feedback sent
We appreciate your effort and will try to fix the article