After creating your Product Knowledge Base file, the next step is to upload it to the Vault. Once uploaded, the file is automatically connected to the selected AI agent, allowing it to use your business information when responding to customer queries.
Think of it like handing a new employee their training manual. Writing the manual was the hard part — now you just need to put it on their desk. Uploading to the Vault is exactly that: you hand the file over, FlexiAgent gives the agent a moment to "read and memorize" it (the enrichment process), and from then on the agent answers customers using what it learned.
.md) format. Haven't created it yet? Use the ready-made Vault Knowledge Builder prompts — attach the prompt file in Claude, ChatGPT, or Gemini, paste the kickoff message, answer the AI's questions, and it generates your .md file(s) for you. See "Create Vault Files Using Our Given Prompts" in Related Articles for the full walkthrough.Follow These Steps
Step 1: Open the Vault
Log in to your FlexiAgent account. From the left navigation menu, under Data, click Vault.
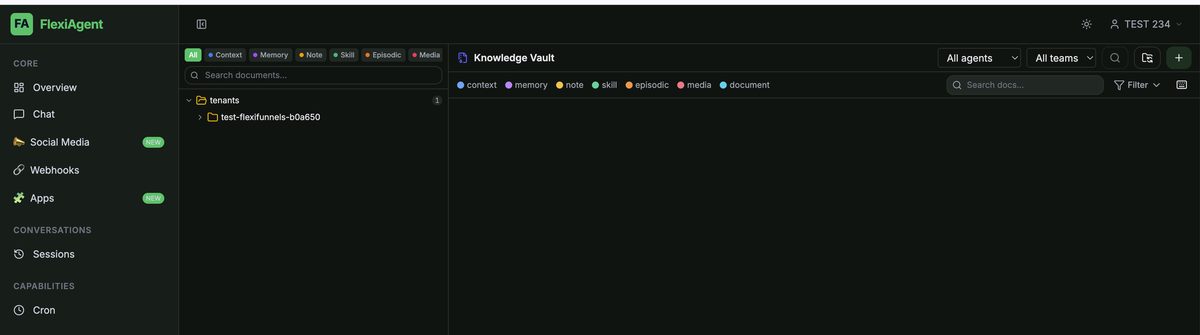
Step 2: Click the Add (+) Button
On the Vault page, click the + (Add) button located in the top-right corner. This opens the upload window for adding a new knowledge base file.

Step 3: Select the AI Agent
In the upload window, choose the AI agent that should use this knowledge base. For example:
- Sales Agent (e.g., Olive-Sales)
- Support Agent (e.g., Sid-Support)
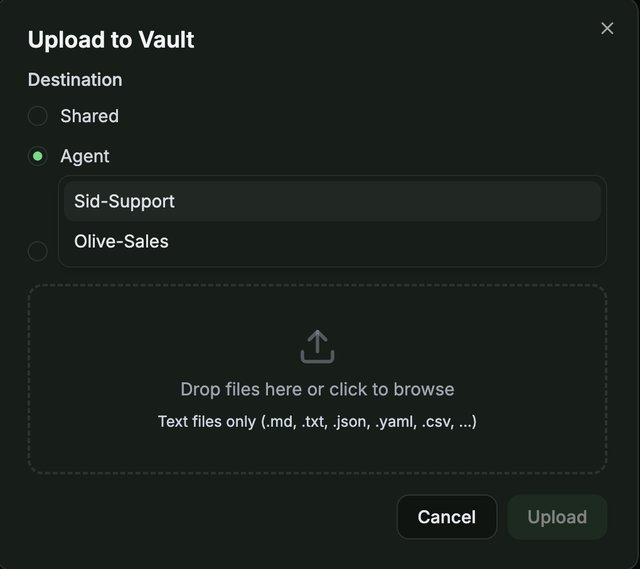
Step 4: Choose Your Knowledge Base File
Click Select File (or drop your file into the upload area) and browse to your Product Knowledge Base file. Select your Markdown (.md) file and confirm your selection. The selected file will appear in the upload window.
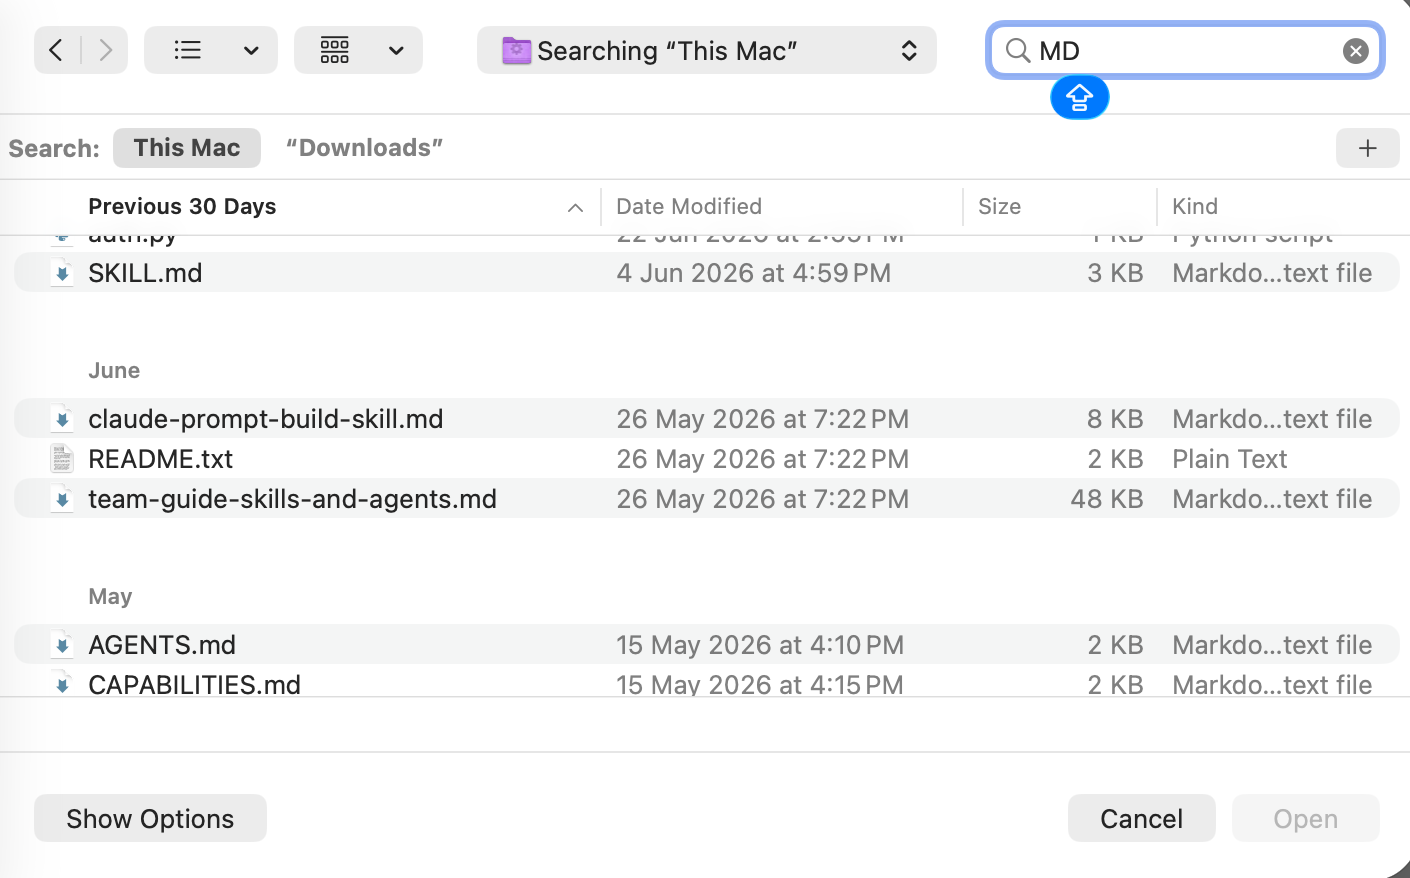
.md) files. PDF, Word (.docx), Text (.txt), and Excel (.xlsx) files are not supported. If your knowledge base is in another format, convert the content into a .md file first.Step 5: Upload the File
Click Upload. FlexiAgent will begin uploading the file to the Vault.
After the upload is complete, the system automatically starts the enrichment process, which prepares the file for use by your AI agent.
Step 6: Verify the Upload
Once the enrichment process is complete:
- Refresh the Vault page.
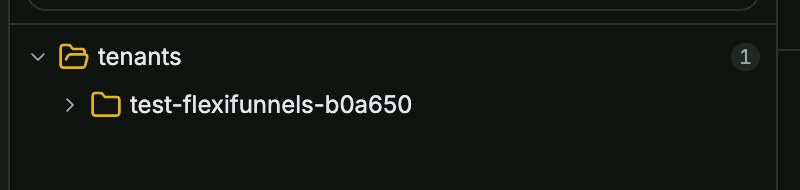
- Open your Tenant folder.
- Navigate to Agents.
- Select the AI agent you uploaded the file for.
You should now see your uploaded Product Knowledge Base file listed under that agent. You can also open the file to verify that it has been uploaded successfully.
What Happens After the Upload?
Once the file is uploaded:
- It is automatically linked to the selected AI agent — no extra connection step needed.
- The agent begins using the information stored in the file.
- Every future conversation with that agent will reference the uploaded knowledge base when answering customer questions.
For example, if a customer asks about your pricing, services, or business policies, the AI agent will retrieve the relevant information directly from this knowledge base — instantly, in any conversation, at any time of day.
Important Notes
- Upload only Markdown (.md) files.
- Each AI agent should have its own dedicated Product Knowledge Base file.
- The knowledge base is automatically connected to the selected agent after a successful upload.
- If you update your business information in the future, you'll need to update the corresponding knowledge base file in the Vault — the agent always answers from what's currently uploaded.
Common Situations & Quick Fixes
.md extension, then try again..md file on your computer, then delete the old file from the Vault and upload the new version (FlexiAgent doesn't support editing an uploaded file directly). The agent answers from what's currently uploaded, so an outdated file means outdated answers. See the related article on replacing your knowledge base file for the full walkthrough.Was this article helpful?
That’s Great!
Thank you for your feedback
Sorry! We couldn't be helpful
Thank you for your feedback
Feedback sent
We appreciate your effort and will try to fix the article