Groups are dedicated community spaces within your membership where members can connect, collaborate, share ideas, and engage in discussions. You can create multiple groups within a membership project, allowing you to organize conversations around specific topics, programs, or audiences.
This guide explains how to create, configure, and manage groups in Flexi Membership.
Some common use cases include:
- Student discussion groups
- Course-specific communities
- Mastermind groups
- Premium member communities
- Accountability groups
- Q&A and support communities
Each group belongs to a membership project and can have its own settings, permissions, and landing page.
Group Types
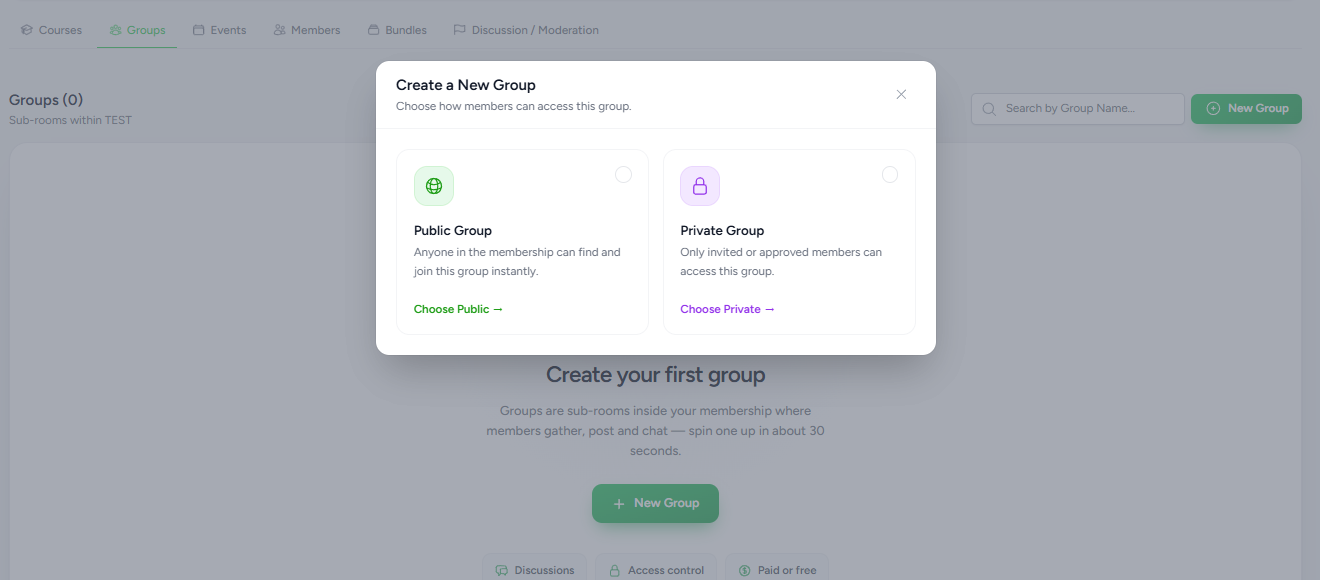
When creating a group, you'll first choose how members can access it.
Flexi Membership currently supports two group types.
Public Group
A Public Group is open to everyone within the membership.
Members can:
- Discover the group.
- Join instantly.
- View and participate in discussions based on their permissions.
Public groups are ideal for general discussions and community-wide engagement.
Private Group
A Private Group restricts access to approved or invited members.
Only authorized members can:
- View the group.
- Join the community.
- Participate in discussions.
Private groups are ideal for premium memberships, coaching cohorts, mastermind groups, or internal team discussions.
Creating a New Group
To create a group:
- Open the Flexi Membership app.
- Navigate to the desired membership project.
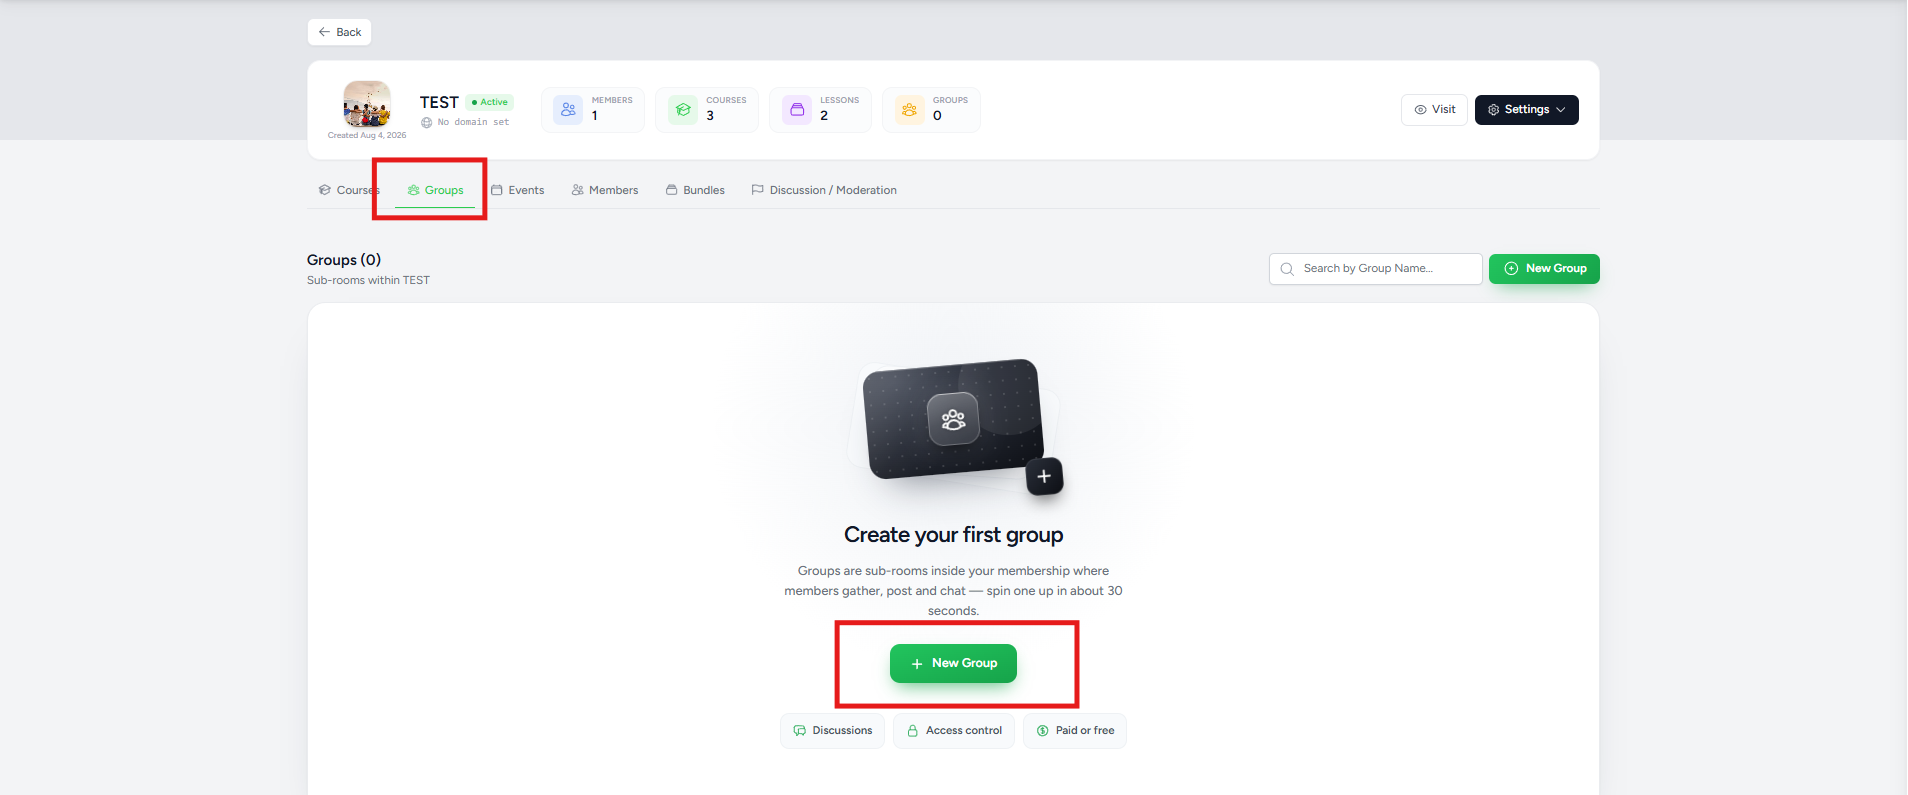
- Click the Groups tab.
- Click New Group.
If no groups have been created yet, you'll see a Create your first group prompt. Click New Group to begin.
Step 1: Select the Group Type
Choose either:
- Public Group
- Private Group
Once selected, the group creation window opens.
Step 2: Configure the Group Details
Complete the required information to set up your group.
Group Name
Enter a descriptive name for the group.
Choose a name that clearly communicates the group's purpose.
Examples:
- Beginner Community
- Marketing Mastermind
- Student Lounge
- VIP Coaching Group
Short Description
Provide a brief summary of the group's purpose.
This description appears on the:
- Group card
- Group landing page
Keep the description concise and informative.
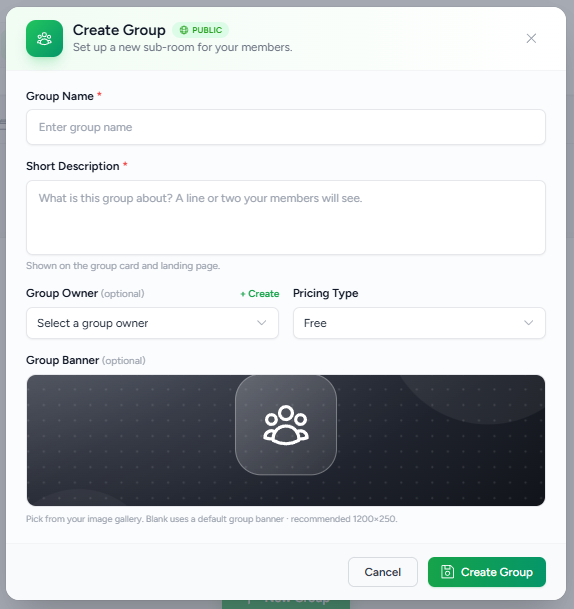
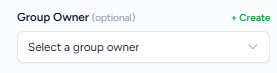
Group Owner (Optional)
Assign a group owner responsible for managing the community.
If the desired owner doesn't already exist, click + Create to add a new one directly from the group creation window.
If left blank, ownership can be assigned later.
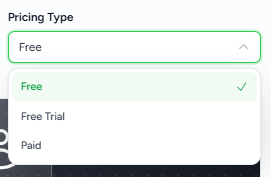
Pricing Type
Choose how members gain access to the group.
Currently supported:
- Free
- Free Trial
- Paid
Group Banner (Optional)
Upload a banner image that represents your community.
The banner is displayed on the group card and landing page.
For the best appearance, use the recommended dimensions of 1200 × 250 pixels.
If no image is uploaded, the default banner is used.
Step 3: Create the Group
After reviewing the details, click Create Group.
The new group will immediately appear on the Groups page.
Managing Existing Groups
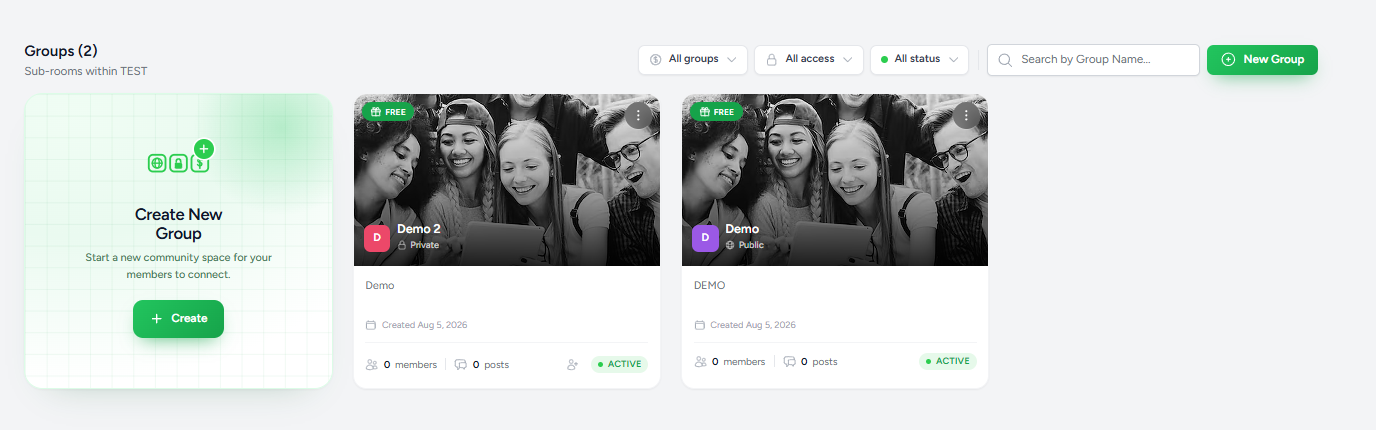
The Groups page displays all groups created within your membership.
Each group card includes key information, such as:
- Group name
- Visibility (Public or Private)
- Pricing type
- Creation date
- Number of members
- Number of posts
- Current status
This overview allows you to quickly monitor the activity and health of your communities.
Group Management Options
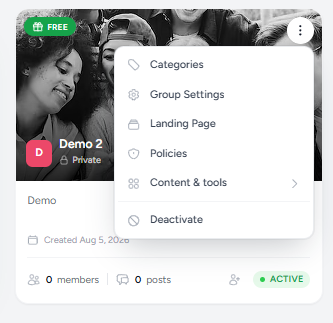
Each group includes a More Actions (⋮) menu that provides access to additional configuration options.
Available options include:
- Categories – Organize discussions using feed categories.
- Group Settings – Configure permissions, automation, and member controls.
- Landing Page – Customize the public-facing group page.
- Policies – Manage Terms & Conditions and Privacy Policy.
- Content & Tools – Access email notifications, custom scripts, scheduled posts, and other group tools.
- Deactivate – Disable the group while preserving its configuration.
Each option is covered in detail in the next articles
 .
.
Best Practices
To build an active and well-organized community:
- Use descriptive group names that clearly communicate the group's purpose.
- Write concise descriptions to help members understand what the group is about.
- Upload a custom banner to create a recognizable identity for the group.
- Use Public Groups for open community discussions and Private Groups for exclusive or premium audiences.
- Regularly review group settings to ensure permissions and access align with your community goals.
Next Steps
Once your group has been created, you can further customize and manage it by:
- Creating Feed Categories to organize discussions.
- Configuring Group Settings for permissions and automation.
- Designing a Group Landing Page.
- Setting up Terms & Conditions and Privacy Policy.
- Configuring Email Notifications.
- Adding Custom Scripts for analytics and tracking.
- Scheduling community posts using the built-in AI and manual scheduling tools.
Was this article helpful?
That’s Great!
Thank you for your feedback
Sorry! We couldn't be helpful
Thank you for your feedback
Feedback sent
We appreciate your effort and will try to fix the article