The Group Landing Page is a dedicated page that showcases your community to prospective members. It allows you to present your group's purpose, highlight its benefits, introduce instructors, display testimonials, answer common questions, and encourage visitors to join your community.
Flexi Membership provides an AI-assisted landing page builder that enables you to generate and customize your landing page without using the FlexiFunnels Editor.
This guide explains how to access, generate, customize, and publish your Group Landing Page.
Accessing the Group Landing Page
To open the Landing Page Builder:
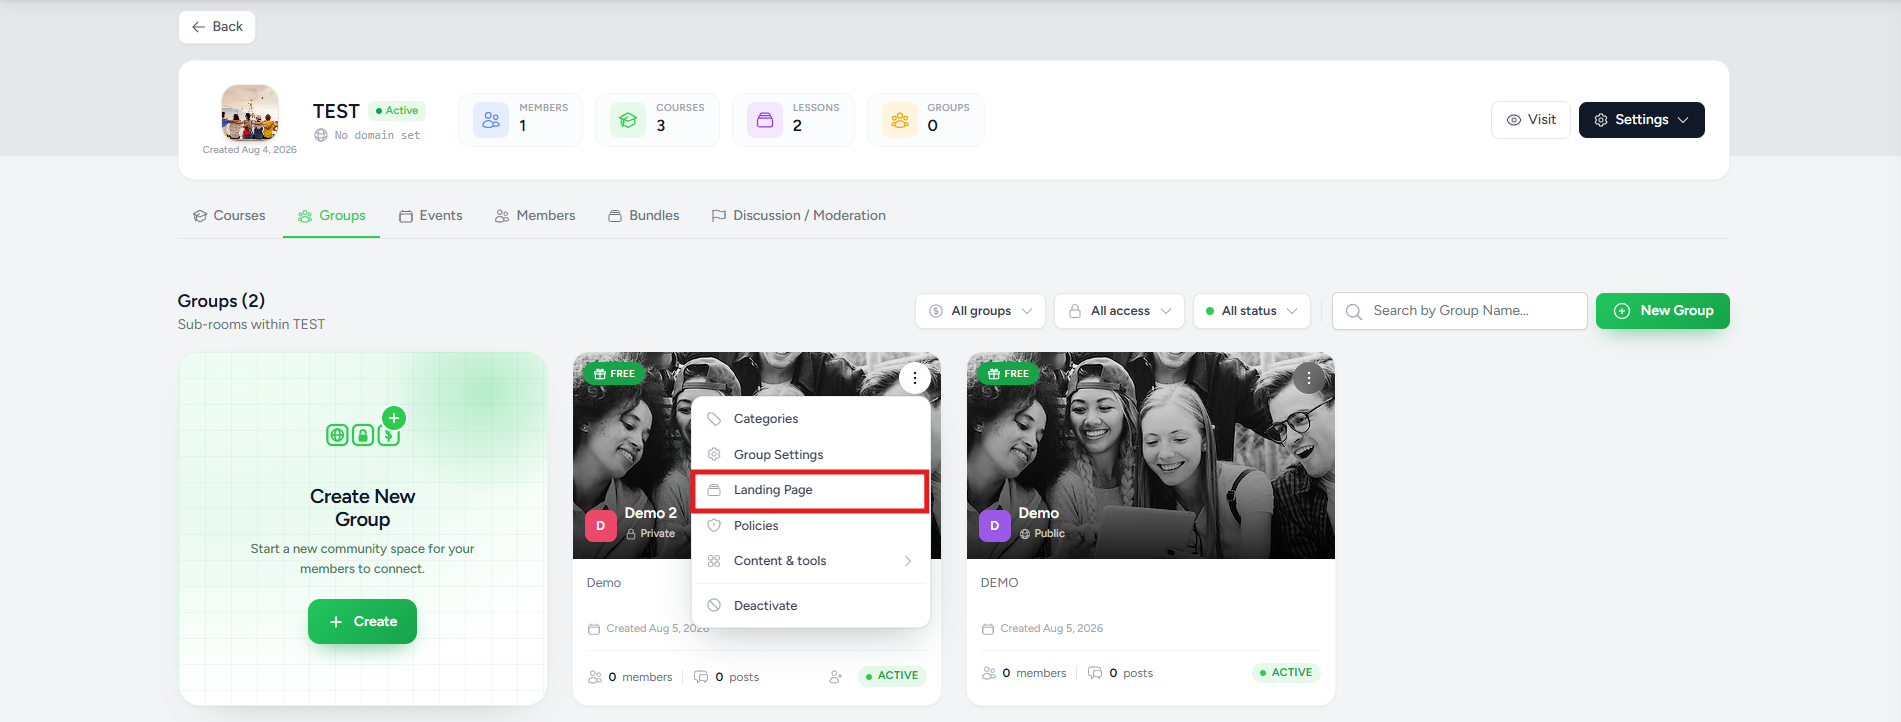
- Open the Flexi Membership app.
- Navigate to your membership project.
- Click Groups.
- Locate the desired group.
- Click the ⋮ (More Actions) menu.
- Select Landing Page.
The Landing Page Builder opens with all available customization options.
Understanding the Landing Page Builder
The Landing Page Builder is divided into multiple sections that allow you to customize the appearance and content of your community page.
These sections include:
- Hero Section
- About Section
- Learning Outcomes
- Instructor
- Testimonials
- Frequently Asked Questions
- Social Media Links
- SEO Settings
- Analytics
- Branding
You can customize each section independently before publishing the page.
Generate Landing Page Content with AI
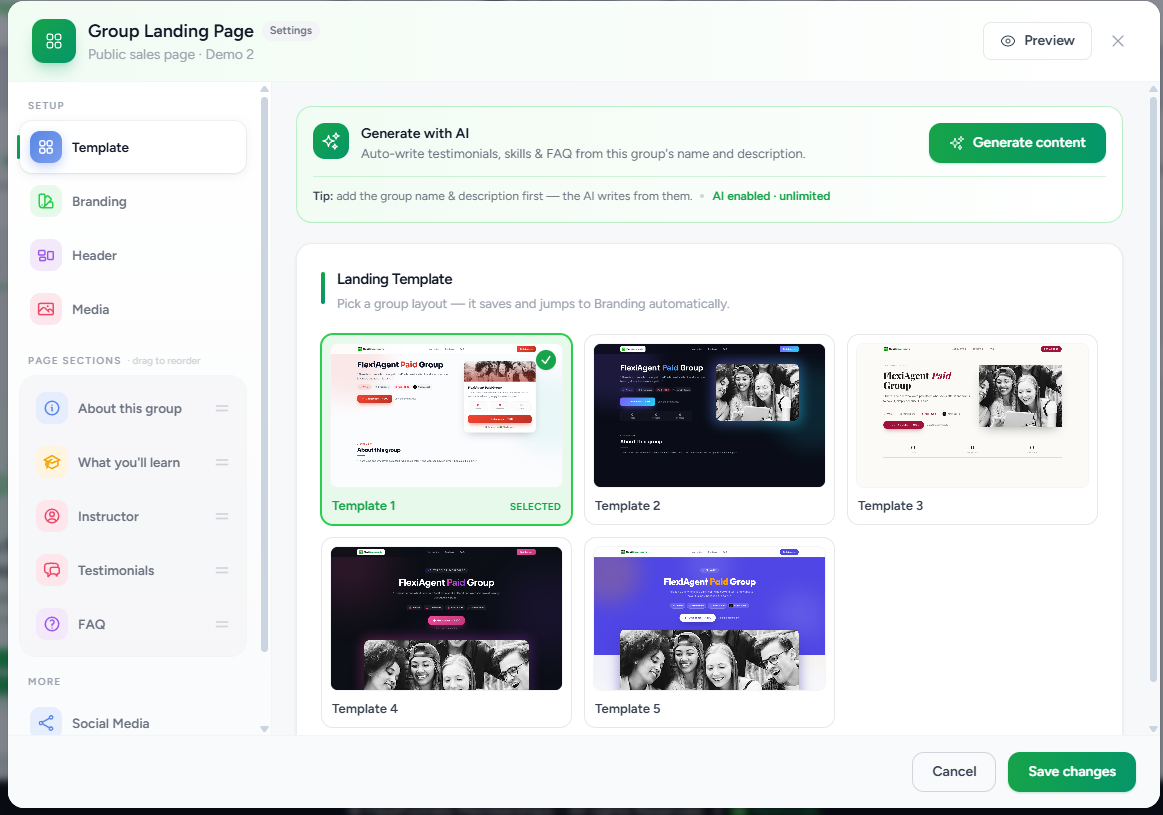
Flexi Membership includes built-in AI to help generate landing page content.
To generate content:
- Open the Landing Page Builder.
- Click Generate with AI.
- Review the generated content.
- Edit the content as needed.
- Save your changes.
The AI generates content based on your group's information, reducing the time required to build a professional landing page.
Tip: Review all AI-generated content before publishing to ensure it reflects your brand voice and accurately describes your community.
Template
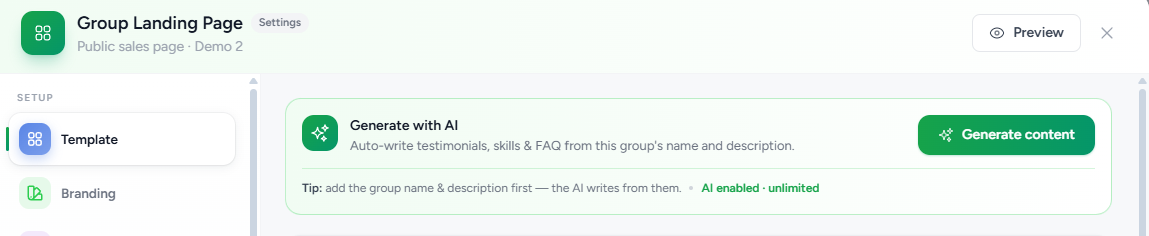
The Template section allows you to choose the overall design and layout of your Group Landing Page.
Flexi Membership provides multiple professionally designed templates that serve as the foundation for your landing page. Each template offers a different visual style while supporting the same core content sections.
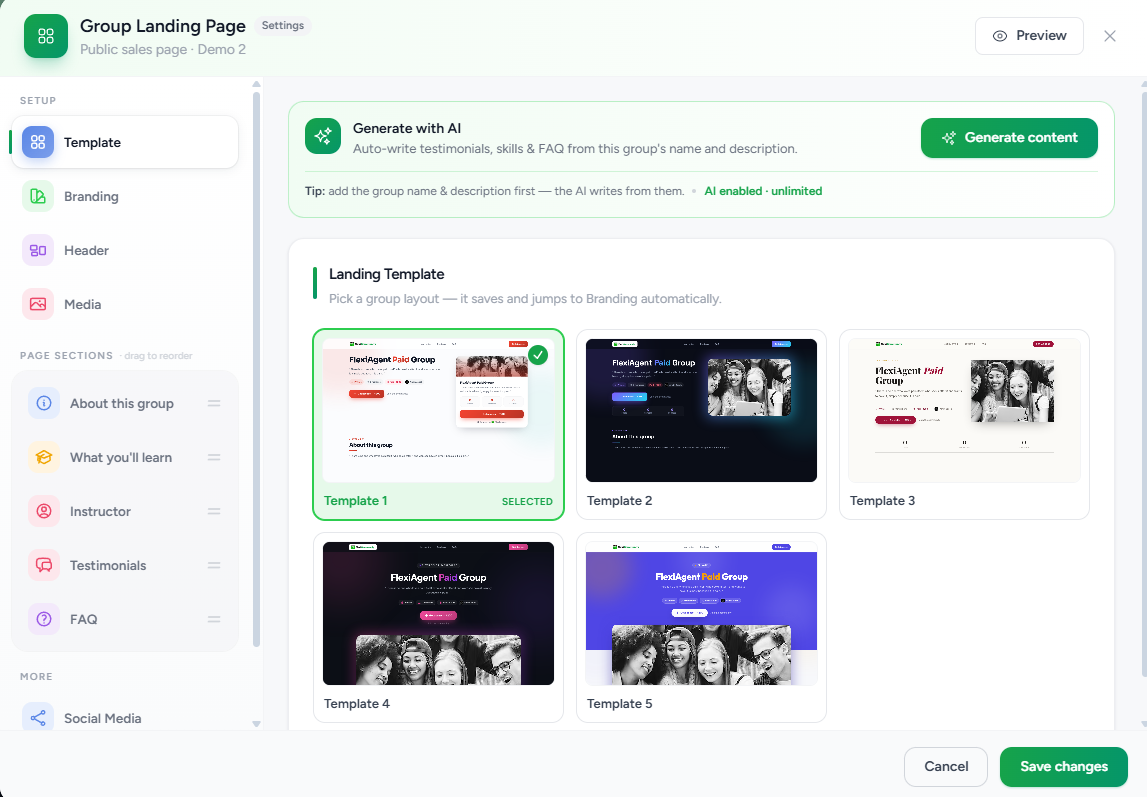
To select a template:
- Open the Template section.
- Browse the available layouts.
- Click the template you want to use.
- The selected template is automatically applied to your landing page.
You can switch templates at any time before publishing without affecting your content.
Tip: Choose a template that best reflects your brand identity and the type of community you're building.
Branding
The Branding section allows you to personalize the visual identity of your Group Landing Page.
From this section, you can configure your community's branding elements, such as:
- Brand colors
- Typography
- Buttons
- Visual styling
- Other available branding options
Maintaining consistent branding helps create a professional experience and ensures your landing page aligns with your organization's identity.
After making your changes, save the settings to apply the updated branding across the landing page.
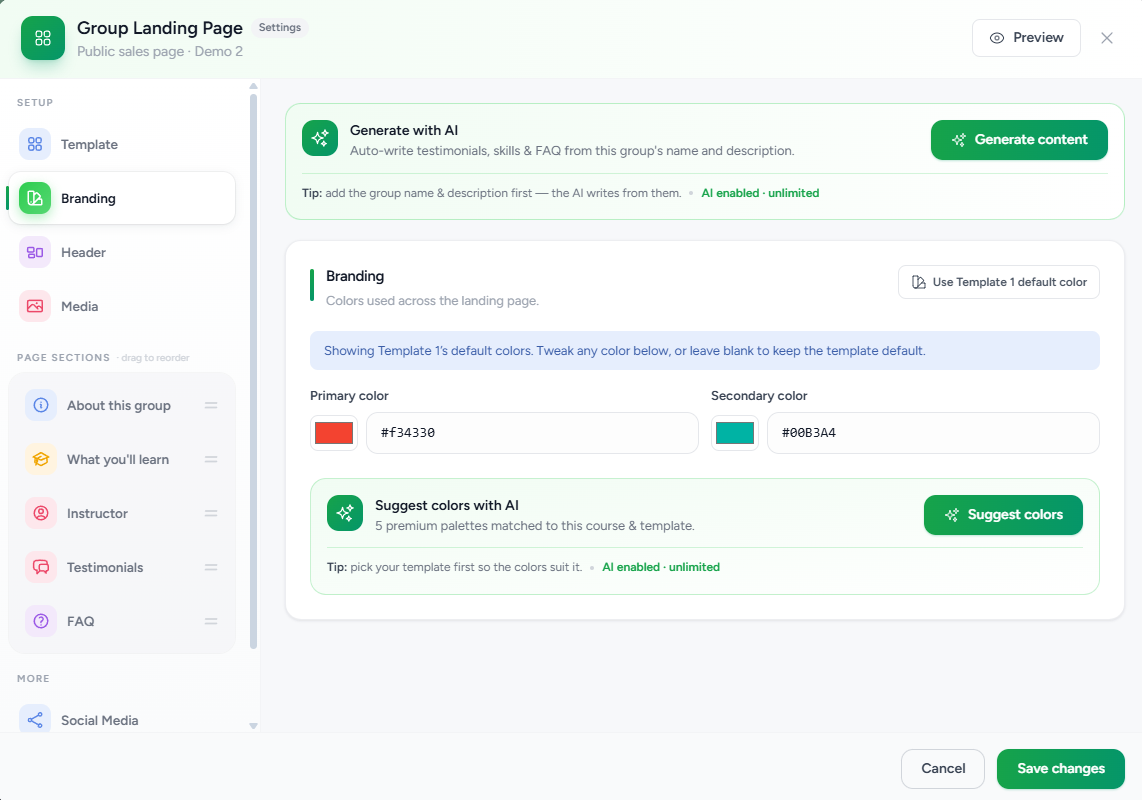
Note: The available branding options may vary depending on the selected landing page template.
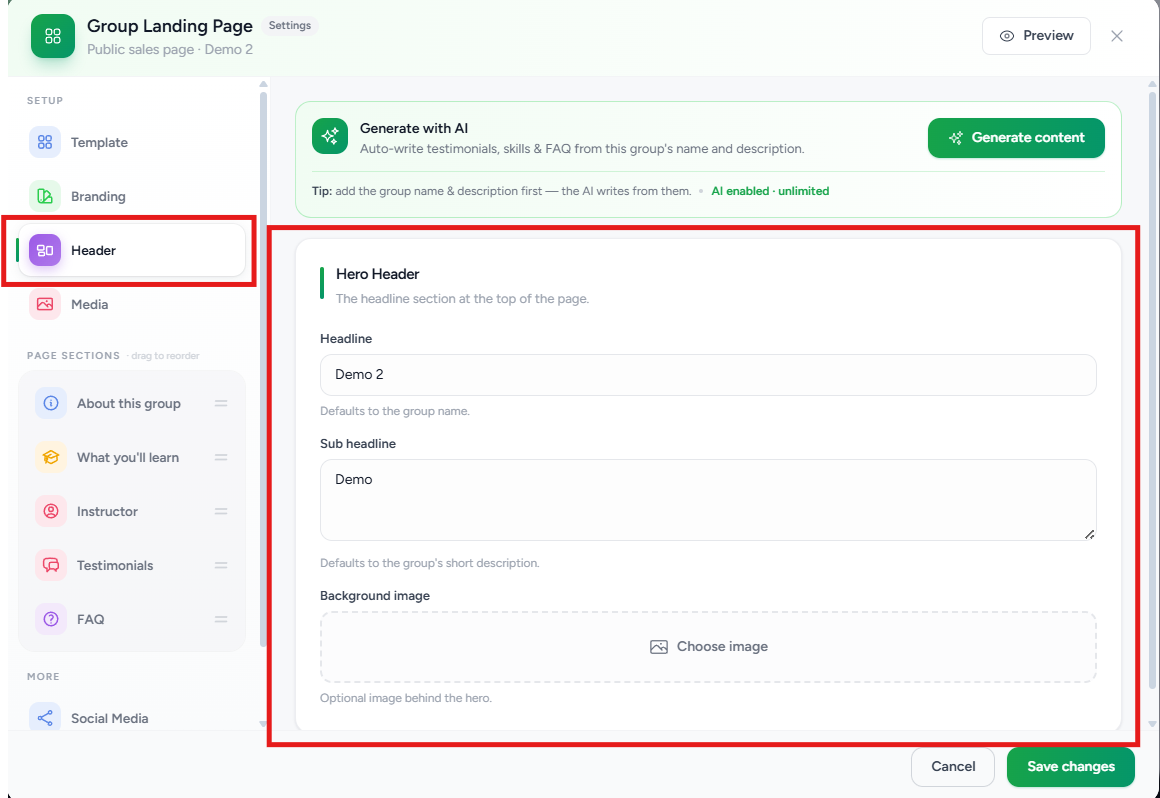
Header
The Header section controls the appearance of the top portion of your Group Landing Page.
From this section, you can customize the information displayed in the page header, including items such as:
- Group title
- Headline
- Navigation elements
- Call-to-action buttons
- Other header-specific content
A well-designed header helps visitors immediately understand the purpose of your community and encourages them to take action.
Review the header in the preview before publishing to ensure all information is displayed correctly.
Media
The Media section allows you to build and manage the Header Media Carousel displayed on your Group Landing Page.
The media carousel helps create a visually engaging first impression by showcasing images and videos at the top of your landing page.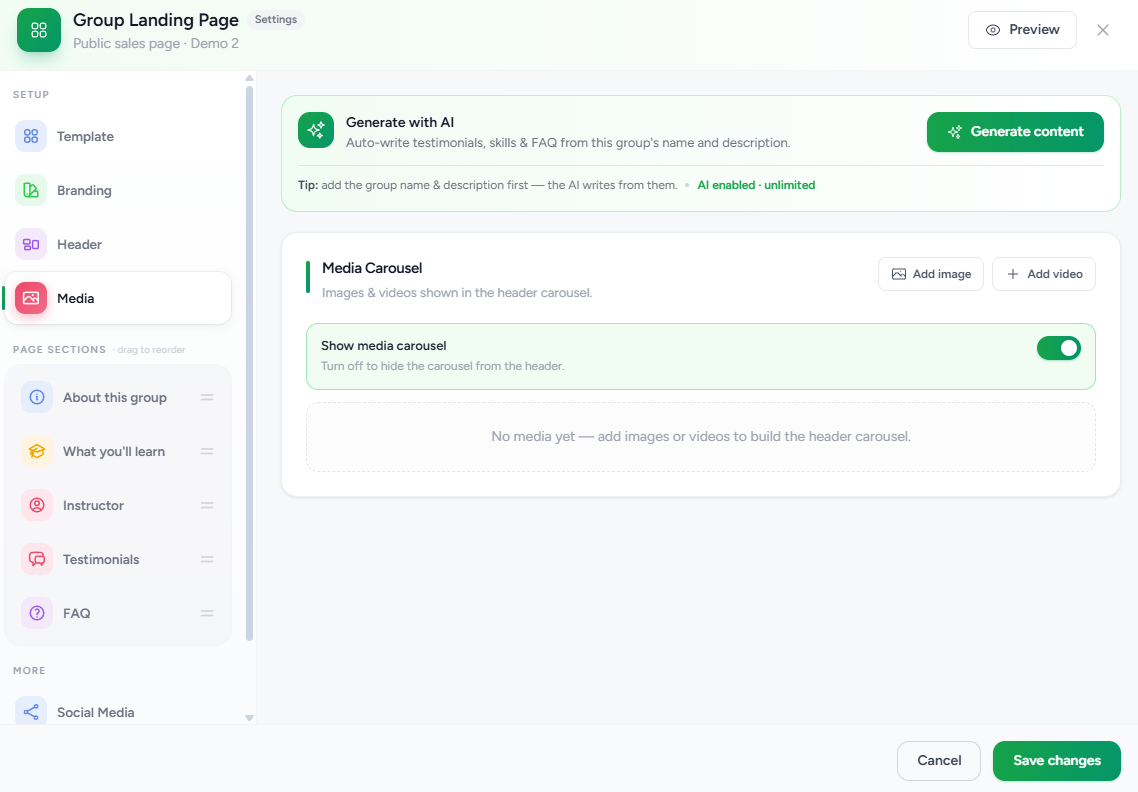
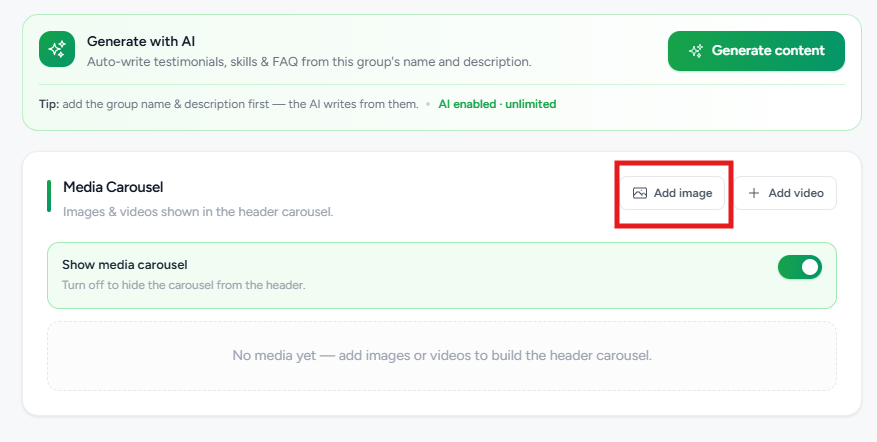
Adding Images
To add images to the carousel:
- Open the Media section.
- Click Add Image.
- Select an image from your media library or upload a new one.
- Save your changes.
The selected image is added to the header carousel and is displayed to visitors when they open the landing page.
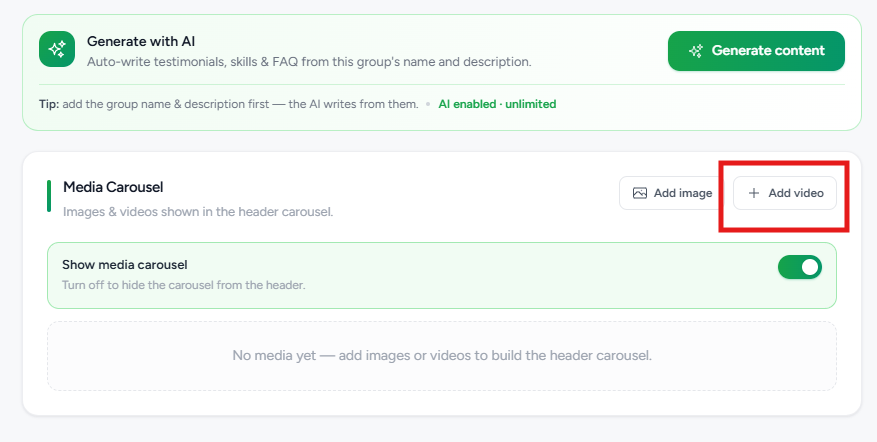
Adding Videos
You can also include videos in the header carousel.
To add a video:
- Click Add Video.
- Select or upload the desired video.
- Save your changes.
Videos can help introduce your community, explain its purpose, or promote upcoming events.
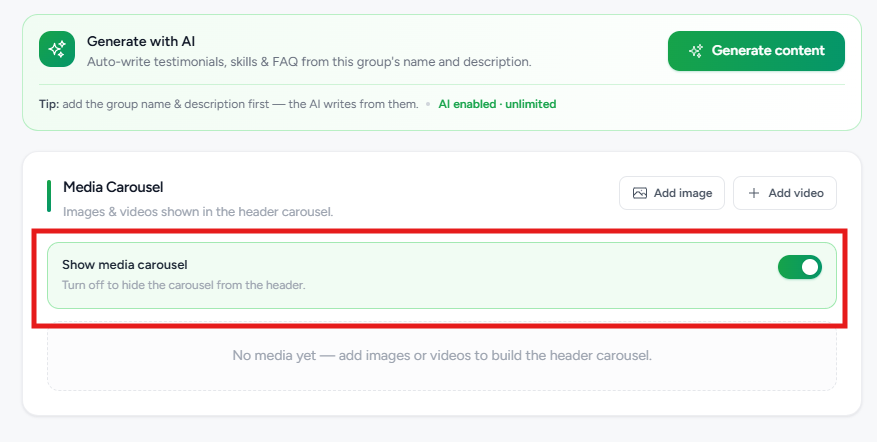
 Show Media Carousel
Use the Show Media Carousel toggle to control whether the carousel is displayed on the landing page.
- Enabled – Images and videos are displayed in the landing page header.
- Disabled – The header carousel is hidden from visitors.
If no media has been added, the carousel remains empty until images or videos are uploaded.
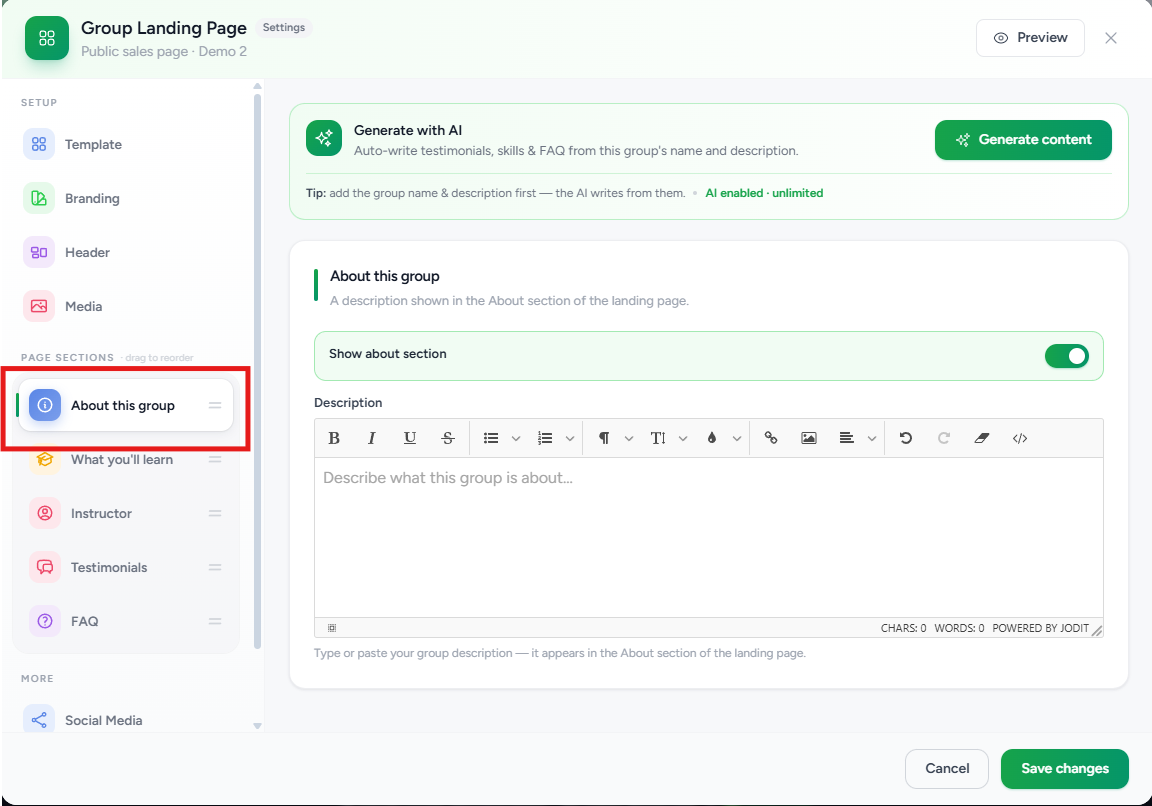
Configure the About Section
Use the About section to introduce your community.
Include information such as:
- What the community is about.
- Who it is designed for.
- What members can expect after joining.
- The overall purpose of the group.
This section helps visitors understand whether the community aligns with their interests.
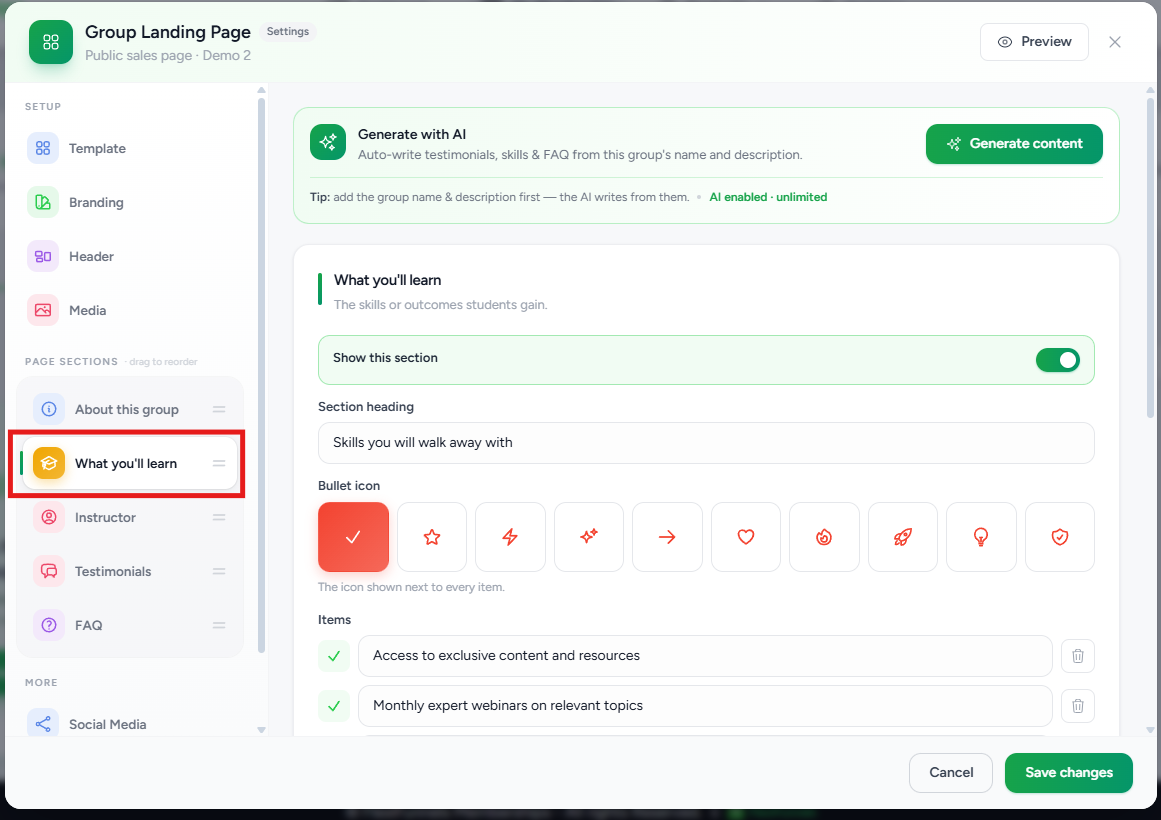
What You'll Learn
The What You'll Learn section allows you to showcase the key benefits members will receive by joining your group.
Examples include:
- Participate in expert discussions.
- Connect with like-minded members.
- Access exclusive community resources.
- Join live events and Q&A sessions.
- Receive ongoing support.
Use concise, benefit-focused statements that clearly communicate the value of membership.
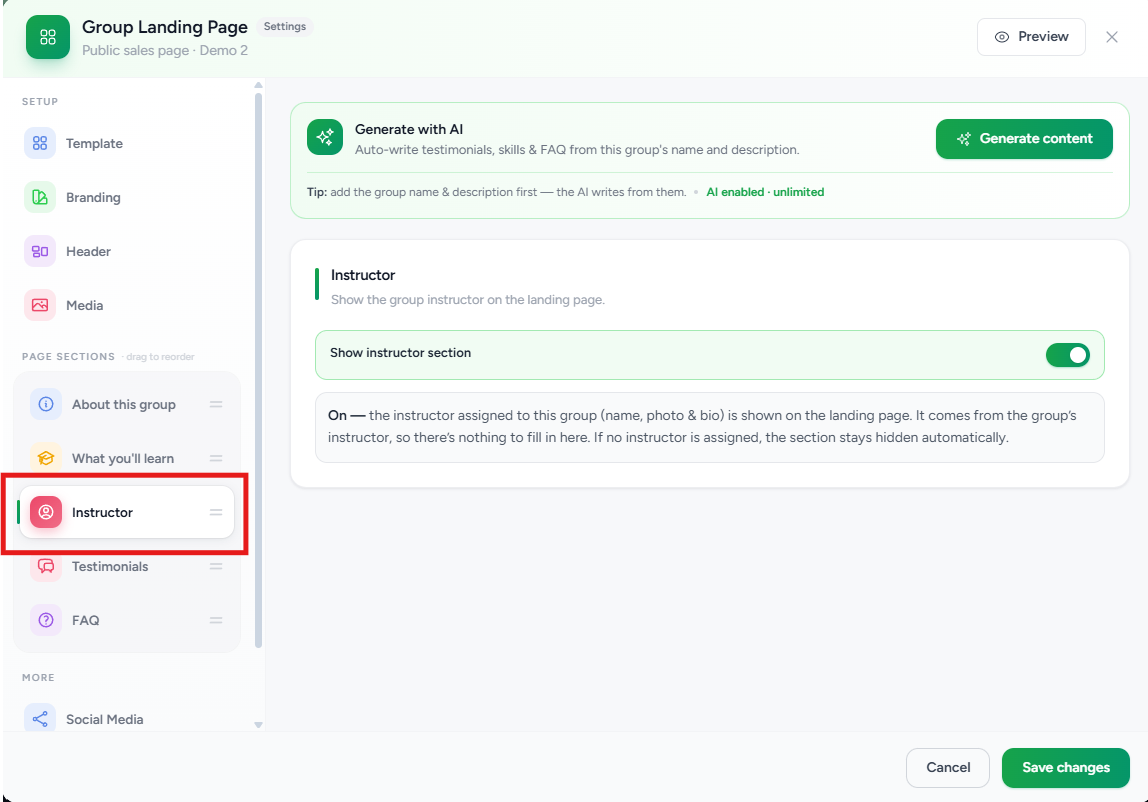
Add Instructor Information
Introduce the people leading your community.
Displaying instructor information helps build trust and credibility with prospective members.
Note: The instructor assigned to this group (name, photo & bio) is shown on the landing page. It comes from the group’s instructor, so there’s nothing to fill in here. If no instructor is assigned, the section stays hidden automatically.
Showcase Testimonials
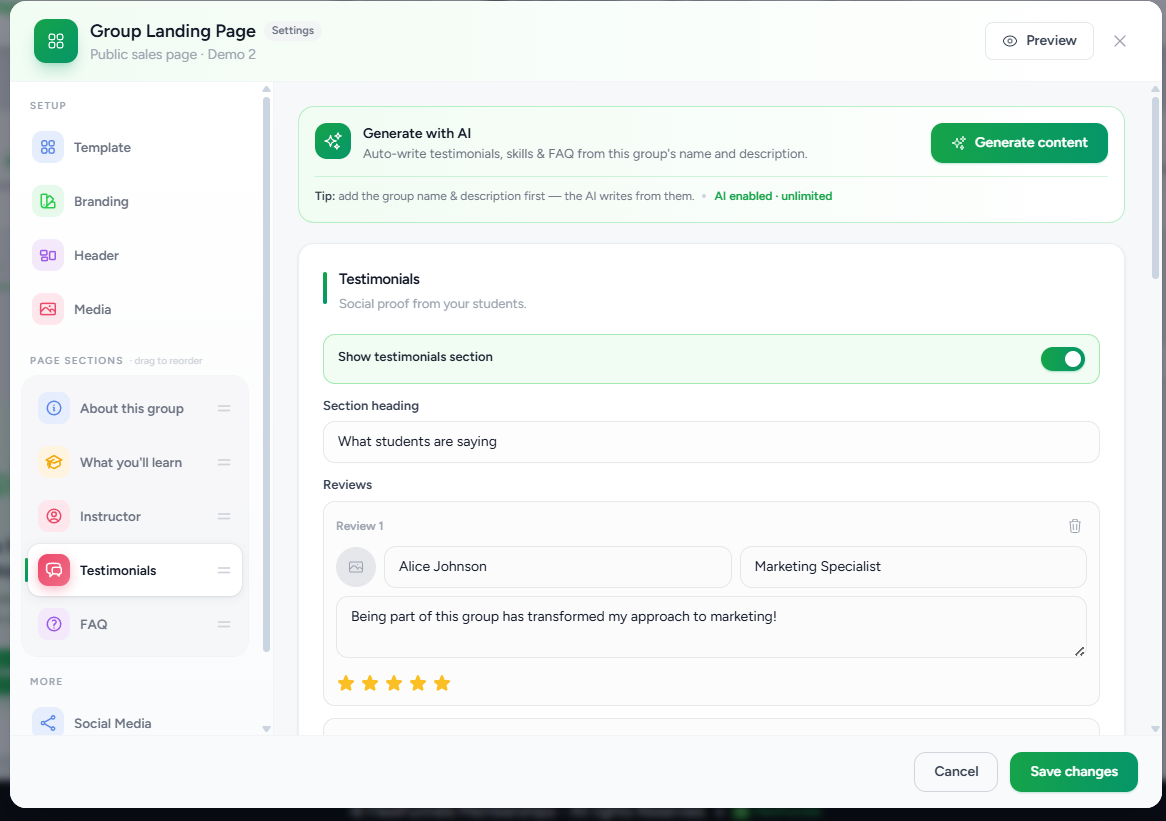
Testimonials provide social proof by highlighting positive experiences from existing members.
For each testimonial, you can add:
- Member Name
- Designation (optional)
- Profile Image
- Testimonial Text
Well-written testimonials increase visitor confidence and improve conversion rates.
Add Frequently Asked Questions (FAQs)
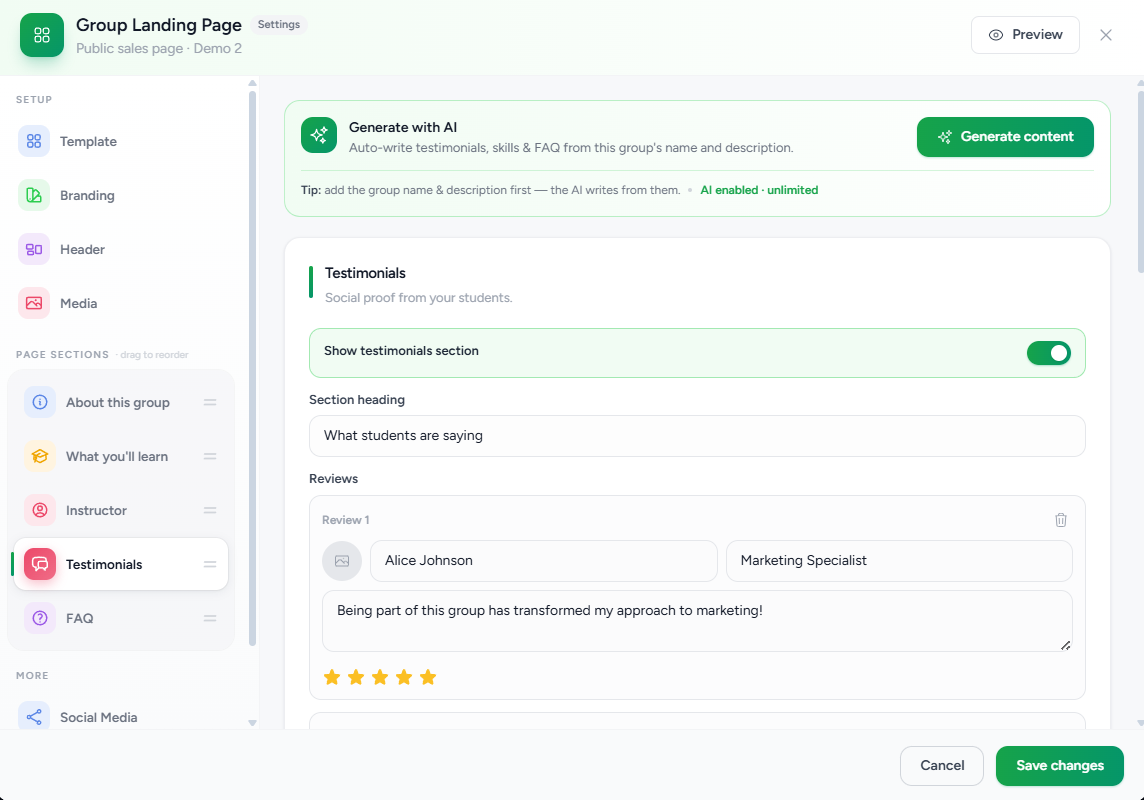
Use the FAQ section to answer common questions before visitors join your community.
Examples include:
- Who is this community for?
- Is the group free or paid?
- How do I join?
- Can I leave the community at any time?
- What kind of content is shared?
Addressing common concerns helps reduce friction during the decision-making process.
Add Social Media Links
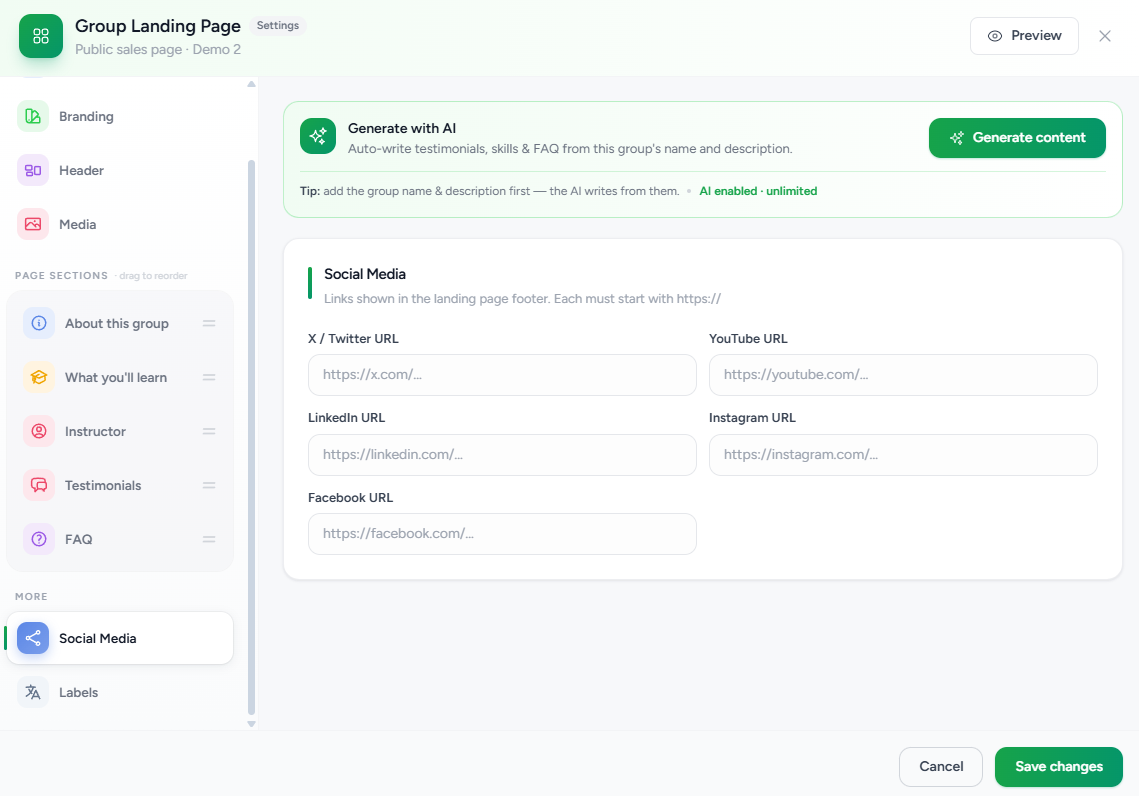
Connect your external social media profiles so visitors can learn more about your brand.
You can include links to platforms such as:
- YouTube
- X (Twitter)
- Other supported platforms
Social media links help strengthen your brand presence beyond the community.
Publishing the Landing Page
Once you're satisfied with the design:
- Review all sections.
- Save your changes.
- Publish the landing page.
Your Group Landing Page is now ready to be shared with prospective members.
Best Practices
- Use a clear and compelling headline.
- Keep descriptions concise and benefit-focused.
- Add a professional banner image.
- Highlight the primary benefits of joining.
- Include real testimonials whenever possible.
- Regularly review and update your content.
- Optimize SEO settings before publishing.
Frequently Asked Questions
Can I edit the landing page after publishing?
Yes. You can update any section of the landing page at any time.
Do I need to use AI-generated content?
No. AI-generated content is optional. You can manually write and customize every section.
Can I preview the landing page before publishing?
Yes. Always preview the page to ensure everything appears correctly before publishing.
Is the landing page separate from the FlexiFunnels Editor?
Yes. The Group Landing Page can be designed directly within Flexi Membership, allowing you to create and manage your community page without using the FlexiFunnels Editor.
Was this article helpful?
That’s Great!
Thank you for your feedback
Sorry! We couldn't be helpful
Thank you for your feedback
Feedback sent
We appreciate your effort and will try to fix the article