The Landing Page feature in FlexiMemberships enables you to create and customize professional Sales Pages, Checkout Pages, and Thank-you Pages directly from your membership product.
Unlike manually creating every page from scratch, FlexiMemberships uses the information from your product configuration—such as the assigned Bundle or Group—to generate conversion-focused pages that can be customized before publishing.
This article explains how to create, customize, and publish all three page types.
Before You Begin
Before creating landing pages, make sure:
- A membership product has already been created.
- The After Purchase configuration is completed.
- Course Products must have at least one Bundle assigned.
- Group Products must have a Group assigned.
Important
The AI Landing Page Builder uses the assigned Bundle or Group to understand what content the customer will receive. Without completing the After Purchase step, landing pages cannot be generated correctly.
Accessing the Landing Page Builder
To open the Landing Page Builder:
- Navigate to Products.
- Open the product you want to configure.
- Select Landing Page from the left sidebar.
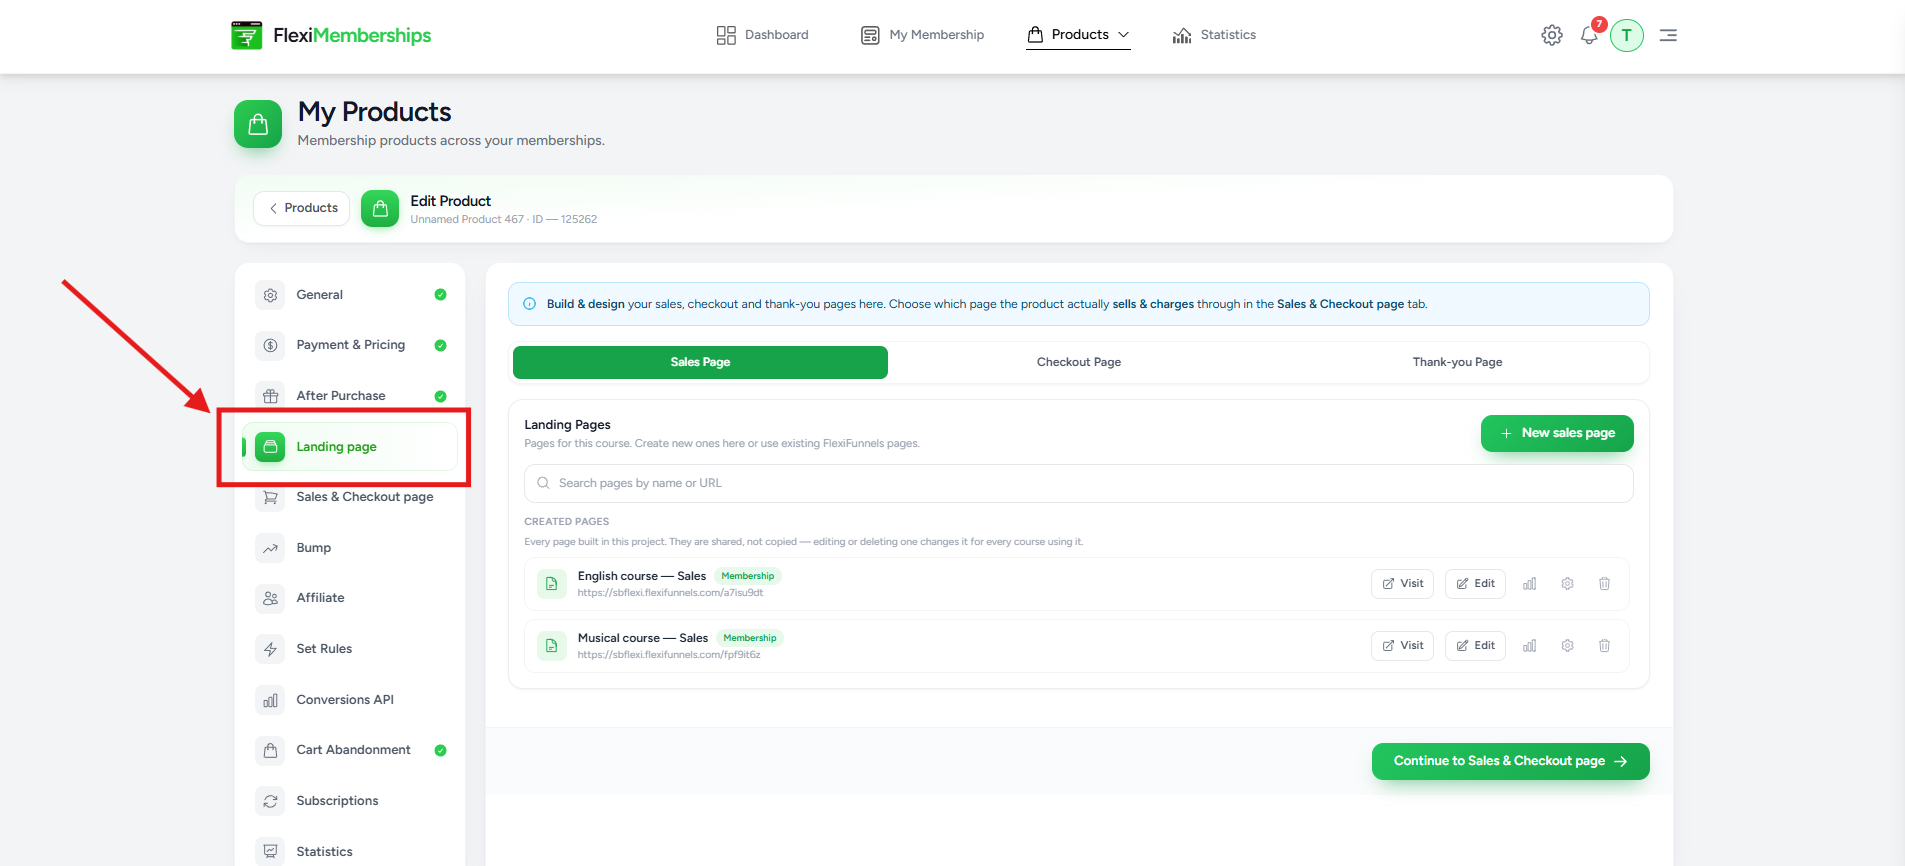
The Landing Page section is divided into three tabs:
- Sales Page
- Checkout Page
- Thank-you Page
Each page type can be created, edited, previewed, and published independently.
Landing Page Overview
The Landing Page section allows you to:
- Create multiple Sales Pages
- Create multiple Checkout Pages
- Manage Thank-you Pages
- Search existing pages
- Preview pages
- Visit live pages
- Edit page designs
- Publish page updates
Creating a Sales Page
The Sales Page introduces your membership offer and helps visitors understand its value before purchasing.
Step 1: Create a New Sales Page
- Open the Sales Page tab.
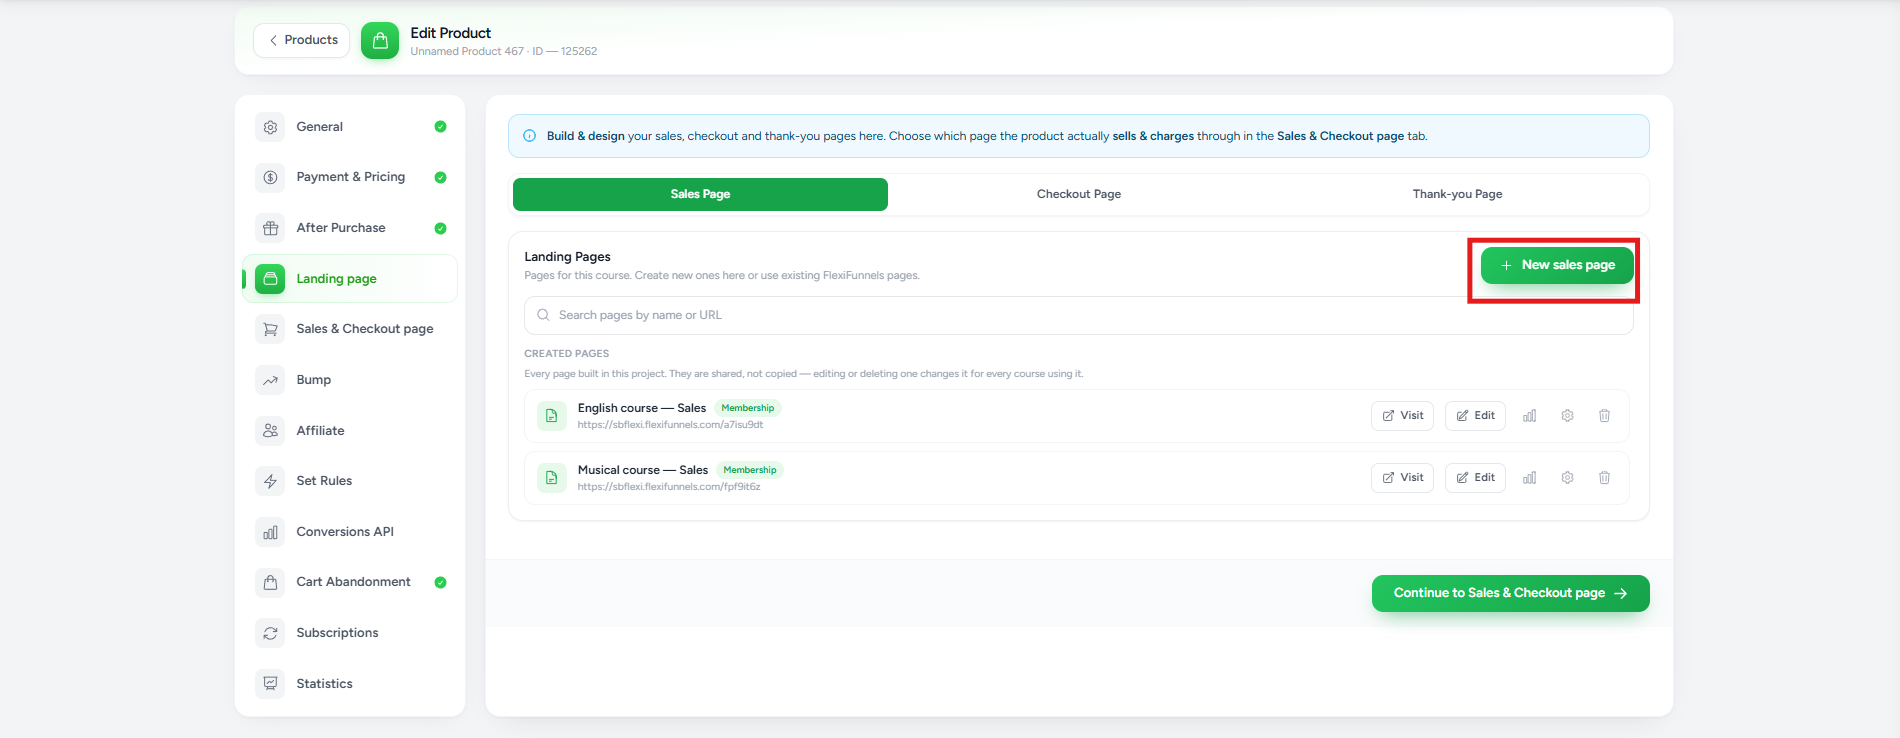
- Click New Sales Page.
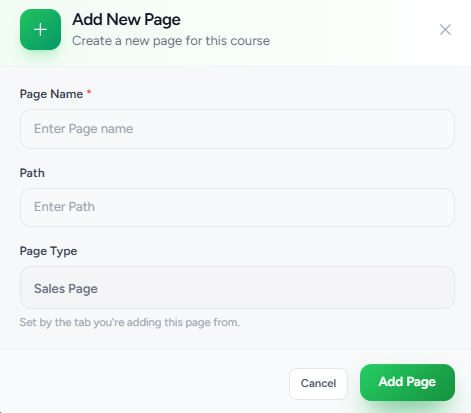
A dialog appears asking for:
- Page Name
- Path
- Page Type (automatically set to Sales Page)
After entering the required information, click Add Page.
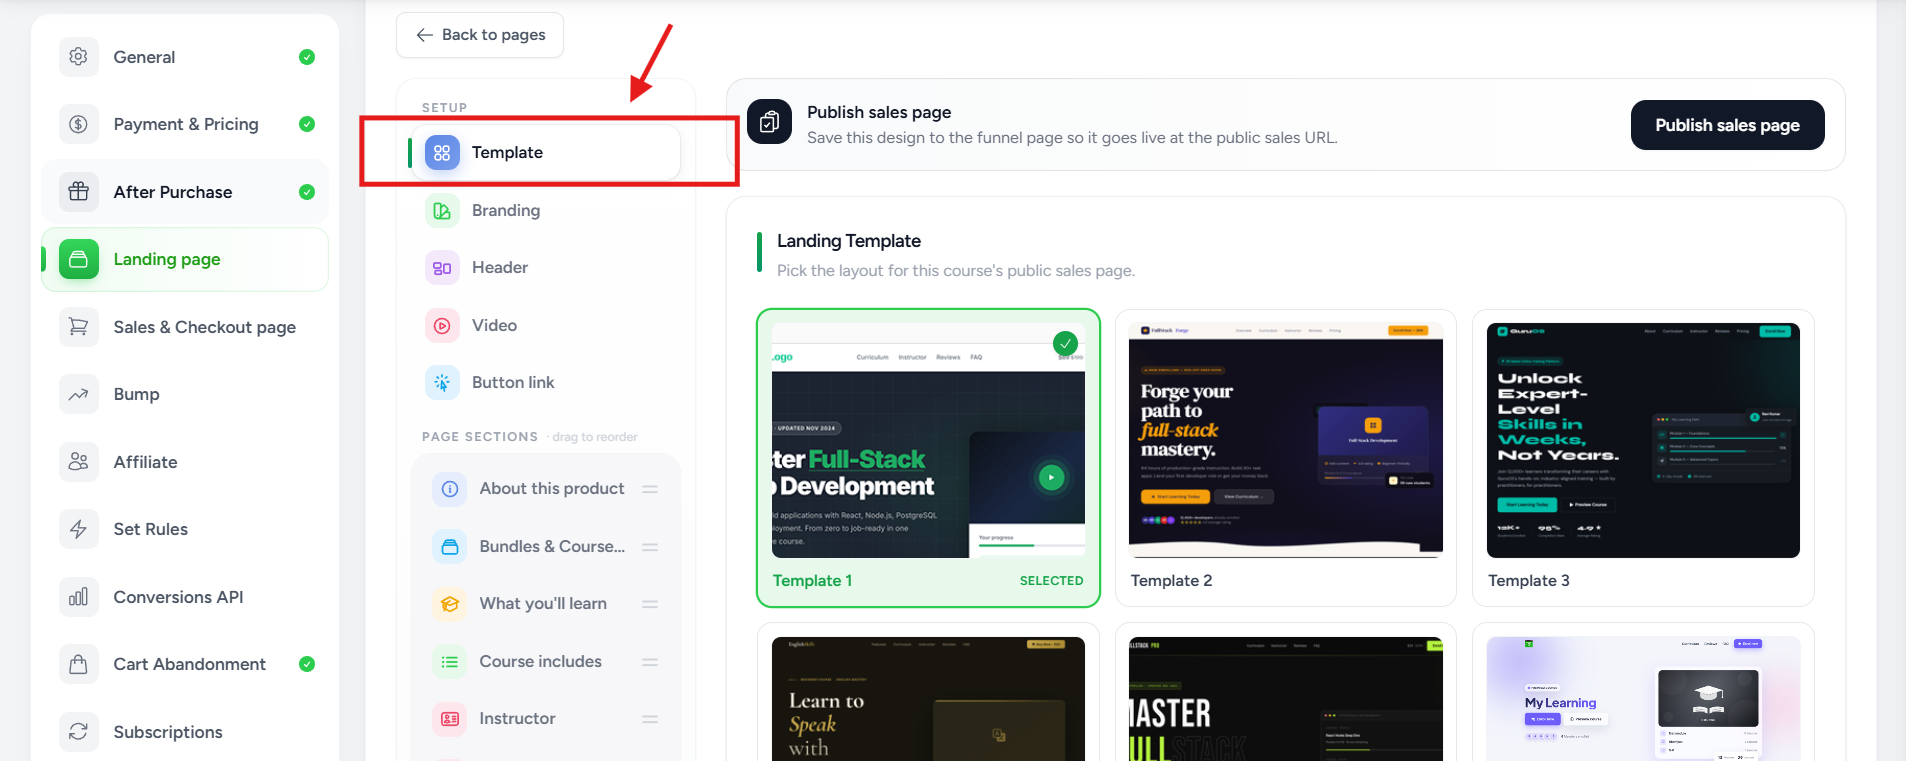
Step 2: Choose a Template
After the page is created, you'll enter the Sales Page Builder.
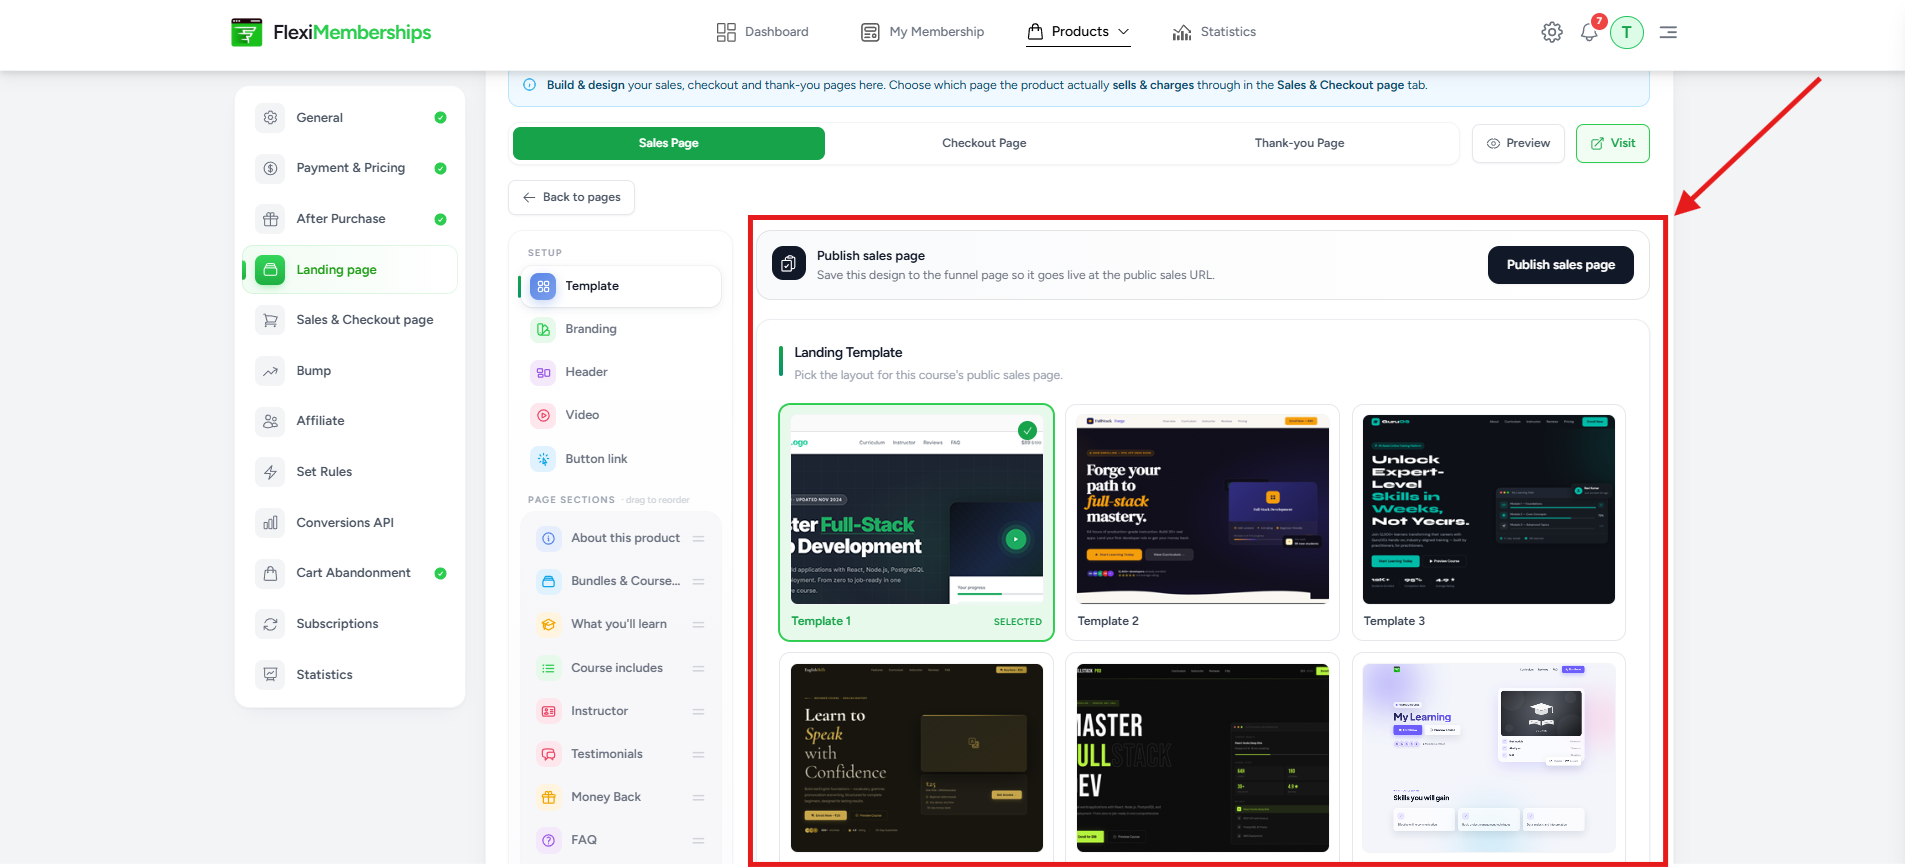
Choose one of the available landing page templates.
Each template includes a professionally designed layout optimized for selling membership products.
Step 3: Customize the Sales Page
The builder allows you to customize multiple sections.
Template
Select the overall page layout.
Changing the template updates the visual structure while keeping your product content intact.
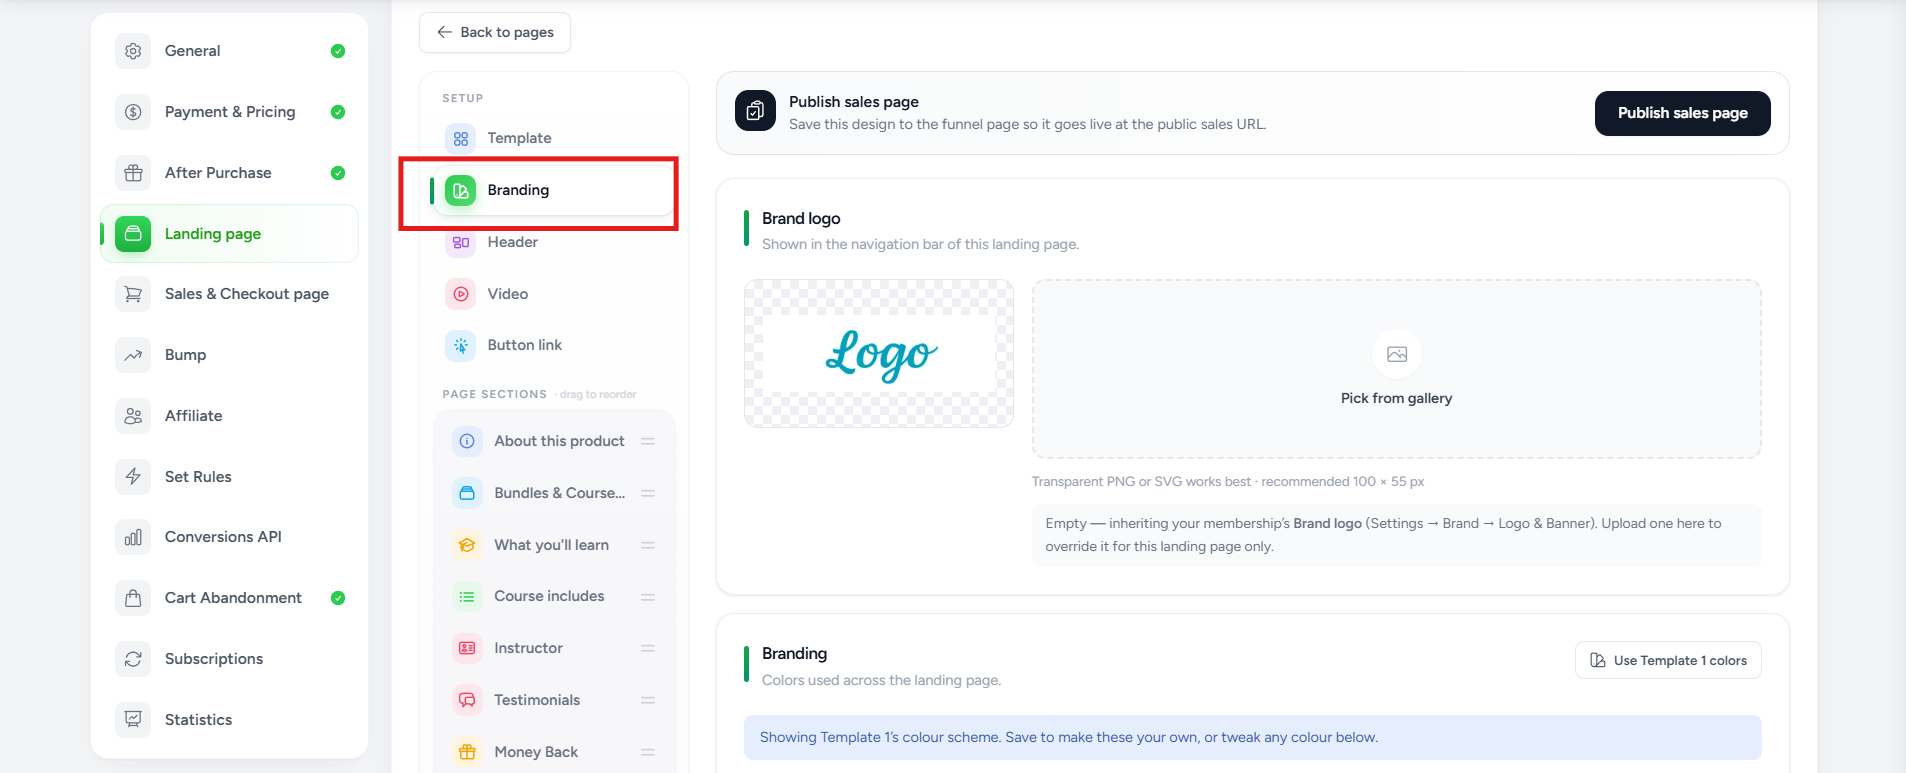
Branding
Customize your brand identity, including colors and visual styling to match your business.
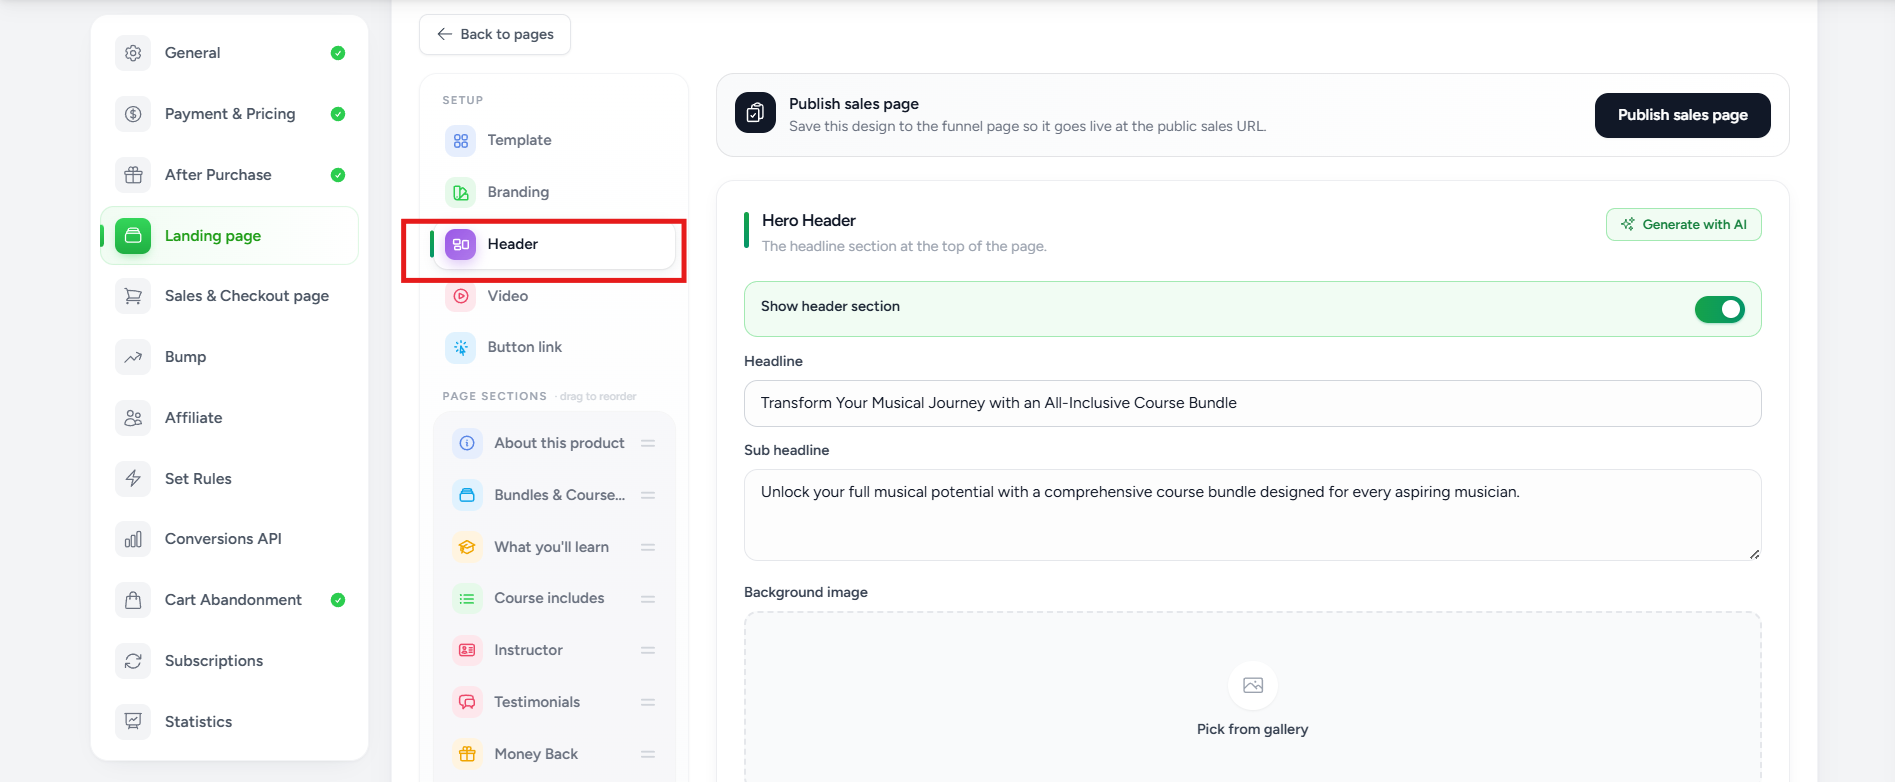
Header
Modify the page headline, navigation, and introductory section.
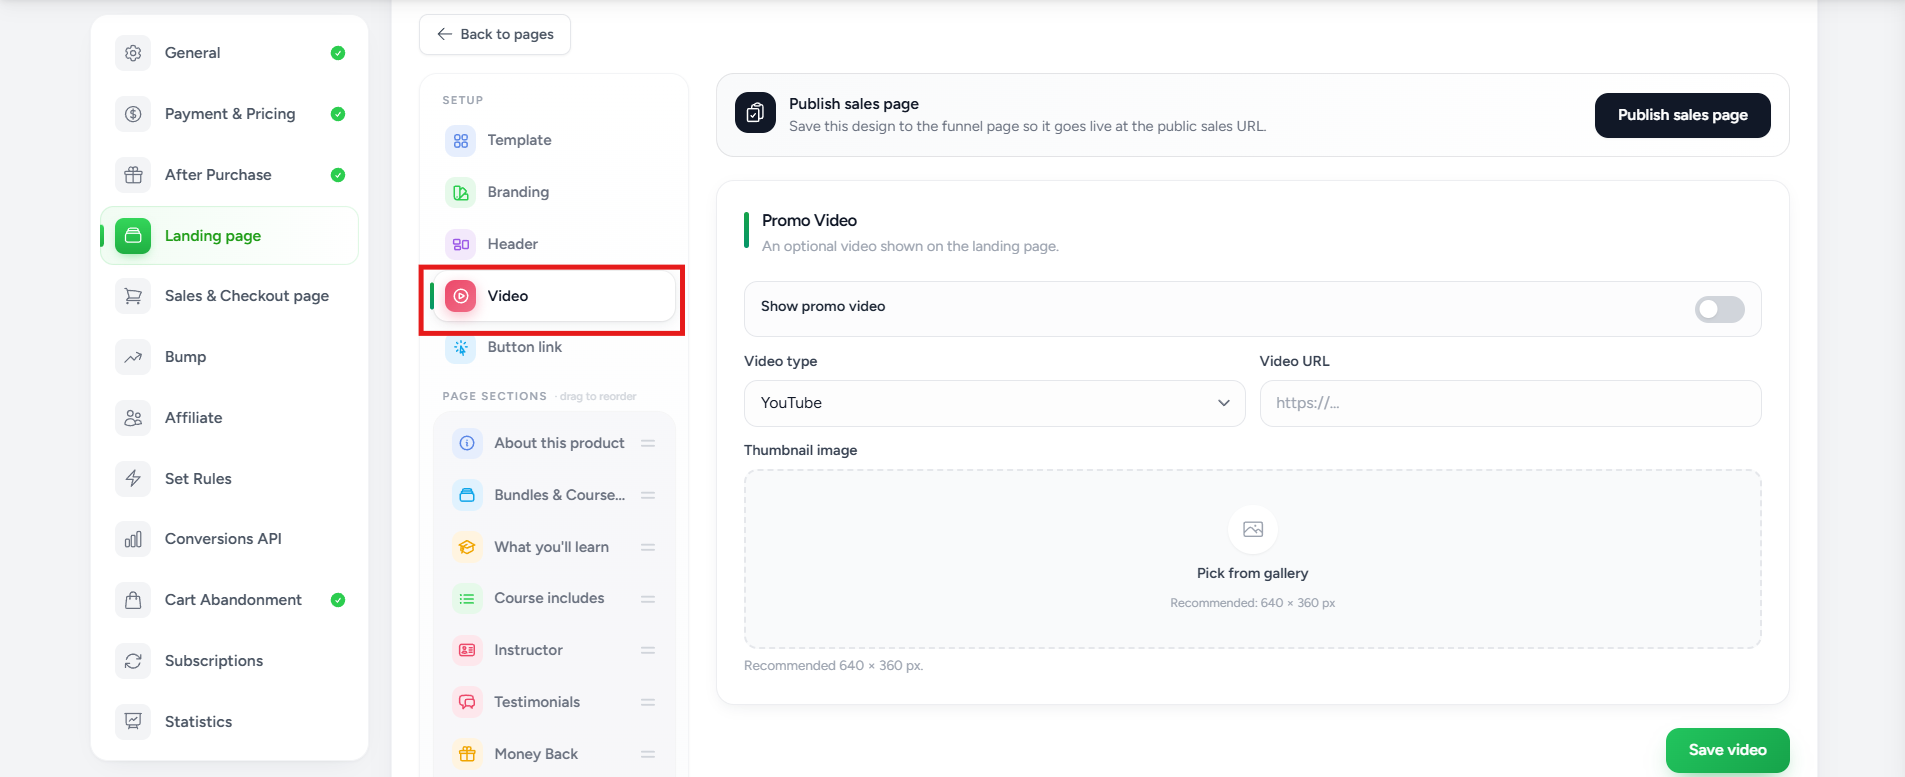
Video
Add a promotional or course introduction video.
This section helps explain your offer visually.
Button Link
Configure the primary call-to-action button.
Typically, this button directs visitors to the product's Checkout Page.
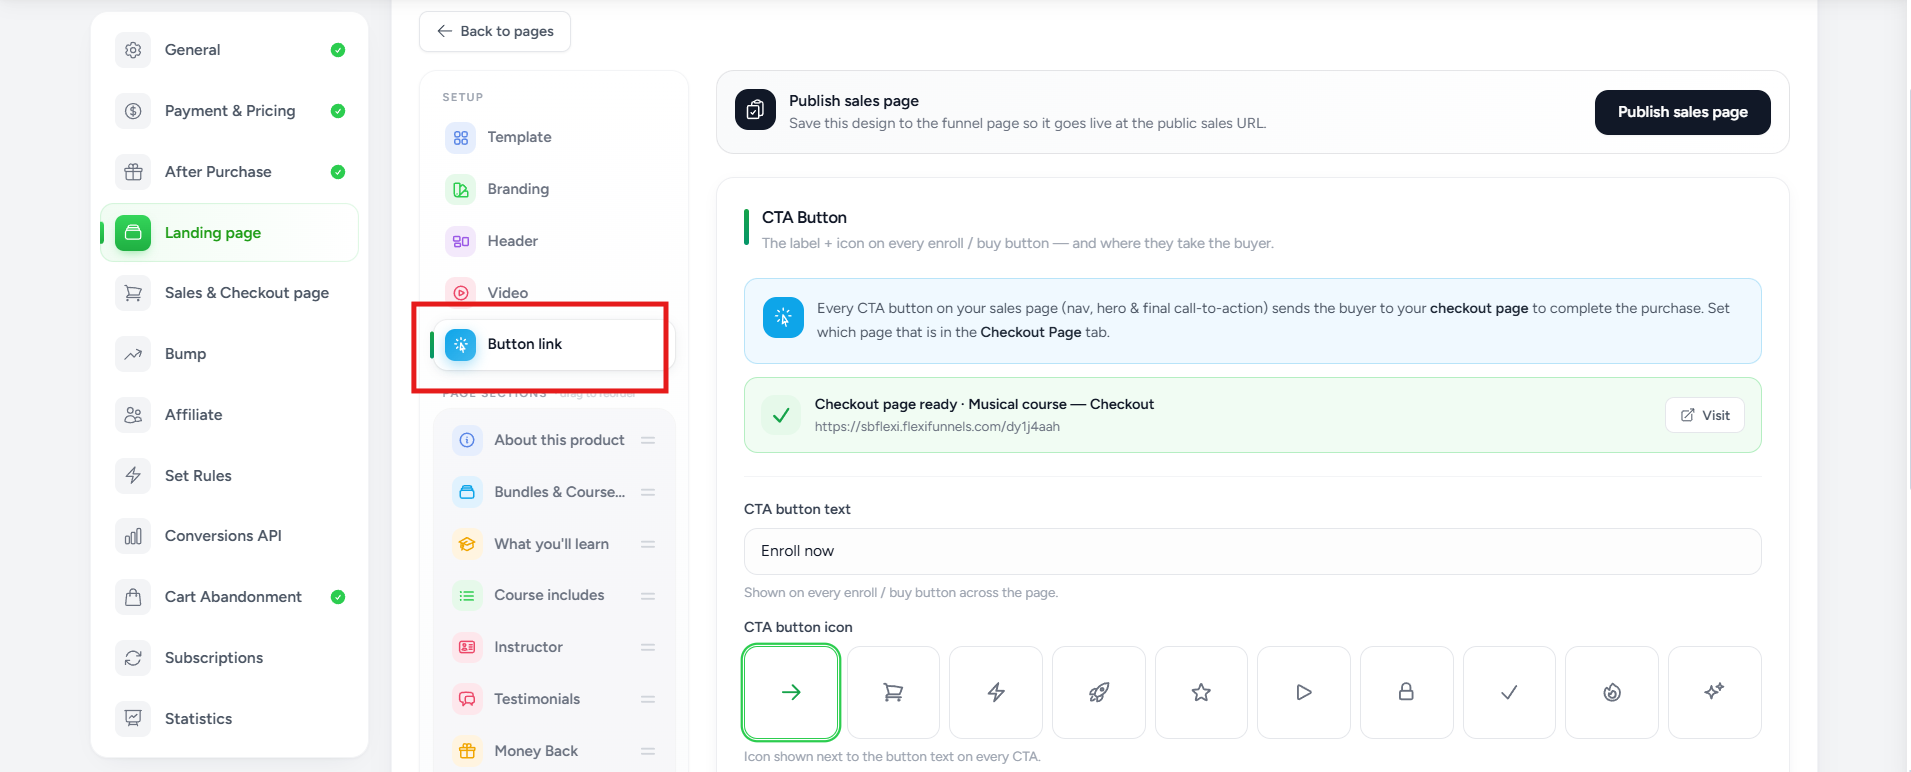
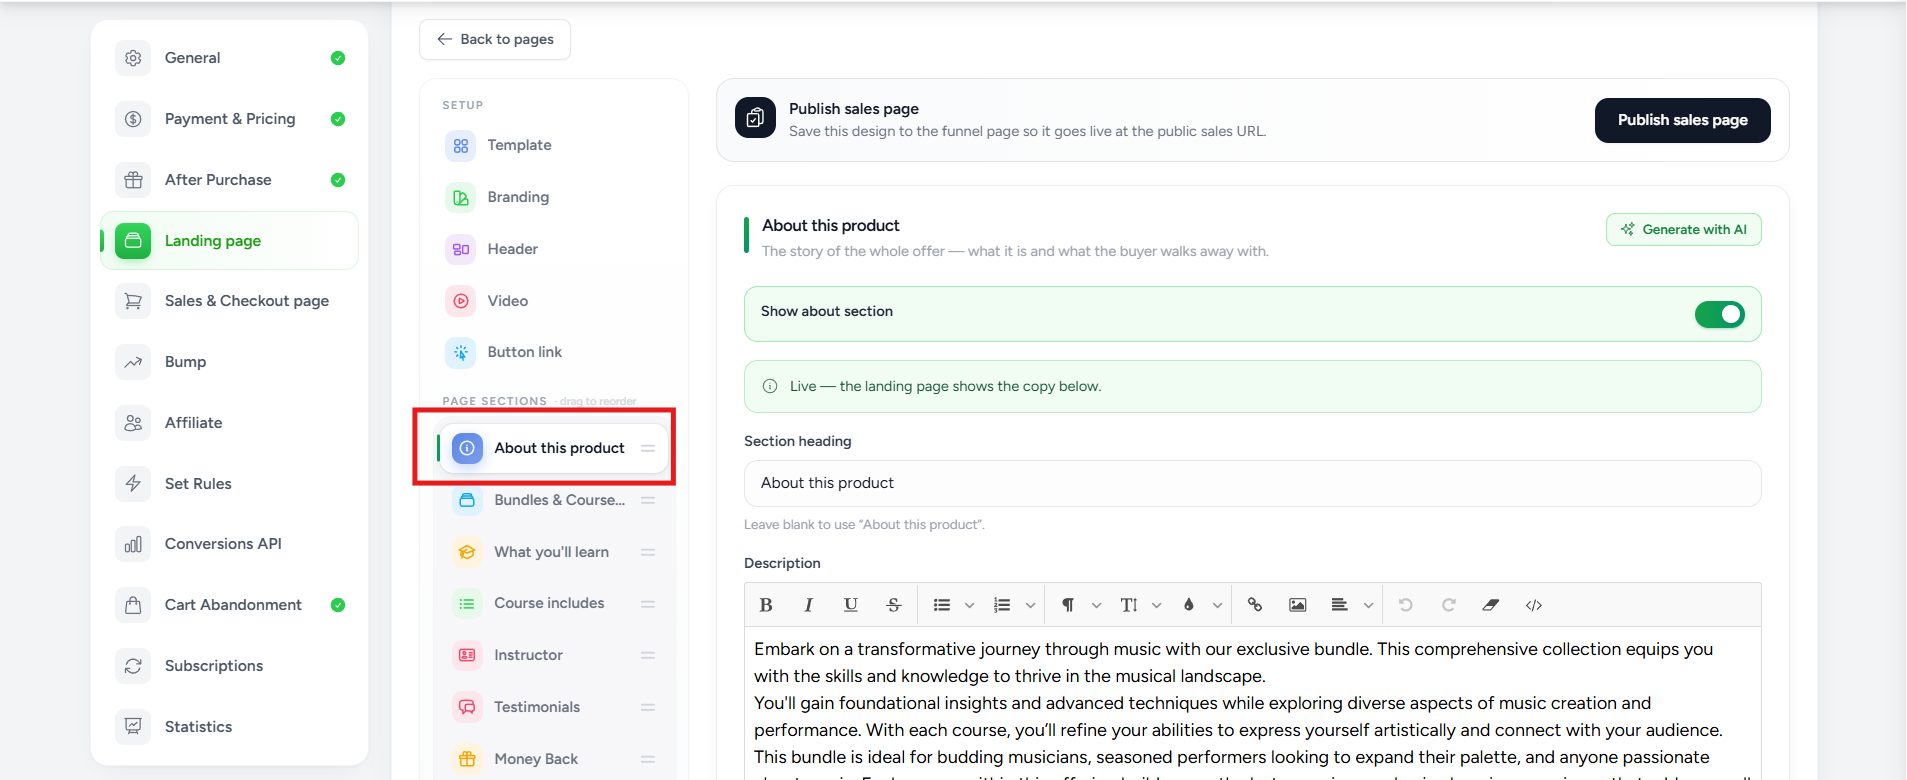
About This Product
Describe what customers receive after purchasing.
This section is generated using your product information and can be edited.
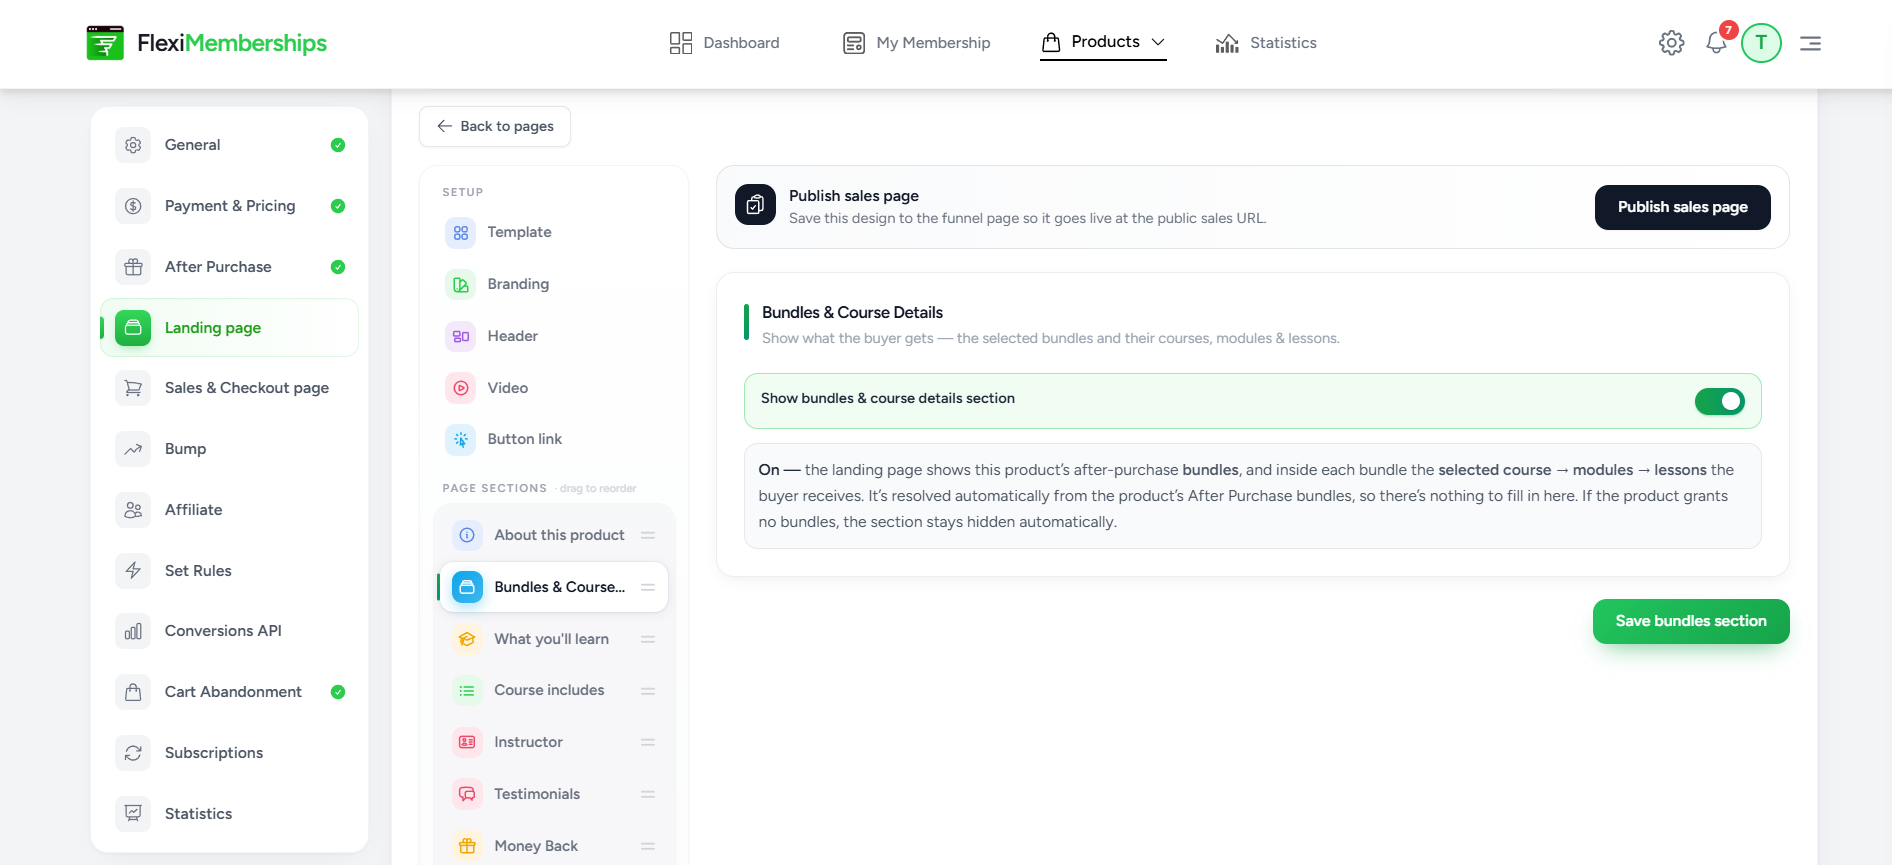
Bundles & Course Content
Display the bundles, modules, lessons, or learning materials included with the purchase.
This section is automatically generated from the assigned Bundle.
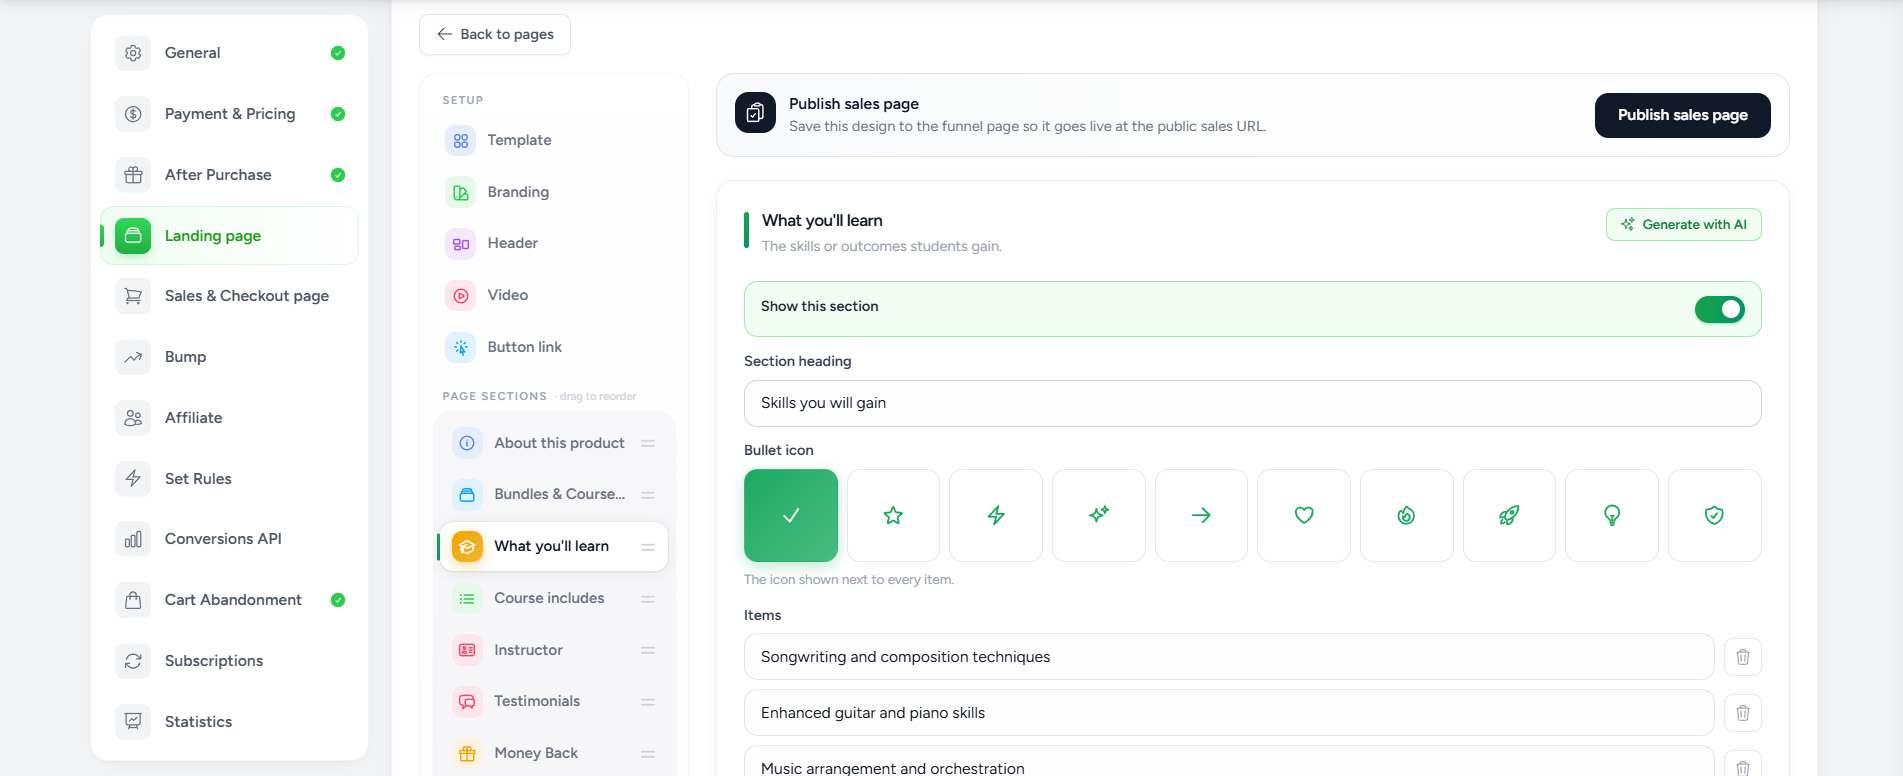
What You'll Learn
Highlight the learning outcomes or key benefits customers can expect.
Course Includes
Show everything included with the purchase, such as:
- Lessons
- Modules
- Downloads
- Resources
- Bonuses
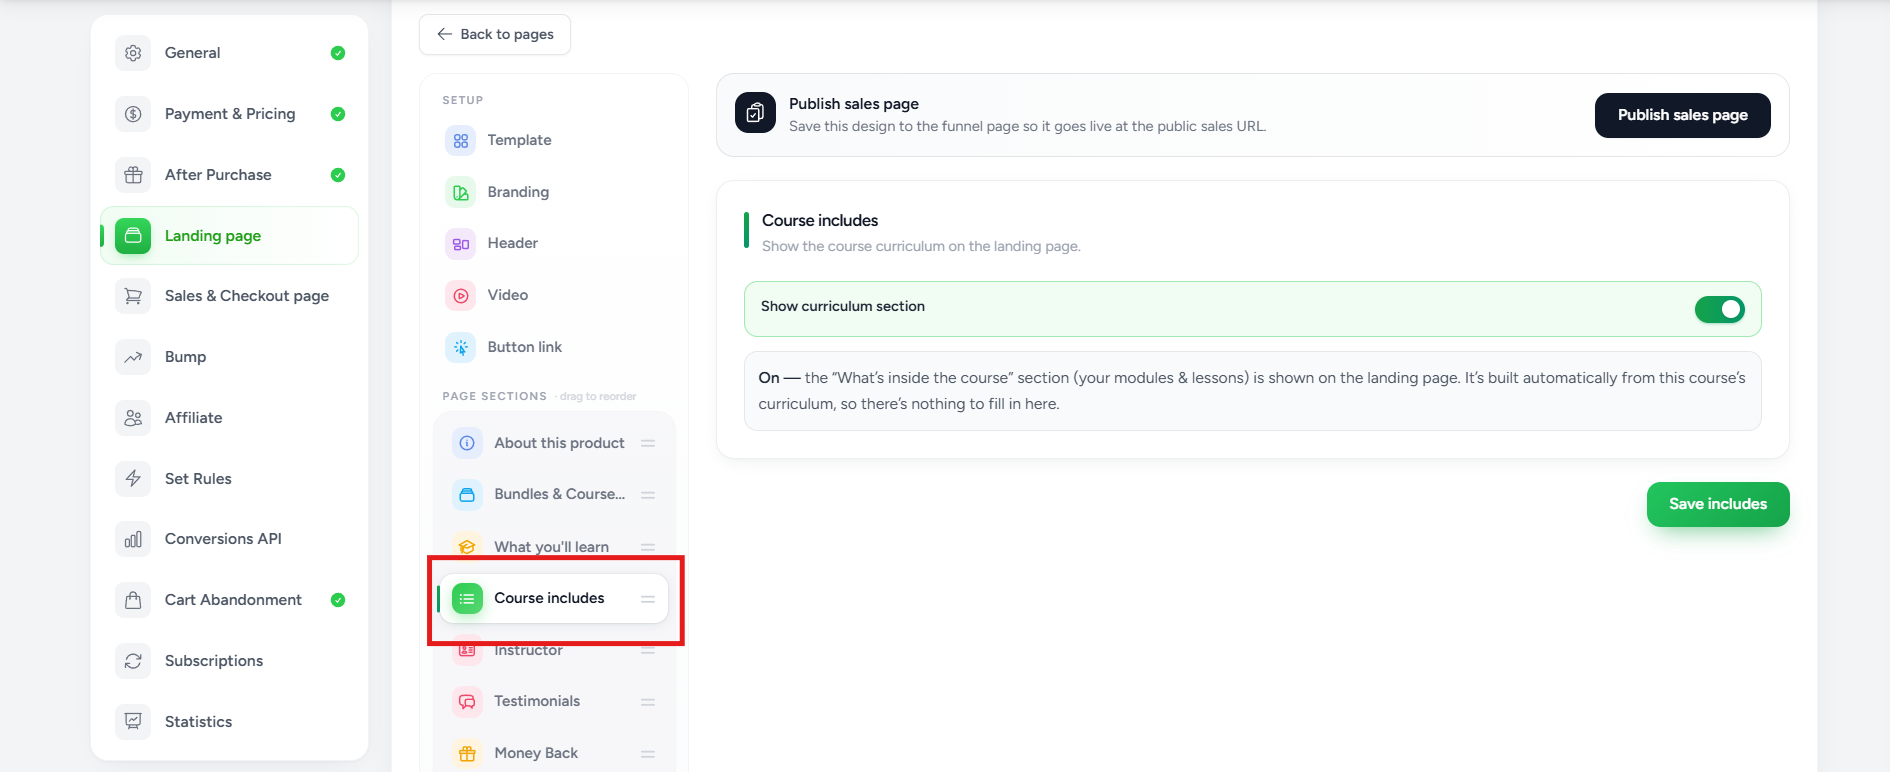
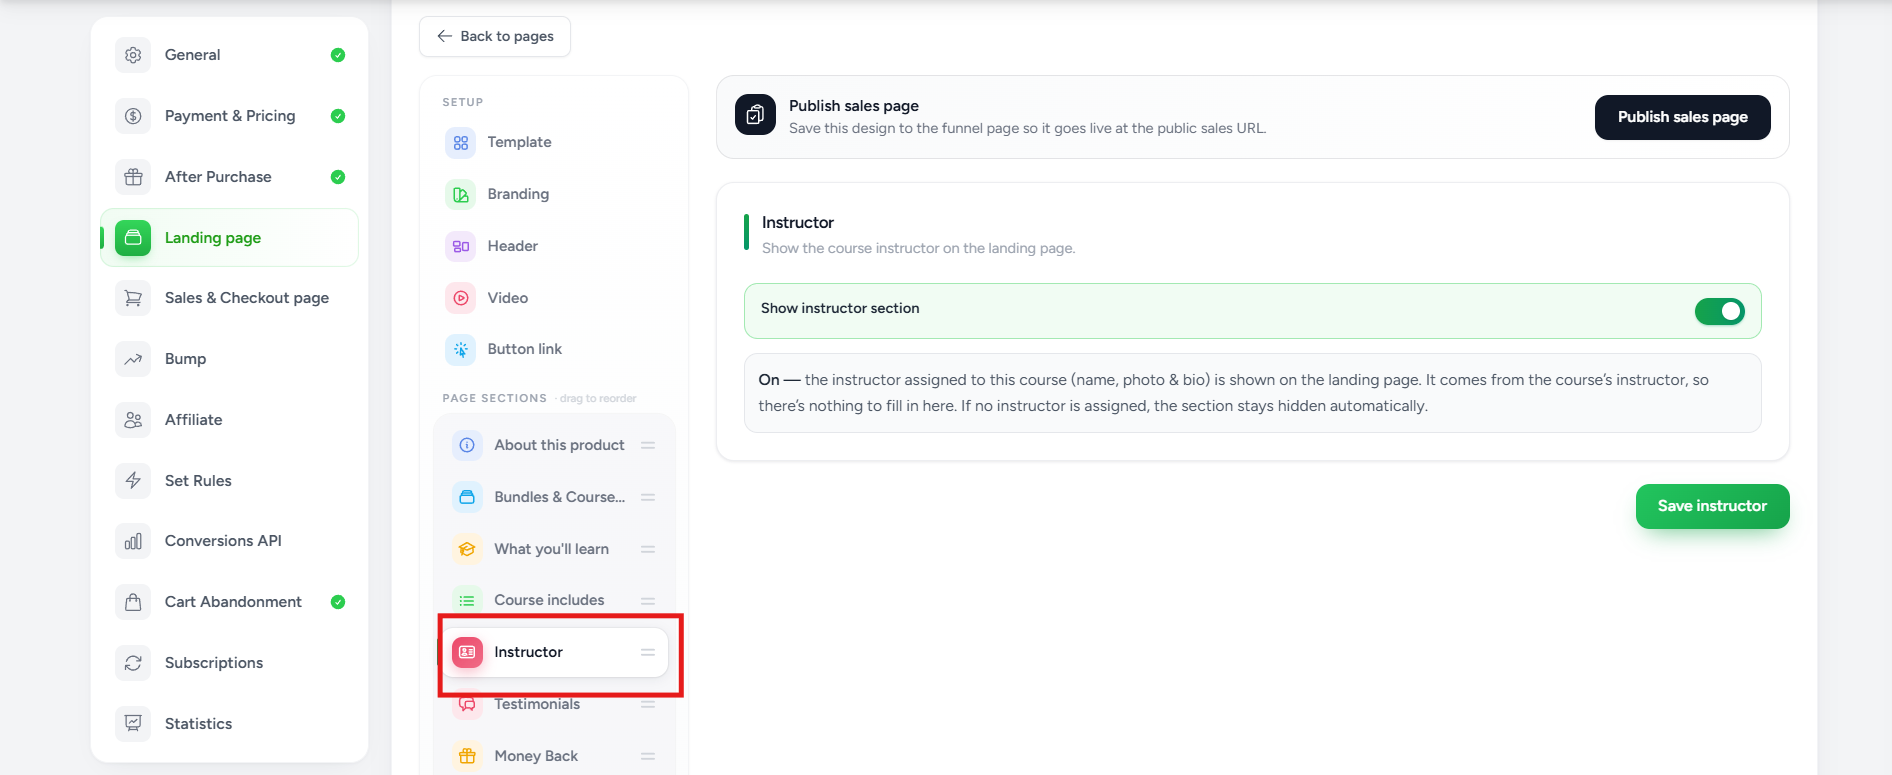
Instructor
Introduce the course creator or instructor.
You can customize the instructor information shown on the page.
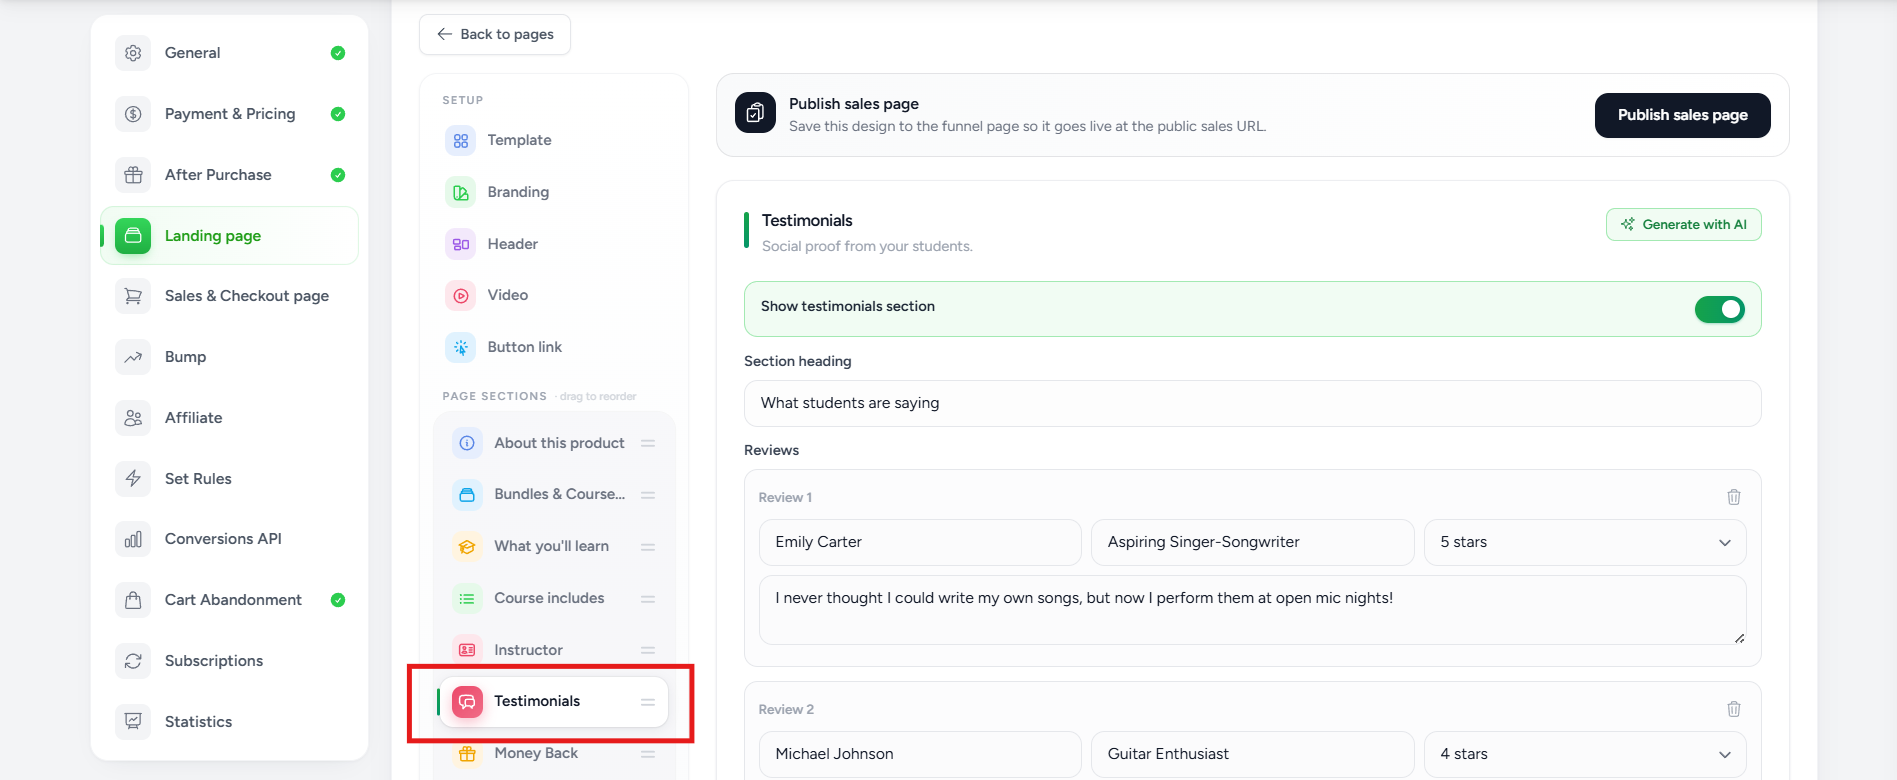
Testimonials
Add customer testimonials to build credibility and trust.
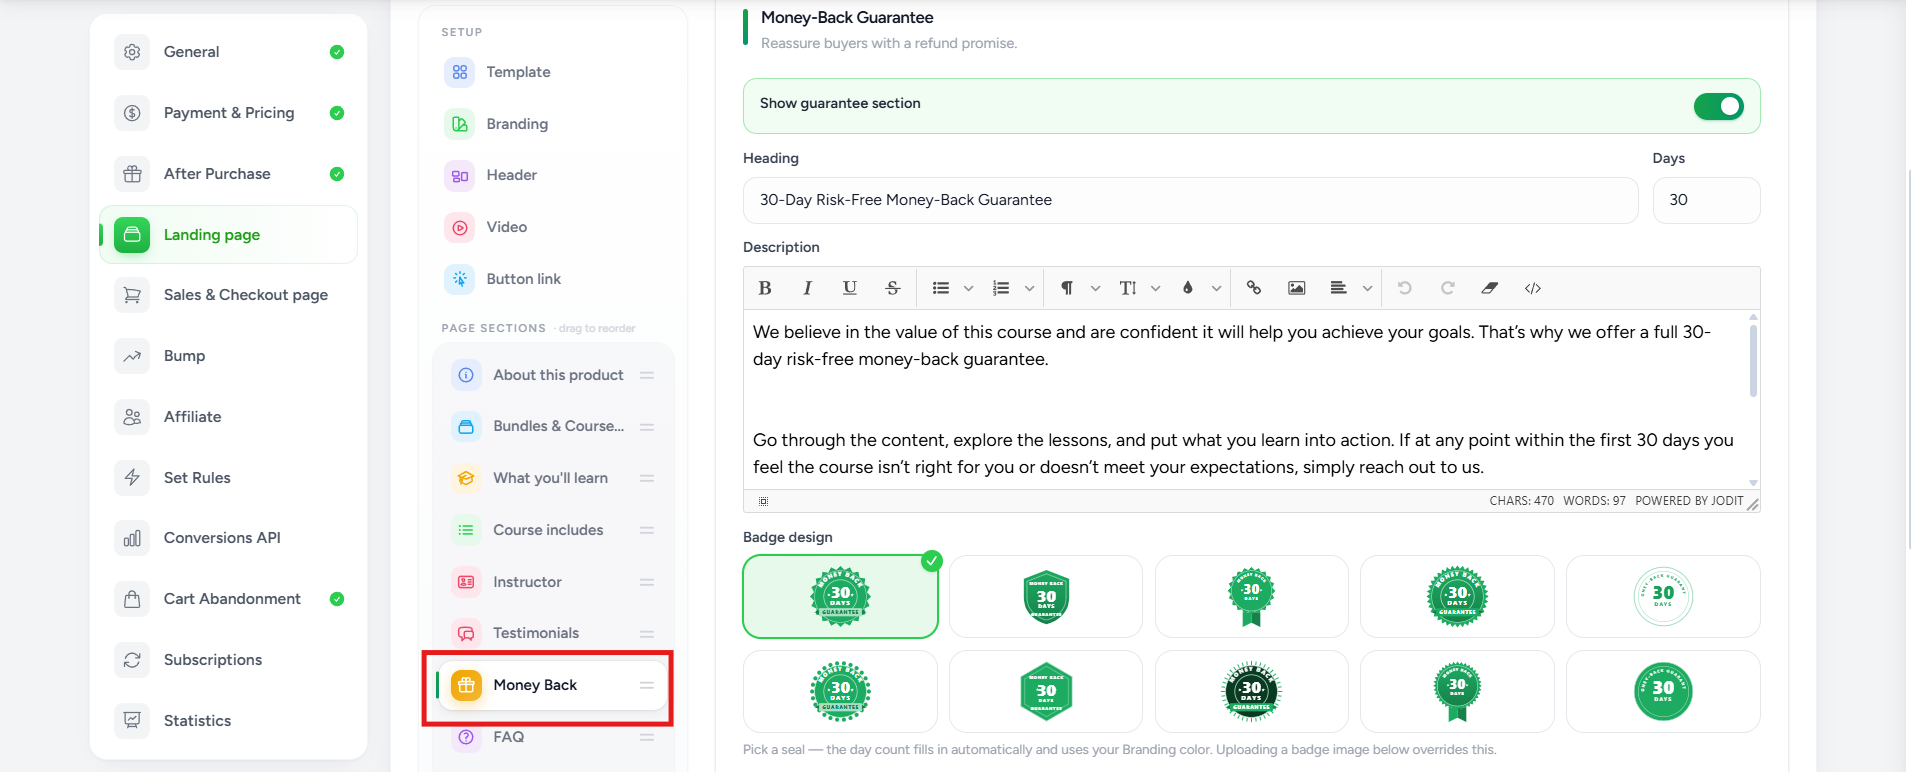
Money Back
Display your refund or satisfaction guarantee.
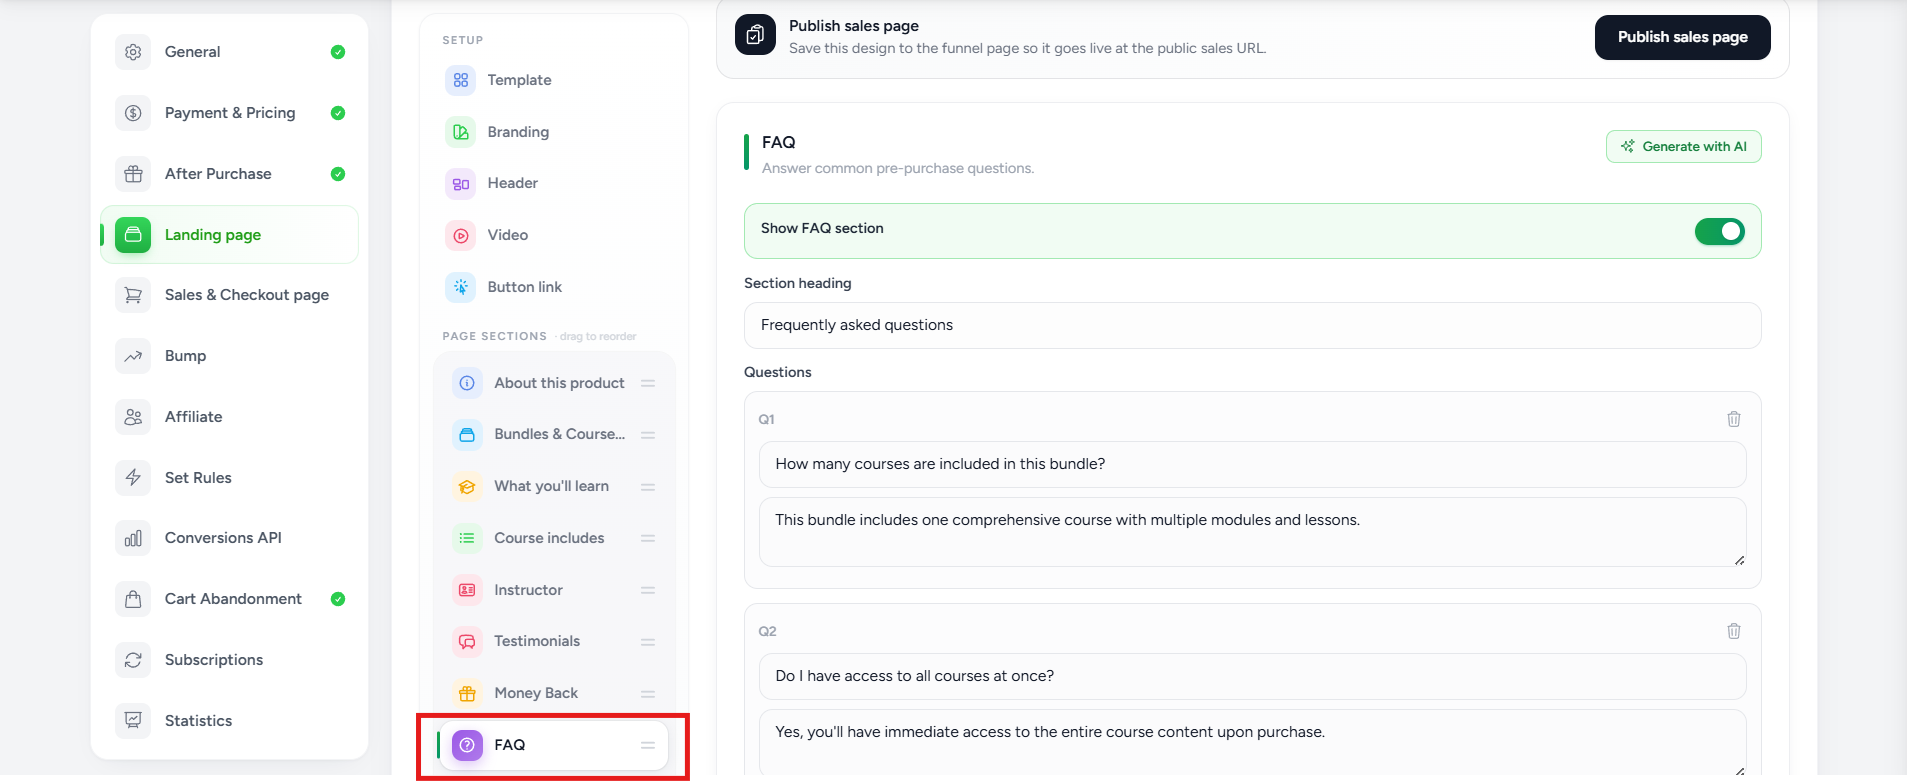
FAQ
Answer common questions to reduce buyer hesitation.
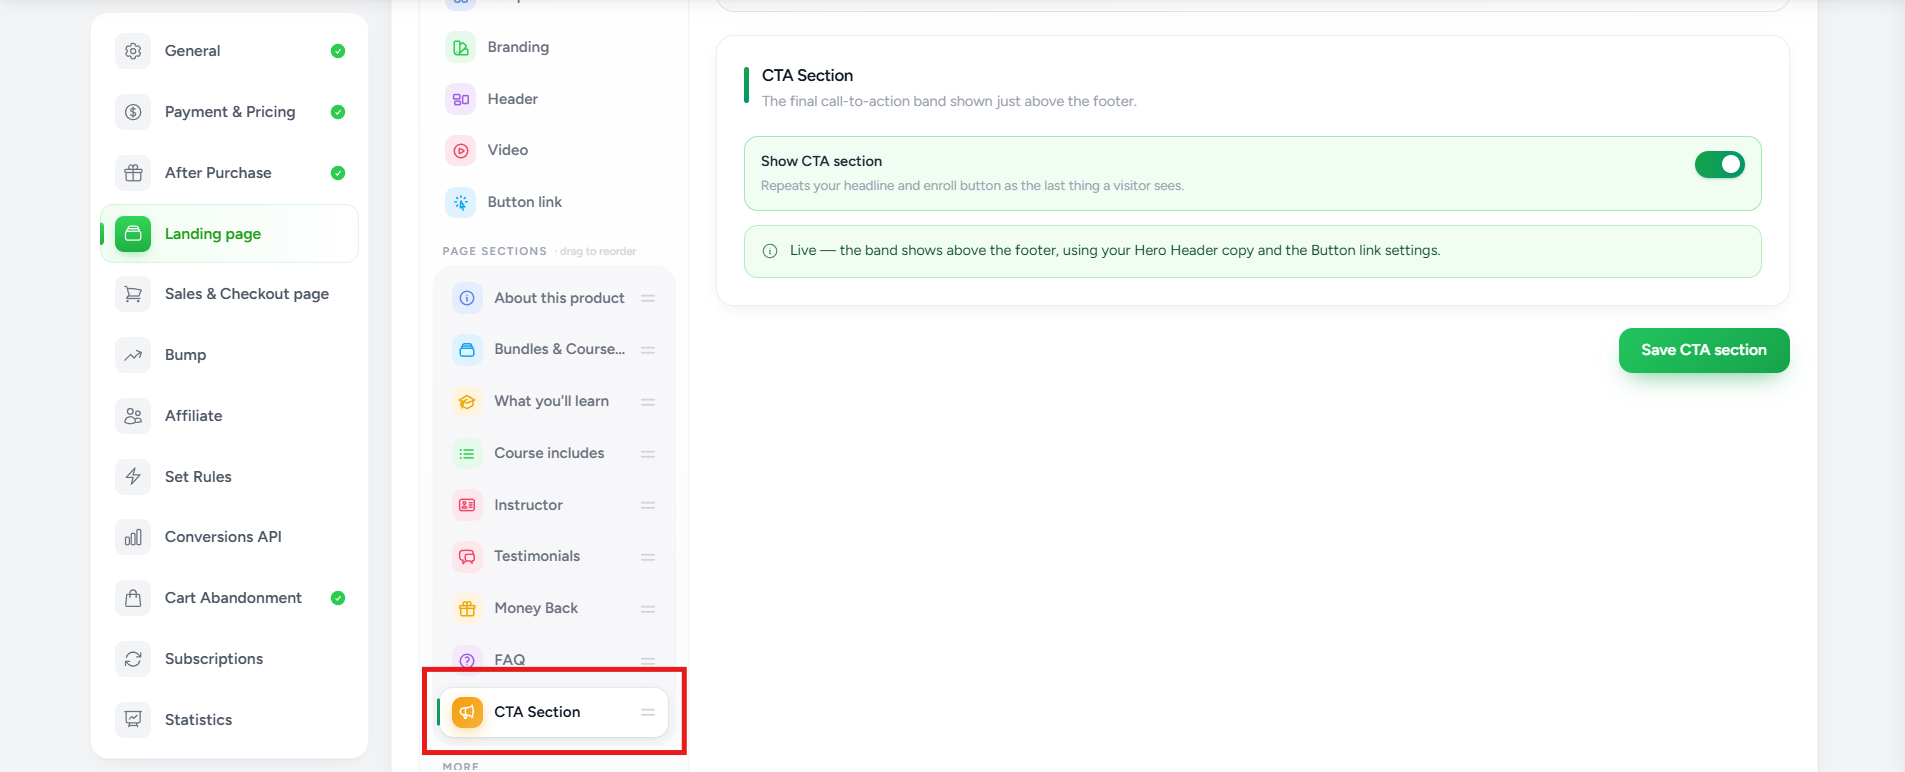
CTA Section
Create additional call-to-action sections throughout the page to encourage conversions.
Social Media
Add social media links so visitors can connect with your brand.
Labels
Configure labels or tags displayed on the landing page.
Retargeting Code
Insert custom tracking scripts for advertising and analytics.
This is useful for platforms such as Meta Pixel, Google Analytics, or other third-party tracking solutions.
Cookie Consent
Enable and customize the cookie consent banner for visitor compliance.
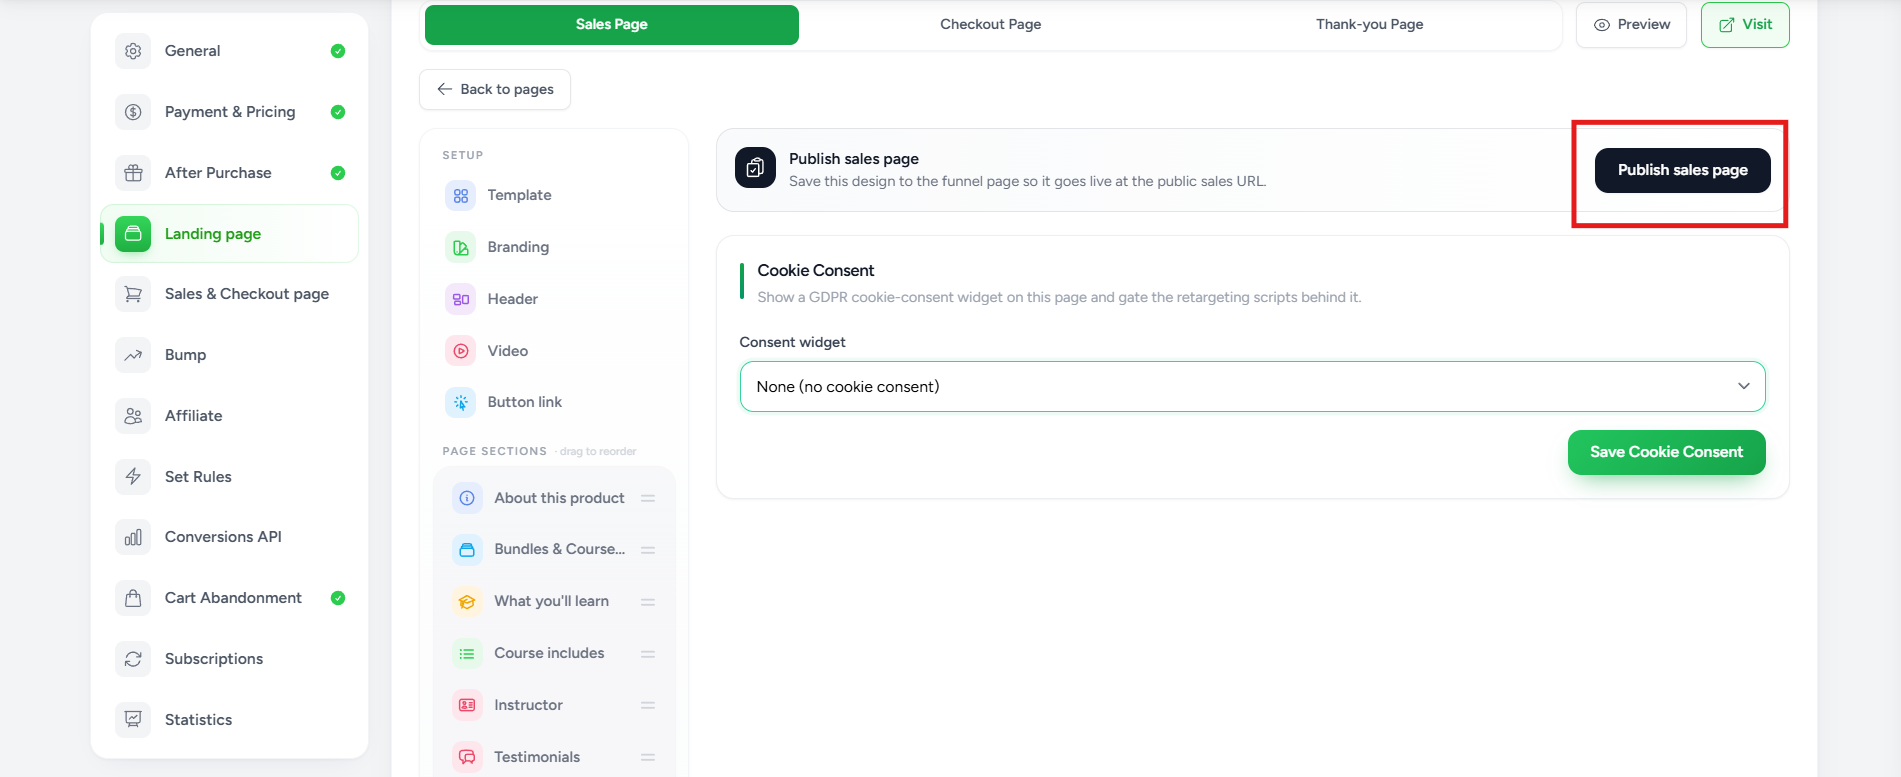
Step 4: Publish the Sales Page
After making your changes:
- Click Publish Sales Page.
- The latest version becomes available on the public Sales Page URL.
Creating a Checkout Page
The Checkout Page is where customers complete their purchase.
Step 1: Create a Checkout Page
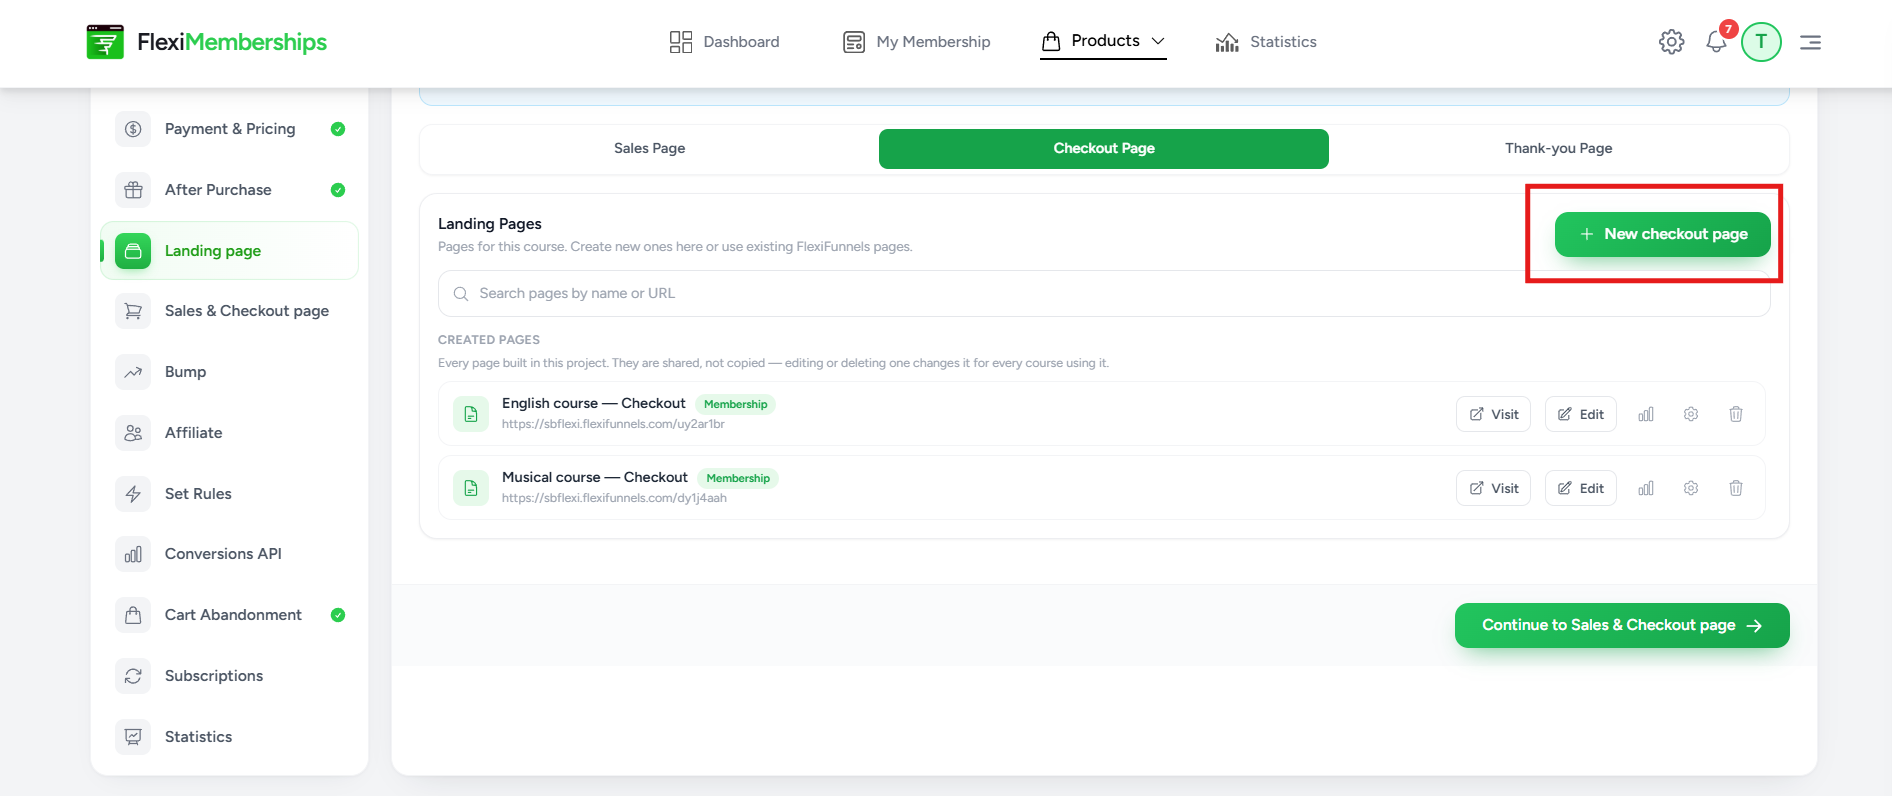
Open the Checkout Page tab.
Click New Checkout Page.
Provide:
- Page Name
- Path
- Checkout Page Type
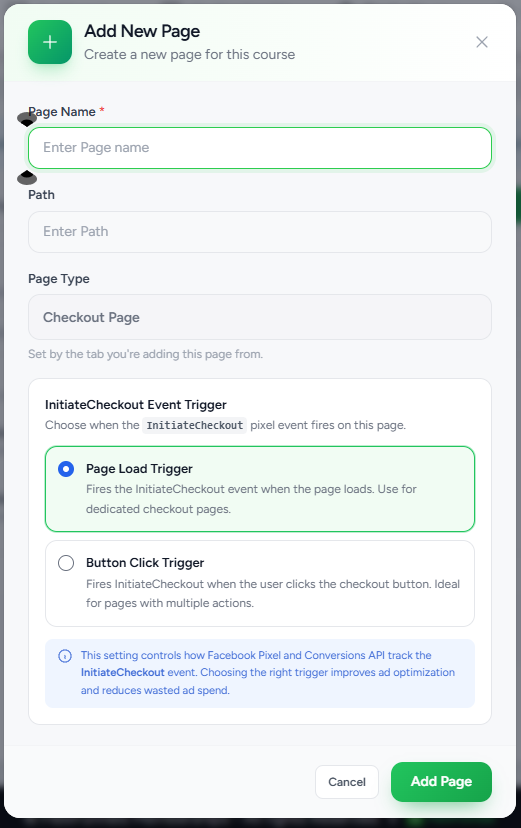
Configure the InitiateCheckout Event Trigger
When creating a Checkout Page, you'll also choose how the InitiateCheckout event should fire.
Two options are available.
Page Load Trigger
The InitiateCheckout event is triggered immediately when the Checkout Page loads.
Use this option for dedicated checkout pages where visitors arrive with the intention of making a purchase.
Button Click Trigger
The event is triggered only after the visitor clicks the checkout button.
This option is recommended for pages that contain multiple actions before the checkout process begins.
Choosing the appropriate trigger helps improve Facebook Pixel and Conversions API tracking accuracy.
Customizing the Checkout Page
The Checkout Page Builder provides several customization sections.
Template
Choose a checkout layout.
Branding
Customize the page colors and branding.
Header
Edit the checkout headline and supporting text.
Fields
Configure the information collected from customers during checkout.
Examples include:
- Name
- Email Address
- Phone Number
- Additional custom fields
Order
Customize the product summary displayed during checkout.
You can control how pricing and purchase details appear.
Trust & Terms
Display trust badges, SSL indicators, refund information, and terms to increase buyer confidence.
Retargeting Code
Add tracking scripts for analytics and advertising platforms.
Cookie Consent
Configure the cookie consent banner for the checkout page.
Publish the Checkout Page
After customization:
- Click Publish Checkout Page.
- Your updated Checkout Page becomes live.
Creating a Thank-you Page
The Thank-you Page is displayed immediately after a successful purchase.
It confirms the order and provides customers with the next steps.
Unlike Sales and Checkout Pages, a Thank-you Page is automatically associated with the product after it is created.
Customizing the Thank-you Page
The Thank-you Page Builder contains fewer sections because its purpose is to acknowledge the completed purchase.
Available customization options include:
Template
Choose the visual layout for the confirmation page.
Branding
Apply your brand colors and styling.
Message
Customize the confirmation message displayed after purchase.
Typical content includes:
- Purchase confirmation
- Welcome message
- Access instructions
- Next steps
- Important links
Publish the Thank-you Page
Click Publish Thank-you Page after completing your changes.
The updated confirmation page will be shown to customers after every successful purchase.
Managing Existing Pages
The Landing Page dashboard allows you to manage previously created pages.
For each page, you can:
- Preview the page
- Visit the live URL
- Edit the page
- View analytics (if available)
- Access page settings
- Delete the page
You can also search existing pages using the search bar for quicker access.
Best Practices
- Complete the After Purchase configuration before creating landing pages.
- Choose templates that align with your brand and audience.
- Customize AI-generated content to reflect your messaging and offer.
- Include compelling headlines, testimonials, and FAQs on Sales Pages to improve conversions.
- Configure the appropriate InitiateCheckout trigger to ensure accurate conversion tracking.
- Preview each page before publishing to verify layout, branding, and functionality.
- Publish your changes after editing; unpublished updates are not visible on the live page.
- Regularly review and update your landing pages to keep them aligned with your latest offers and branding.
Was this article helpful?
That’s Great!
Thank you for your feedback
Sorry! We couldn't be helpful
Thank you for your feedback
Feedback sent
We appreciate your effort and will try to fix the article