Events allow you to schedule and share webinars, live sessions, online meetings, and other time-based activities with your members. Whether you're hosting a coaching call, product webinar, or community meetup, the Events feature helps you create, organize, and display upcoming sessions within your membership.
This guide explains how to create, manage, and organize events in Flexi Membership.
What are Events?
Events provide a centralized place to schedule live interactions with your members.
You can use Events for:
- Live coaching sessions
- Webinars
- Google Meet sessions
- Zoom meetings
- Community meetups
- Live Q&A sessions
- Product launches
- Workshops
Each event appears inside your membership, making it easy for members to discover and join scheduled sessions.
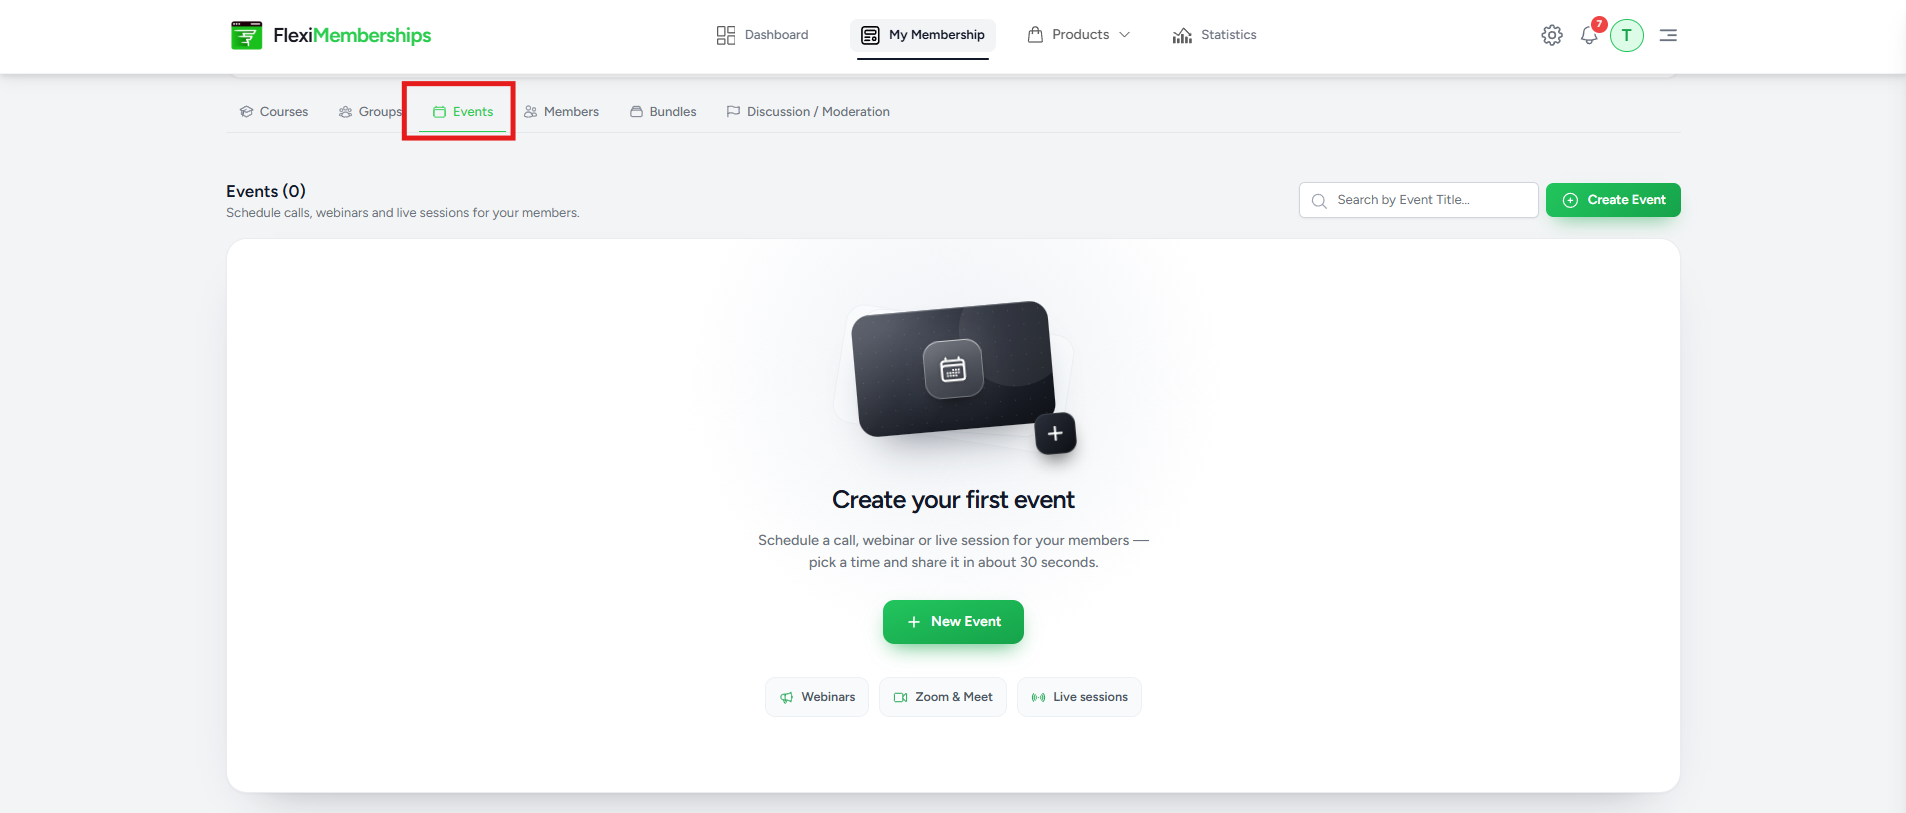
Accessing the Events Section
To manage events:
- Open the Flexi Membership app.
- Navigate to your membership project.
- Click Events.
If no events have been created, you'll see a Create your first event prompt.
Creating an Event
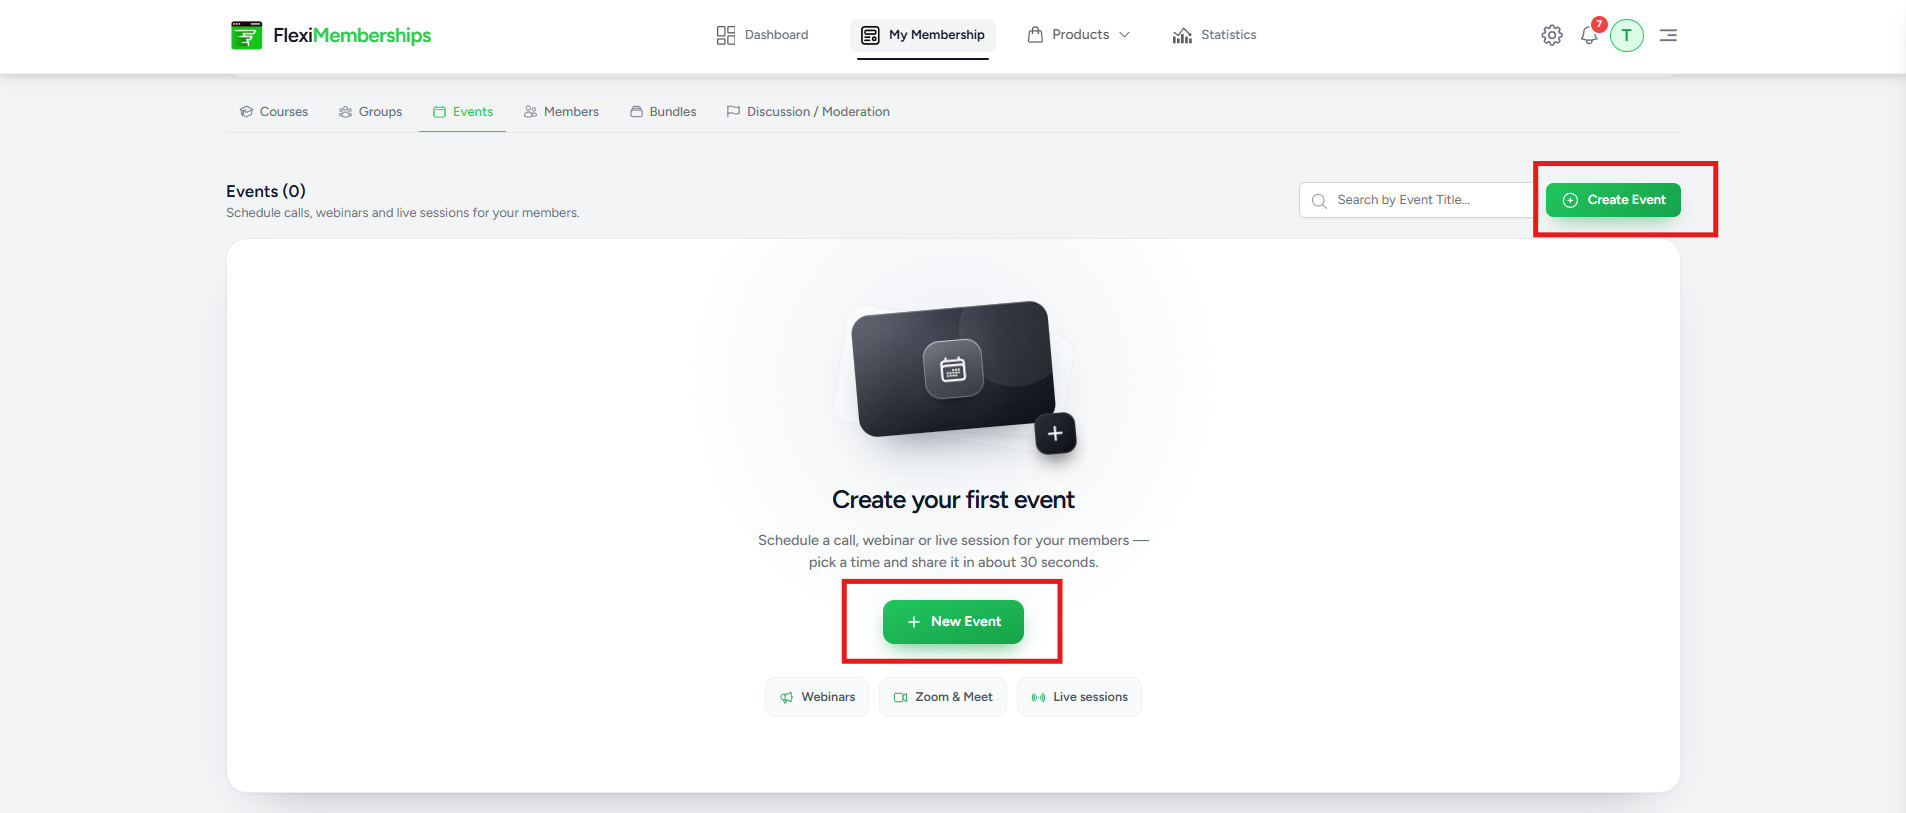
To create a new event:
- Open the Events section.
- Click Create Event.
- Complete the event details.
- Click Save.
The event is immediately added to your membership.
Configure Event Details
The Event Details section contains the information members will see before joining the event.
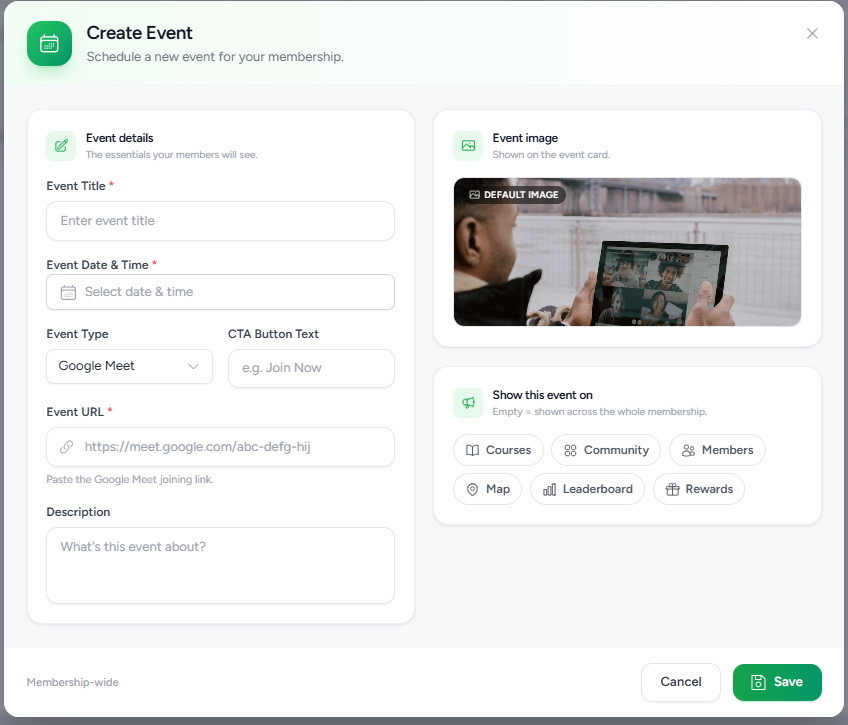
Event Title
Enter a clear and descriptive title for your event.
Examples:
- Weekly Coaching Call
- Facebook Ads Workshop
- Community Q&A
- Product Launch Webinar
The event title appears on the event card and throughout the membership.
Event Date & Time
Specify when the event will take place.
Select:
- Event Date
- Event Time
Members use this information to know when the event begins.
Event Type
Choose the platform where the event will be hosted.
Based on the current interface, supported event types include:
- Google Meet
Additional event platforms may be available depending on future product updates.
Choose the platform that matches your meeting link.
CTA Button Text
Customize the text displayed on the event's action button.
Example:
- Join Now
- Register
- Watch Live
- Join Meeting
- Attend Webinar
Choose wording that clearly communicates the intended action.
Event URL
Enter the meeting or webinar URL that members will use to join the event.
For example:
- Google Meet link
- Zoom meeting URL
- Webinar URL
- Live Event Address
Ensure the URL is accessible before publishing the event.
Description
Provide a brief overview of the event.
Include details such as:
- Event agenda
- Topics covered
- Speaker information
- What members can expect
A clear description helps members decide whether to attend.
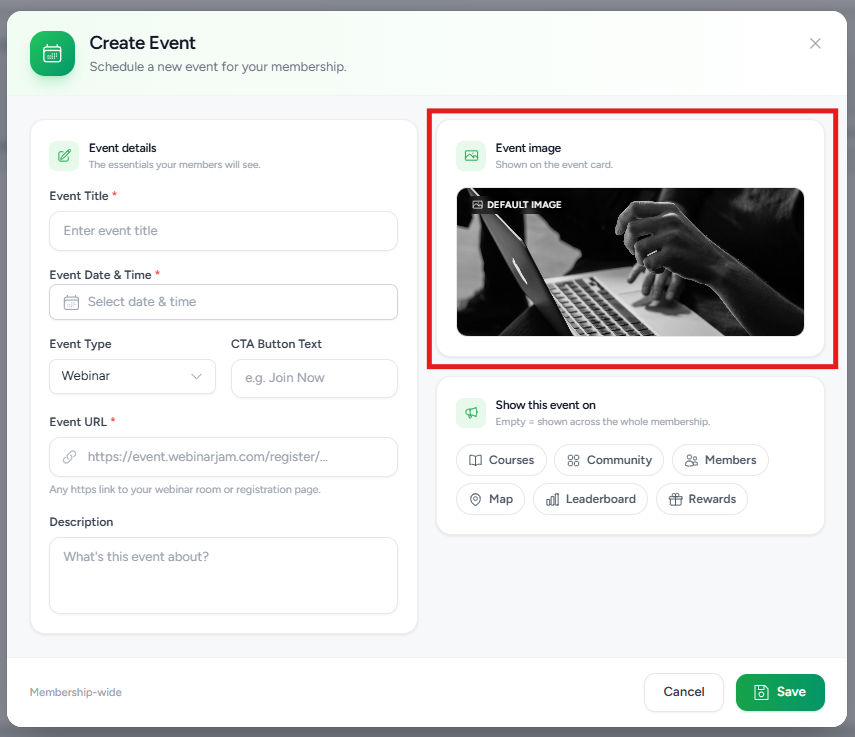
Event Image
You can assign an image to represent the event.
The selected image appears on the event card and helps members quickly recognize the event.
If no custom image is selected, the default event image is displayed.
Insert Screenshot: Event Image.
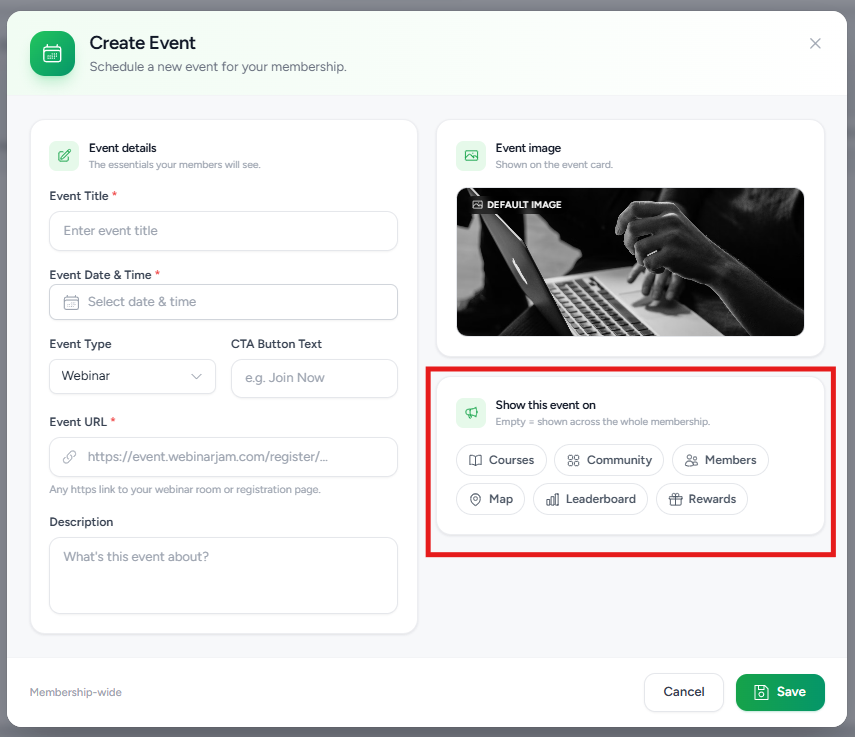
Show This Event On
Choose where the event should be displayed throughout your membership.
Available display locations include:
- Courses
- Community
- Members
- Map
- Leaderboard
- Rewards
If no location is selected, the event is displayed membership-wide, making it visible across the entire membership.
Select only the areas where the event is relevant to your audience.
Saving the Event
After completing the required information:
- Review all event details.
- Verify the meeting URL.
- Confirm the event date and time.
- Click Save.
The event is immediately published within the selected locations.
Understanding Event Status
Each event displays its current status.
For example:
- Ended – The scheduled event has already concluded.
Event status helps administrators quickly identify whether an event is upcoming or has already taken place.
Best Practices
To create effective events:
- Use clear and descriptive event titles.
- Verify the event date and time before publishing.
- Test meeting links to ensure members can join successfully.
- Add a descriptive event summary so members know what to expect.
- Upload a relevant event image to improve visibility.
- Display events only in the sections where they are most relevant.
- Review completed events periodically and remove outdated sessions if no longer needed.
Frequently Asked Questions
Can I edit an event after creating it?
Yes. Open the event, click the Edit icon, update the information, and save your changes.
Can I delete an event?
Yes. Events can be deleted at any time using the Delete option from the Events page.
Can I choose where an event appears?
Yes. During event creation, you can select the areas where the event should be displayed, such as Courses, Community, Members, Map, Leaderboard, or Rewards. If no option is selected, the event is displayed membership-wide.
What happens if I don't upload an event image?
The default event image is used until you upload a custom image.
Can I search for events?
Yes. The Events page includes both search and filter options to help you quickly locate events by title, type, or time.
Was this article helpful?
That’s Great!
Thank you for your feedback
Sorry! We couldn't be helpful
Thank you for your feedback
Feedback sent
We appreciate your effort and will try to fix the article